
How to ‘Turn on’ the Lights Using Adobe Photoshop
So you’re editing a photo, and you’re looking over everything and you spot it… that one light pole with a burnt out bulb. It’s so frustrating… like, doesn’t the utility company know that I’m out here taking photos and I NEED every light on??? But all jokes aside, it can be frustrating when you’re capturing a beautiful night shot and there’s a pesky light out. OR, you could be taking a photo in broad daylight and you want to artificially turn on lights for dramatic effect. Whatever your reason is, this tutorial will show you how to turn on lights using Adobe Photoshop!
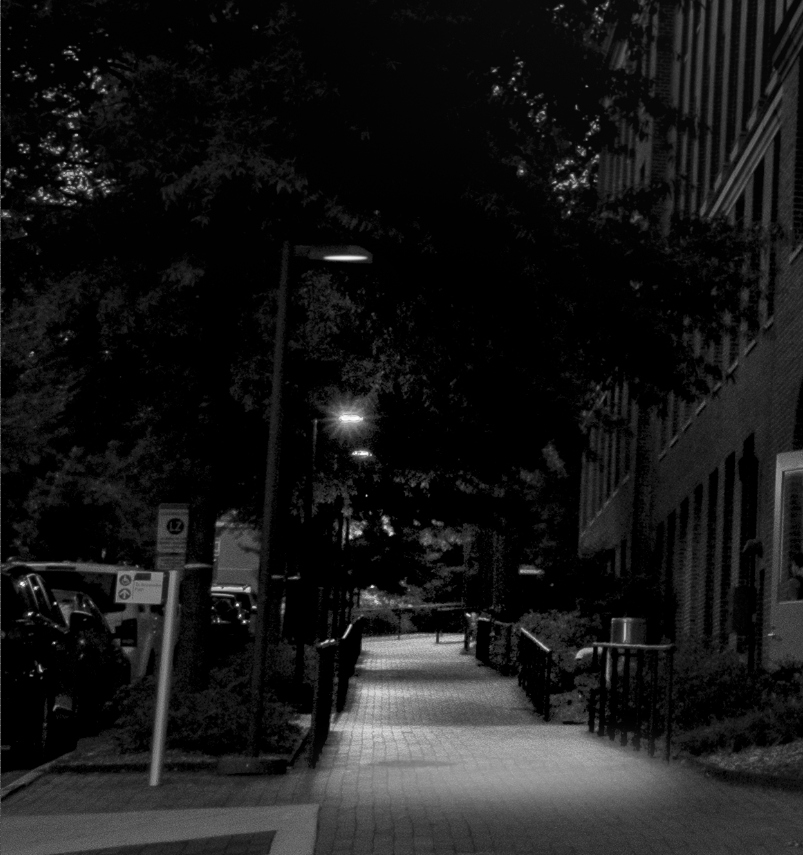
First, let’s take this picture…


…pretty cool, pretty dramatic, except one thing. This one street light is out! Now, what’s the big deal, it’s just one street light, you probably didn’t notice it at first. But that’s the thing, YOU DIDN’T NOTICE IT. Imagine having those three street lights on. The way this photo is framed gives use to vanishing points, one down that brick path alongside the left side of the building, and one off the right side of the photo. I want to really SELL that vanishing point, and having those streetlights on helps guide the viewer’s attention down that vanishing point, almost like having the view imagining that they are walking down that path.
What’s at the end of the path? Nobody knows, but having the streetlights on certainly makes it more welcoming and less sketchy, right?
In fact, look at how more open that brick path looks when we ‘turn on’ that street light! You can actually tell that there is a light pole there now! It helps define our perspective and guides our eye down that path. This is why we would want to turn on the lights, to help us tell the story!
Let’s get to it and learn how to turn on our streetlights!
Start by creating a new layer and drawing where the light will hit the ground
The first thing you want to do is create a new layers. You do this by clicking the “+” button under the '“Layers” tab at the bottom right of Photoshop. From here, click the elliptical marquee tool in the tool bar on the left of the screen. The elliptical marquee tool and the rectangular marquee tool share a button so you may have to right-click on the image of the rectangle to select the elliptical marquee tool. Once you have selected the elliptical marquee tool, find the spot on the image where you think the light would hit the ground under the light pole, and click-and-drag your elliptical marquee tool to select that section of the image.
Once you have your selection, go down to the half filled circle to the left of the “+” button you clicked earlier, and click that circle. A dropdown menu will pop up, and you will select “Solid Color…” and make your color white. You’ll get this incredibly unrealistic circle like you see below, but the next step will help us clear that up!

2. Add gaussian blur to your selection

To make the spot more realistic, we have to add blur to it. Light isn’t at it’s full intensity all the time, it tends to soften over distance. To make the light softer, we’re going to add a gaussian blur. At the top of Photoshop, select “Filter”.
The following steps will lead you to Gaussian Blur: Filter>Blur>Gaussian Blur…
Photoshop may ask if you would like to convert your selection to a Smart Object, and if so, click '“yes”. The Gaussian Blur tool will pop up, and generally speaking, I usually like to select a radius of about 30px for this part of the light. It helps soften up the intensity, but doesn’t completely blur out the light.
.
3. Repeat steps 1 and 2 for the light source

To create the light source, you will follow the exact same process for steps one and two except that your elliptical selection will be much smaller and you’ll want to fill in where the light bulb will be.
For blurring the light source, I go with a much smaller radius, such as 1-2px. Light is strongest at it’s source, so we want to help the viewer perceive this selection as being very bright. The more blur you add, the softer the light appears, so add minimal blur.
4. Create your selection for the light beam and add gaussian blur

We are once again going to follow a similar process to steps 1 and 2, except we are ditching the elliptical marquee tool, and picking up the polygonal lasso tool. We want to create a faint light beam that goes from the edges of the light source to the edges of where the light hits the ground. I use the polygonal lasso tool to click on the edges of the light source and where the light hit’s the ground and hit enter to create my selection. Don’t forget to do this in a new layer!!
Once you’ve made your selection, fill with a solid color, and add gaussian blur.

You probably hate me at this point because this looks SO unrealistic, but trust the process!!
Side note, sometimes working in Photoshop is having a bad feeling about a project all the way through and then in the end it turns out beautiful. Working in Photoshop can be scary sometimes, but you got this!!!
We’re almost done. For this gaussian blur, I usually stick to around 30-40px to get some decent feathering, but by all means do what you like! We’re going to have to blend this light beam next.
5. Change your blend mode for the light beam layer
The final step of this tutorial is to blend your light beam into your background layer. This step is actually the easiest of all the other steps. Under the “Layers” tab on the right side of Photoshop, you will see a box that say’s “Normal” (boxed in red). Change that box to “Overlay”. This will overlay the light beam on top of your background layer and help with blending. I will sometime play with the opacity to the right of the box to soften the light beam further.
Now, lets compare the before and after to see the difference!

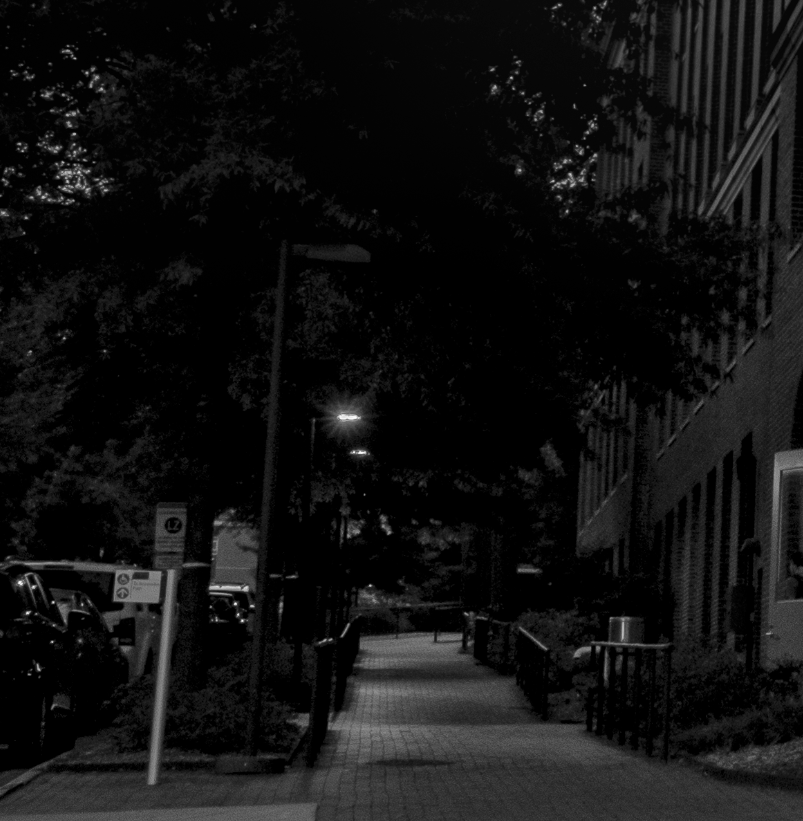

And that’s how you turn on lights using Adobe Photoshop! Look at how that helps us clean up the perspective of this photo! After doing some more touchup, we have a beautiful piece of fine art. If you’d like to follow along in real time, I have made a tutorial on YouTube at the bottom of this page that you can see. Be sure to like and subscribe to my channel and sign up for my newsletter for more tutorials and updates! Cheers! - Garrett
