
I’m a Pilot! (Almost)
So here’s the deal… I’m not a PILOT pilot…. and I don’t even have my permanent license yet… but never the less, I’m on my way to becoming one!

Yes, this is me flying this plane back in 2020 during my discovery flight, but I’m not this type of pilot! I’m a DRONE pilot!
Drone photography has taken hold in the real estate market, and it seems like everybody wants aerial shots of properties… so to expand my current offerings, I’m moving towards drone photography in my real estate packages!
I’m eagerly waiting for my official remote pilots license to arrive in the mail, but I though I would use this forum to talk through what my experience was like studying for the Part 107 knowledge test!
How Do You Become a Drone Pilot?
This is where I, along with many other people start… How do you become a drone pilot?
Luckily, it’s pretty straight forwards, however, the FAA website can be intimating to navigate.
To be eligible to become a drone pilot there are 4 criteria that must be met:
You must be at least 16 years old
You must be able to read, speak, write, and understand English
You must be in physical and mental condition to safely fly a drone
You must pass initial aeronautical knowledge exam: “Unmanned Aircraft General - Small (UAG)”
Criteria 1-3 are pretty easy to meet… but criteria 4 is where many people get hung up… and rightfully so, because there’s a couple of ways to get this. The first way is to already hold a Part 61 certificate… if you’re here, you probably don’t have a Part 61 certificate. If you don’t have a Part 61 certificate, you need to take the Unmanned Aircraft General - Small (UAG).
So You Have to Take the Knowledge Exam… How do you do this?
The process is very formal, and can be overwhelming, so here’s how do it it step-by-step
Obtain an FAA Tracking Number (FTN). You can do this by creating an IACRA (Integrated Airman Certification and Rating Application) profile prior to registering for your exam.
Start studying for you exam
Pass the Unmanned Aircraft General - Small (UAG) at an FAA-approved Knowledge Testing Center. Again, all of this informatio can be found on the FAA website.
Complete FAA From 8710-13.
Pass a TSA security background check.
Obtain a temporary license while the official license is printed and mailed
Receive your official license!
Always carry your license when flying your drone
What’s a Part 107?
Part 107 is a section of the Code of Federal Regulations that prescribes regulations related to small unmanned aircrafts systems (drones). Receiving your drone license demonstrates that you understand the regulations, operation requirements, and procedures for safely flying a drone.
But I can just pay for a study course, do I really need to know this section???
YES. 100% YES YOU DO.
In fact, I never even bought a course for my license. I studied Part 107… that’s the SOURCE of the exam. If you understand Part 107, you’ll understand the exam.
So How Did I Study?
This is where you may not want to take my advice… My dad was a helicopter pilot, and a couple years ago I started studying for get my private pilots license… so I’m a bit more advanced than somebody looking to fly for this time.
However, I recommend learning Part 107 as the starting point. I then recommend following the Knowledge Test Study Guide found here on the bottom of the page.
Personally, I don’t think you need to pay hundreds or thousands of dollars for a study course… the FAA materials are solid choices. And once you have completed that, I then suggest finding practice exams online and taking those… once again, there are PLENTY of free options, so DO NOT PAY FOR A PRACTICE EXAM.
Overall, it was a great experience, and I hope that anybody who finds this, will also find the process of earing their drone license rewarding!
Cheers,
Garrett
My Real Estate Photography Lightroom Workflow
Introduction
Ok, lets be honest, there’s a lot to discuss here. So much goes into capture these shots… from composition, to camera settings, to equipment, to image sizing… it can be alot. BUT! I’m here to talk about my photo editing process.
I’m Garrett, a photographer based in Raleigh, NC who enjoys fine art photography, real estate photography, and traveling! Join me on this blog to learn about my photo editing process.
Camera Setting Notes
The first things I’ll say about my photo editing process is that is starts with the camera settings… two to be exact.
ALWAYS shoot in RAW
ALWAYS shoot in HDR (I prefer two stops)
Without these two very important settings, you can’t follow this workflow. It’d be like making a cake but you’re missing eggs and flour.
Lightroom Work

Because I shot in HDR I have three images (all shot at different exposures) in my Lightroom catalog. One Image is at the correct exposure, one is over exposed, and one is under exposed.
HDR stands for High Dynamic Range and it allows us to get a larger dynamic range than what is natively available on your camera.

Lets Merge These Photos Together
You’ll do this by selecting all three photos (using the ‘shift‘ key) and right-clicking so you can see an options menu appear. Go to the “Photo Merge” tab and click “HDR…”

How HDR Looks
Adobe Lightroom will do all of the work and will pop up a screen similar to This. I generally keep my Deghost Amount set to “High” and I ALWAYS create a stack to help clean up my workspace. Keeping Auto Align and Auto Settings checked is also important as it adjusts for any shift you may have had in your images. Note: always use a tripod ;)
If you’re satisfied with the image, then click Merge!
There Very Next Things You Should Do
Go to Lens Corrections and select Remove Chromatic Aberration and Enable Profile Corrections. These are two checkmarks than can be easy to miss starting out, but make significant differences between amateur photos and professional photos. Chromatic Aberration (for those interested) occurs when the color wavelengths in light are separated and rejoined as they pass through a lens… giving you some red and green haloing around edges. Enabling Profile Corrections also tells Lightroom how to adjust for the camera and lens profile you are using, including removing vignetting.
After you’ve checked these two boxes, go to Transform and select Auto. This will straighten your image in multiple directions, which is important when you use a wide angle lens.
Always click these three before you do anything else!!!! It saves incredible time when photo editing!!!!

Now Work Your Way Up
Work your way up to the Detail tab and adjust your sharpness and noise reduction to these setting (Roughly). This is photography… it’s an ART! These numbers aren’t exact, I just go with a vibe of what I think looks right and tells the better story. As a general rule of thumb, I keep my sharpening around 90 and my Masking around 50. Everything else is Vibes.


Minor Adjustment Before Color Grading
I wasn’t totally happy with the way Lightroom delivered the HDR shots (and I never really am to be honest, and you probably won’t be either) so I made some adjustments. I play around with the highlights, shadows, whites and blacks until I get a photo that gives me more detail. This is where I try to capture the true tone of the room when I was there… I don’t want the image overly warm or cold. The lights are often too warm, so I’ll go to the Color tab and turn down the saturation of the yellows and oranges a bit and turn up their luminance to get a nice glow.


Optional: Color Grading
If I’m REALLY not happy with the temperature of the image then I will go into Color Grading and adjust the image from there.

Final Touch Ups
The very last thing I do in my workflow is touching up spots and specks in my image. I unfortunately had a dirty lens, so it required a TON of touch up, but the end product really shines compared to the original photo. I mostly use the touch-up tool and gradients during my last phase in Lightroom.
Final Product
Use the slider to see the transformation!
In summary, my steps are:
Shoot in Raw and set up HDR shooting (2 stops!!)
HDR Merge in Lightroom
Remove Chromatic Abberation
Correct Lens Profile
Auto Transform the image
Sharpen / Reduce Noise
Adjust color, temp, highlights, shadows, whites and blacks
Color Grade if Needed
Touch up using the touch-up tool and gradients.
I hope this helps, and be sure to subscribe to my newsletter to stay up to date on new videos, blogs, and tutorials!
Cheers!
-Garrett

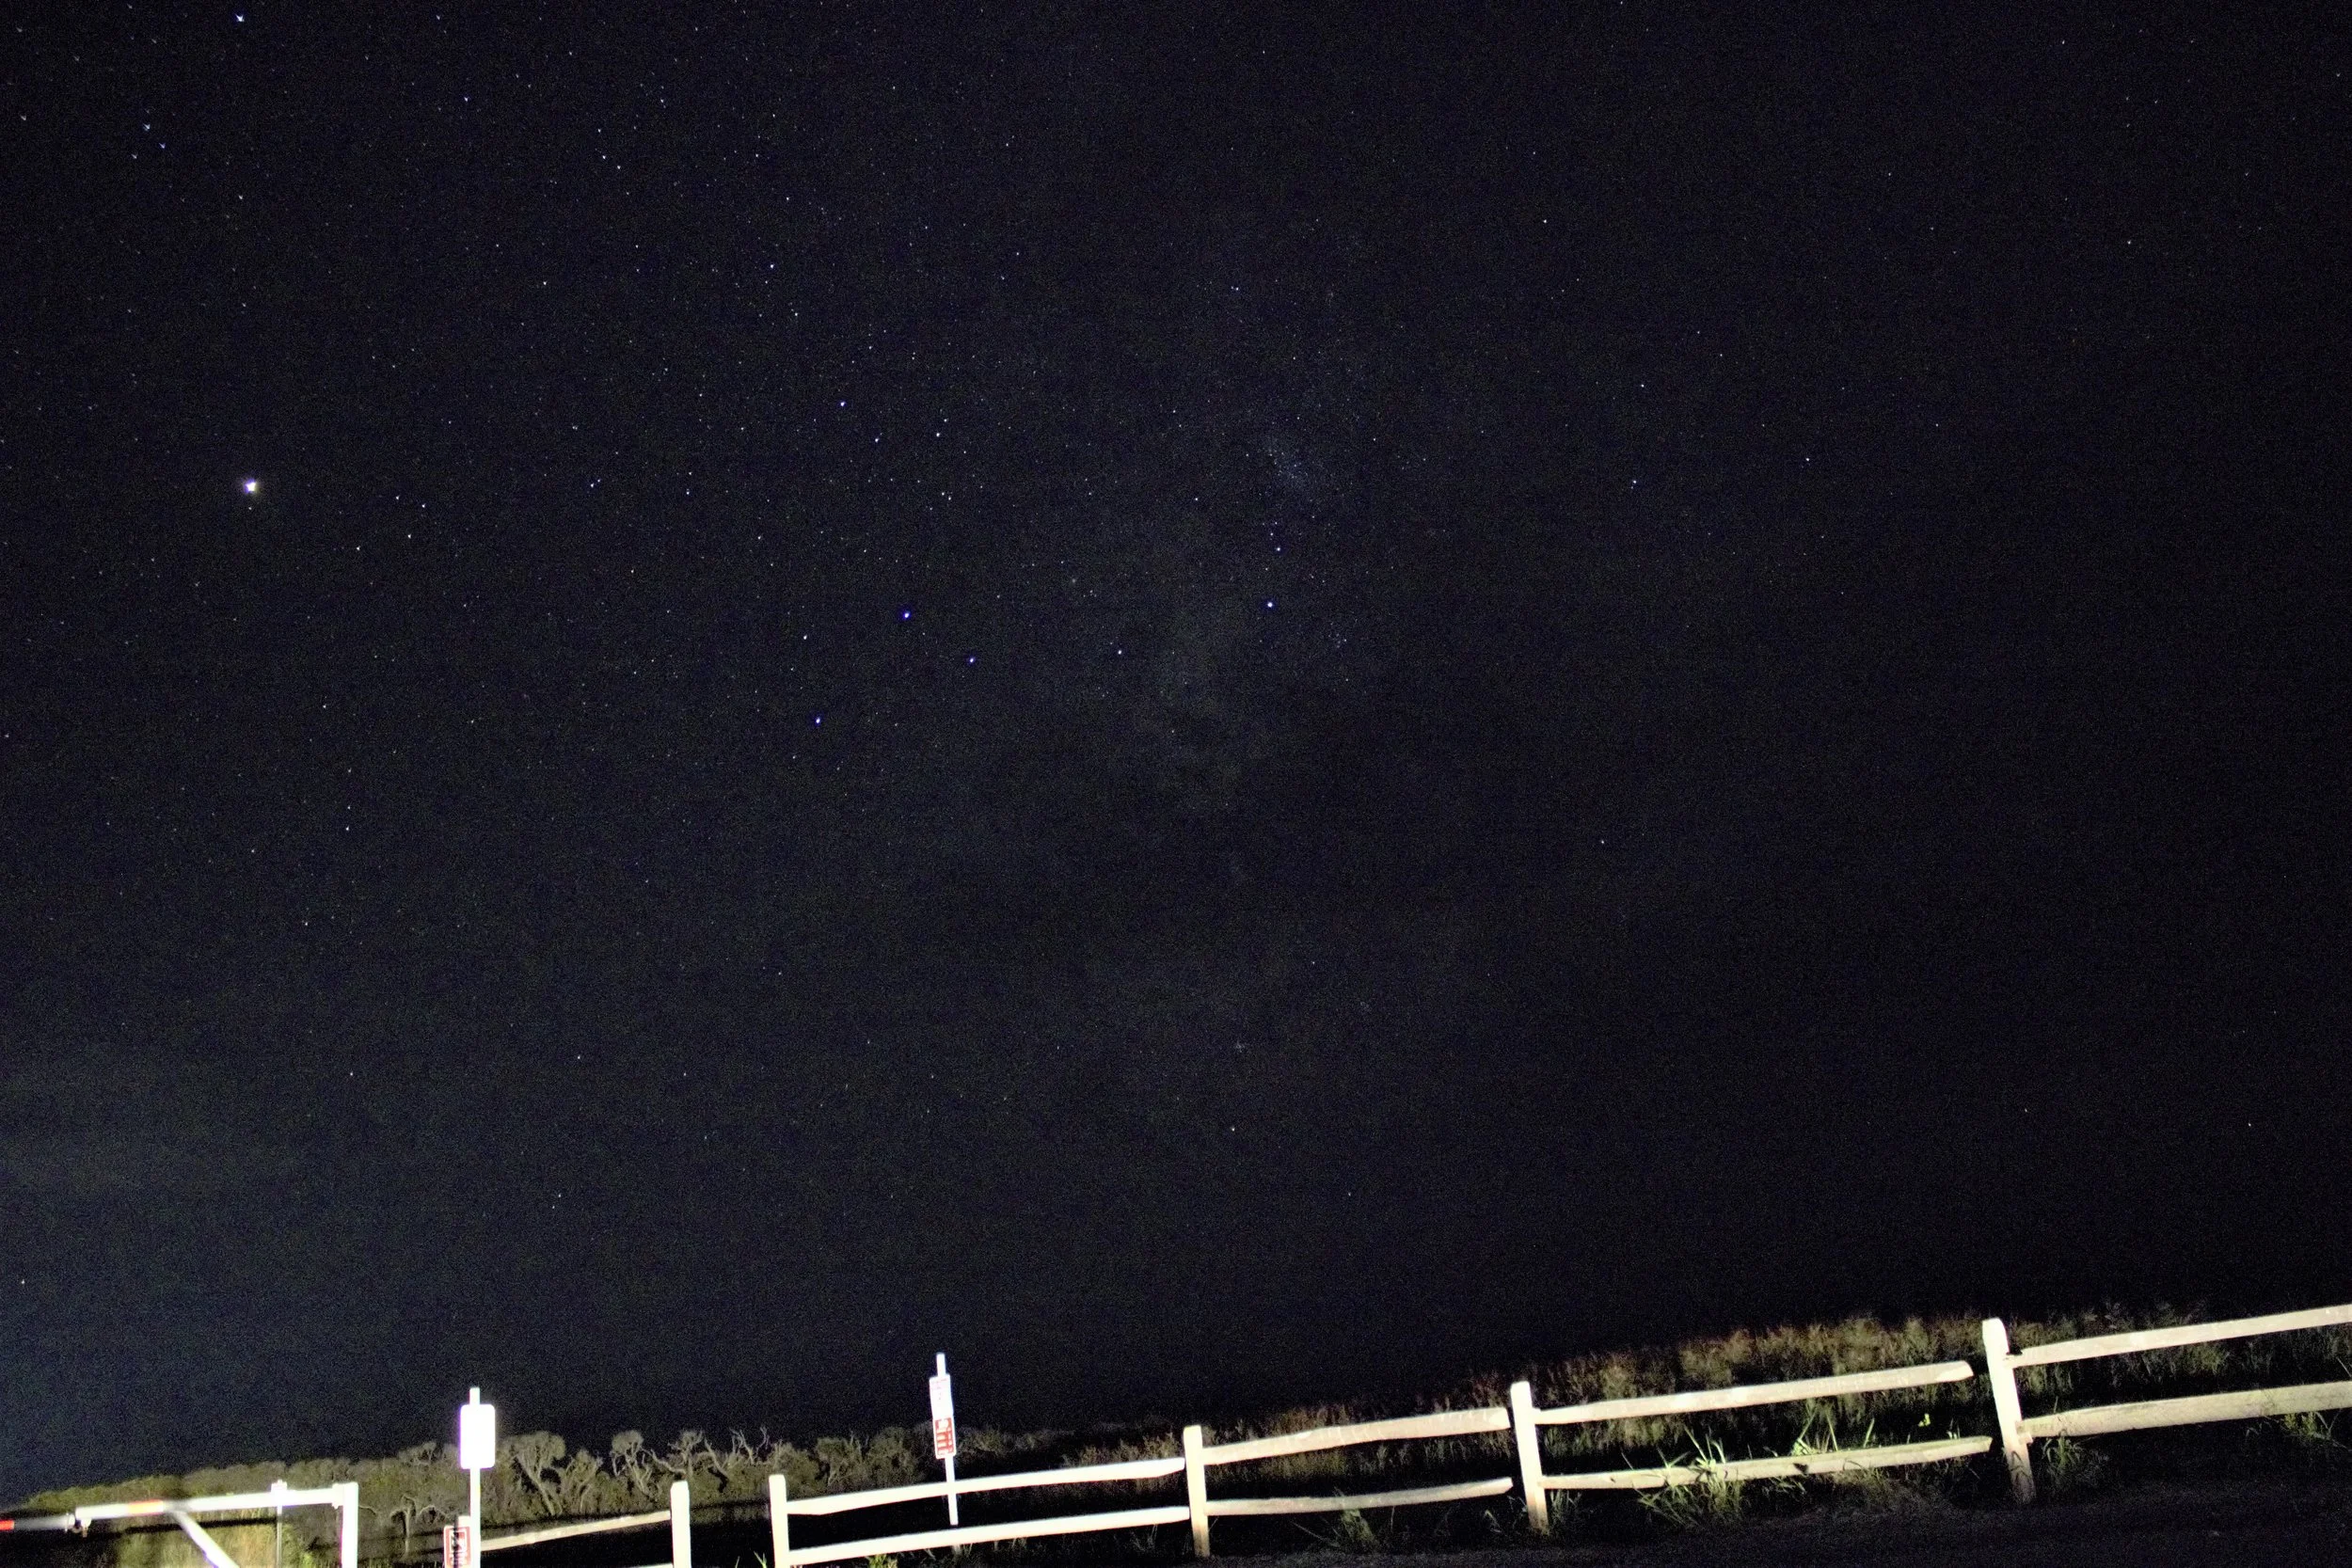
Let’s Talk About the Milky Way
2 Years, 6 hours of driving, a storm, 1 hour window to capture the shot…
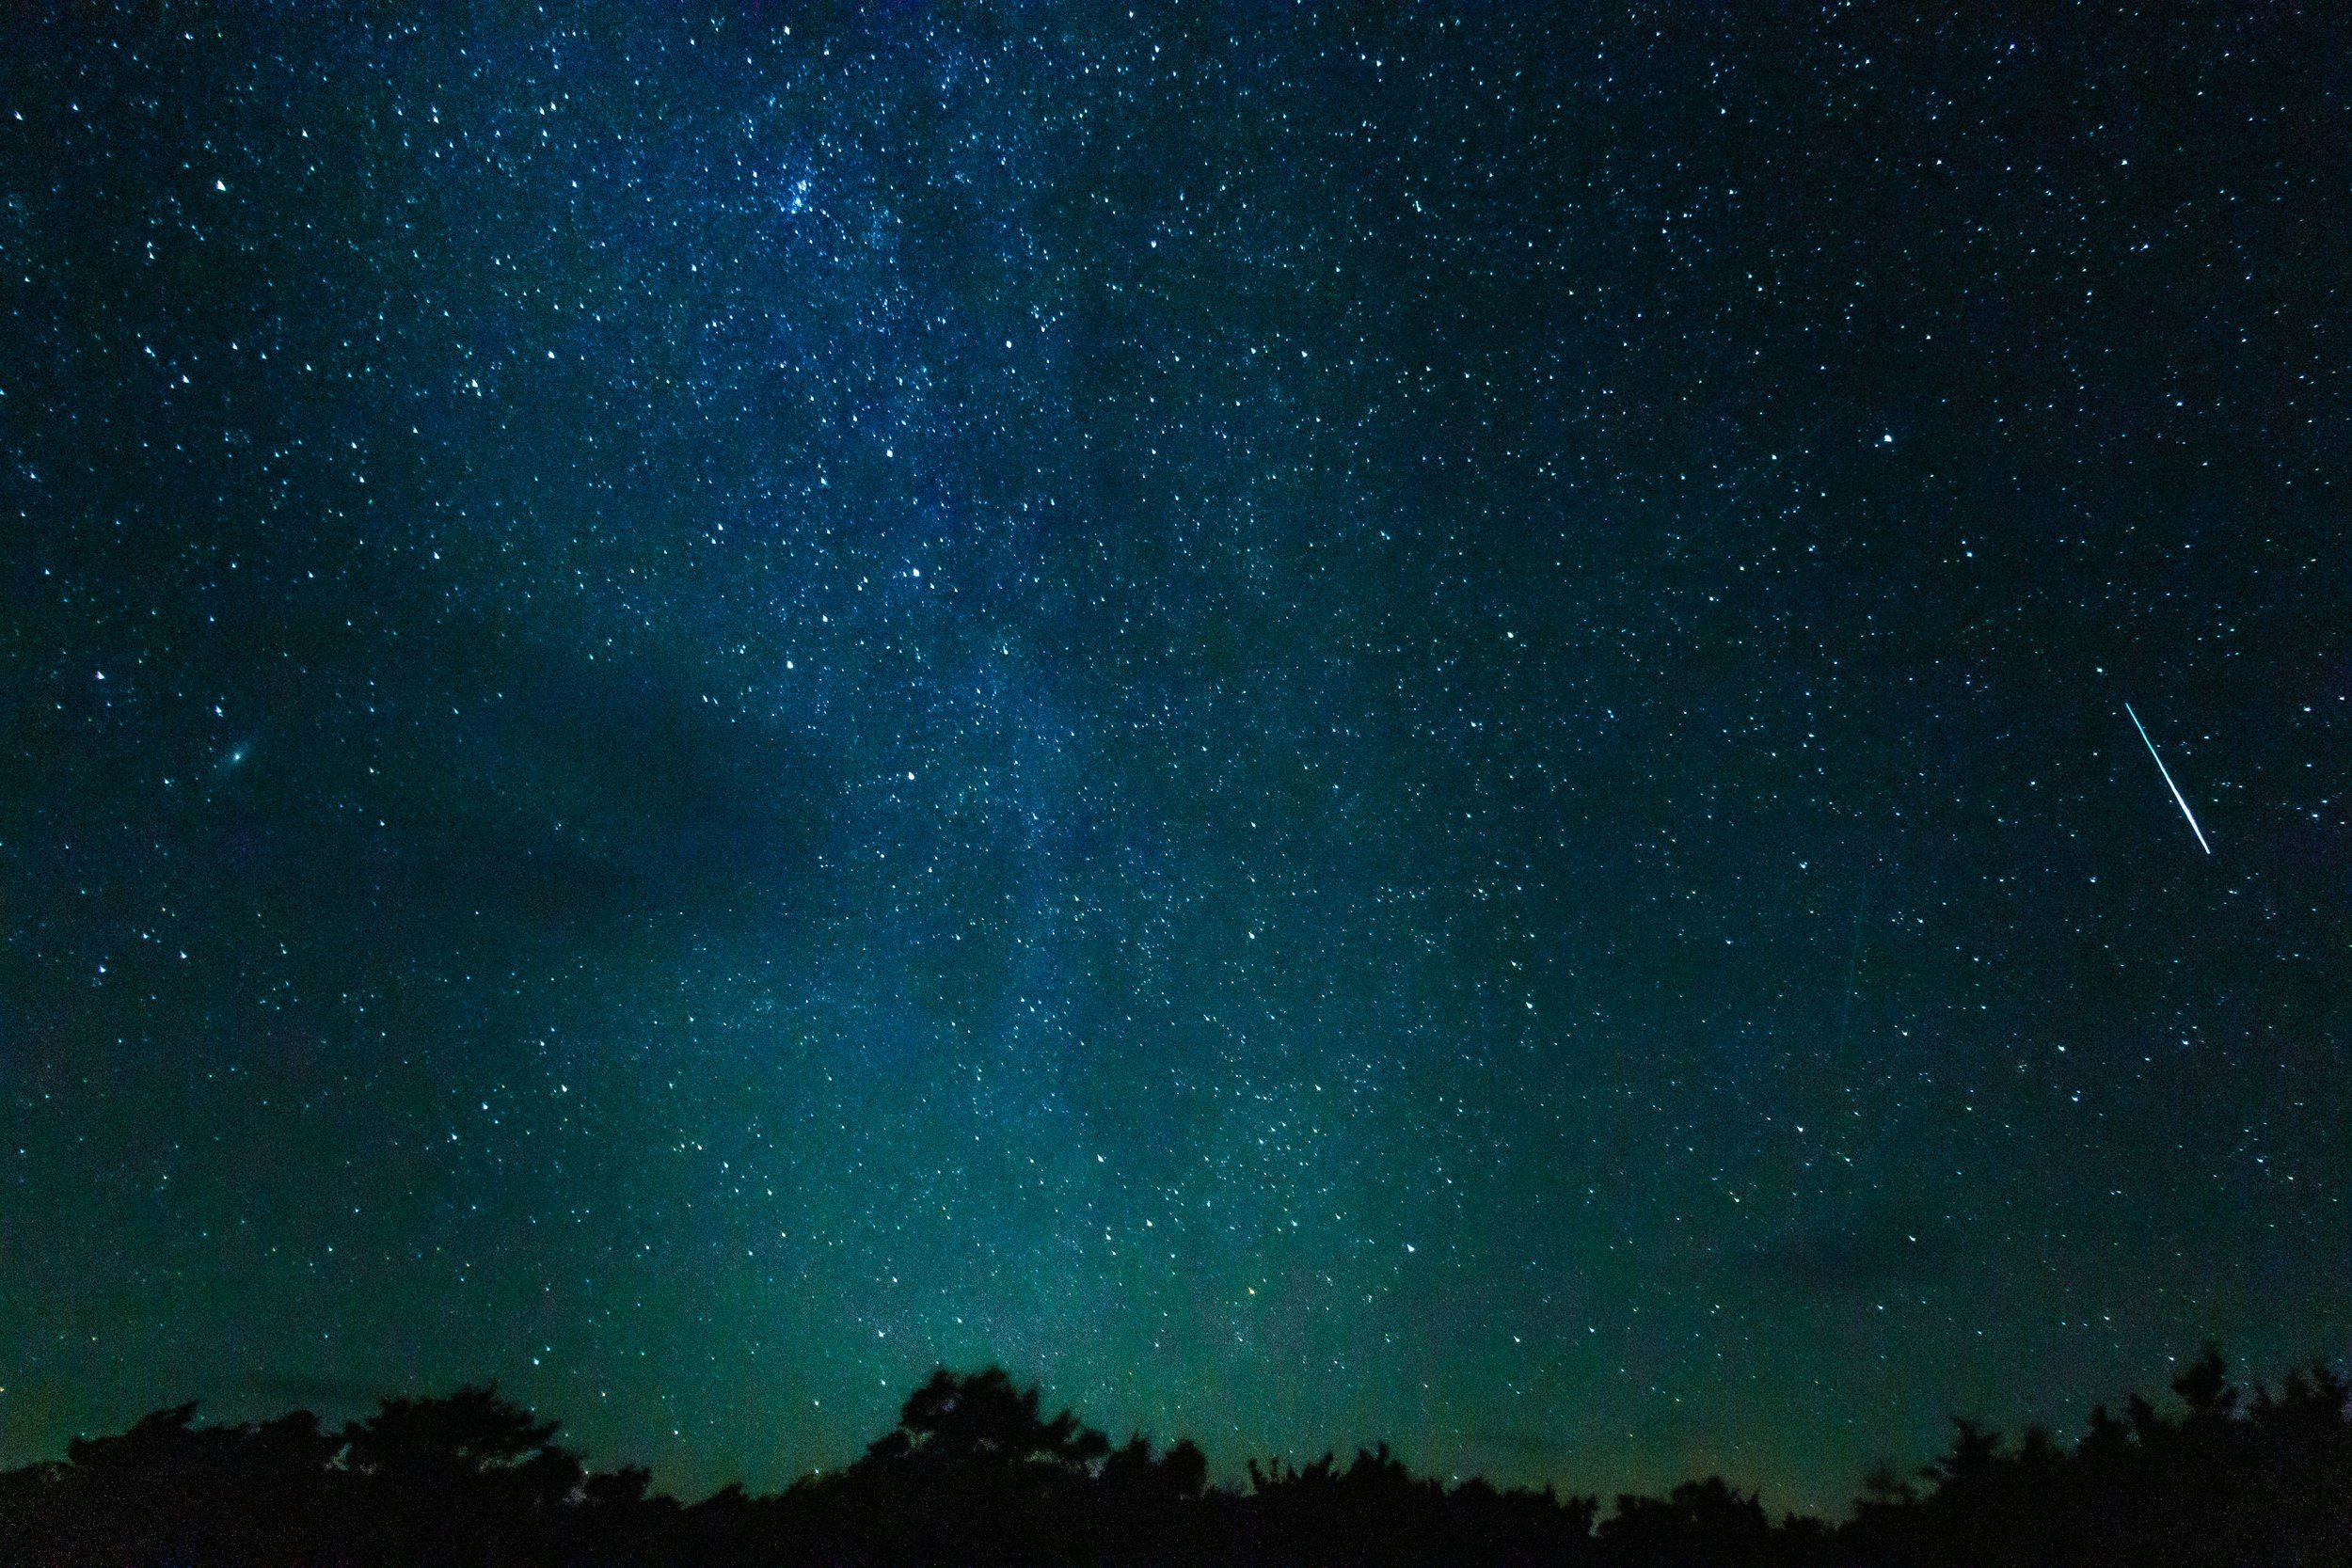
This.

2 Years, 6 hours of driving, a storm, 1 hour window to capture the shot, and this was the result. Could it be better… probably… but I don’t care, I love it! I don’t just love the photo, I love the story behind it.
You see, this photo was the result of YEARS of failed attempts. There were years of blurry images, failed editing, bad equipment, I mean you name it, and I did it wrong. And to be honest, this isn’t even the best shot I could get, it just so happens to be the only one that I could capture given our circumstance on that brutal night on an island in the middle of the ocean (I’ll tell you where I was later, I want to keep you guessing on the location).
In fact, let me show you just how bad one of the original takes was… back in 2018.
LITERALLY. WHAT. AM. I. LOOKING. AT?????????
I was sooooo bad at getting the galaxy shot. I thought I had everything. I thought I knew everything, but it wouldn’t be another two years until I got a better shot. So, how exactly did I get the better shot? How did I improve? What made me better?
Planning

The first thing I did was plan the trip. We planned a guy’s trip, solely around my photography, with the mission to drive out to Ocracoke Island (fine, I told you, but you can’t leave now). We planned this trip for October 2020 since that is the last month in North Carolina where you can see the milky way galaxy before it falls beneath the horizon until May.
But OK Garrett, I don’t get what the big deal is…. why do you have to travel to an island, can’t you just go to a field and point your camera at the sky?
To answer my own question, NO you cannot, it’s tough to see in most of the eastern United States because of light pollution, so I used the website Dark Sky Finder to help me find where the least amount of light pollution near me exists. For most of us in North Carolina, that’s Ocracoke, NC, a part of the country that is almost entirely void of light pollution. Ocracoke is great because you can see the milky way galaxy with the naked eye and that really helps with framing your shots.

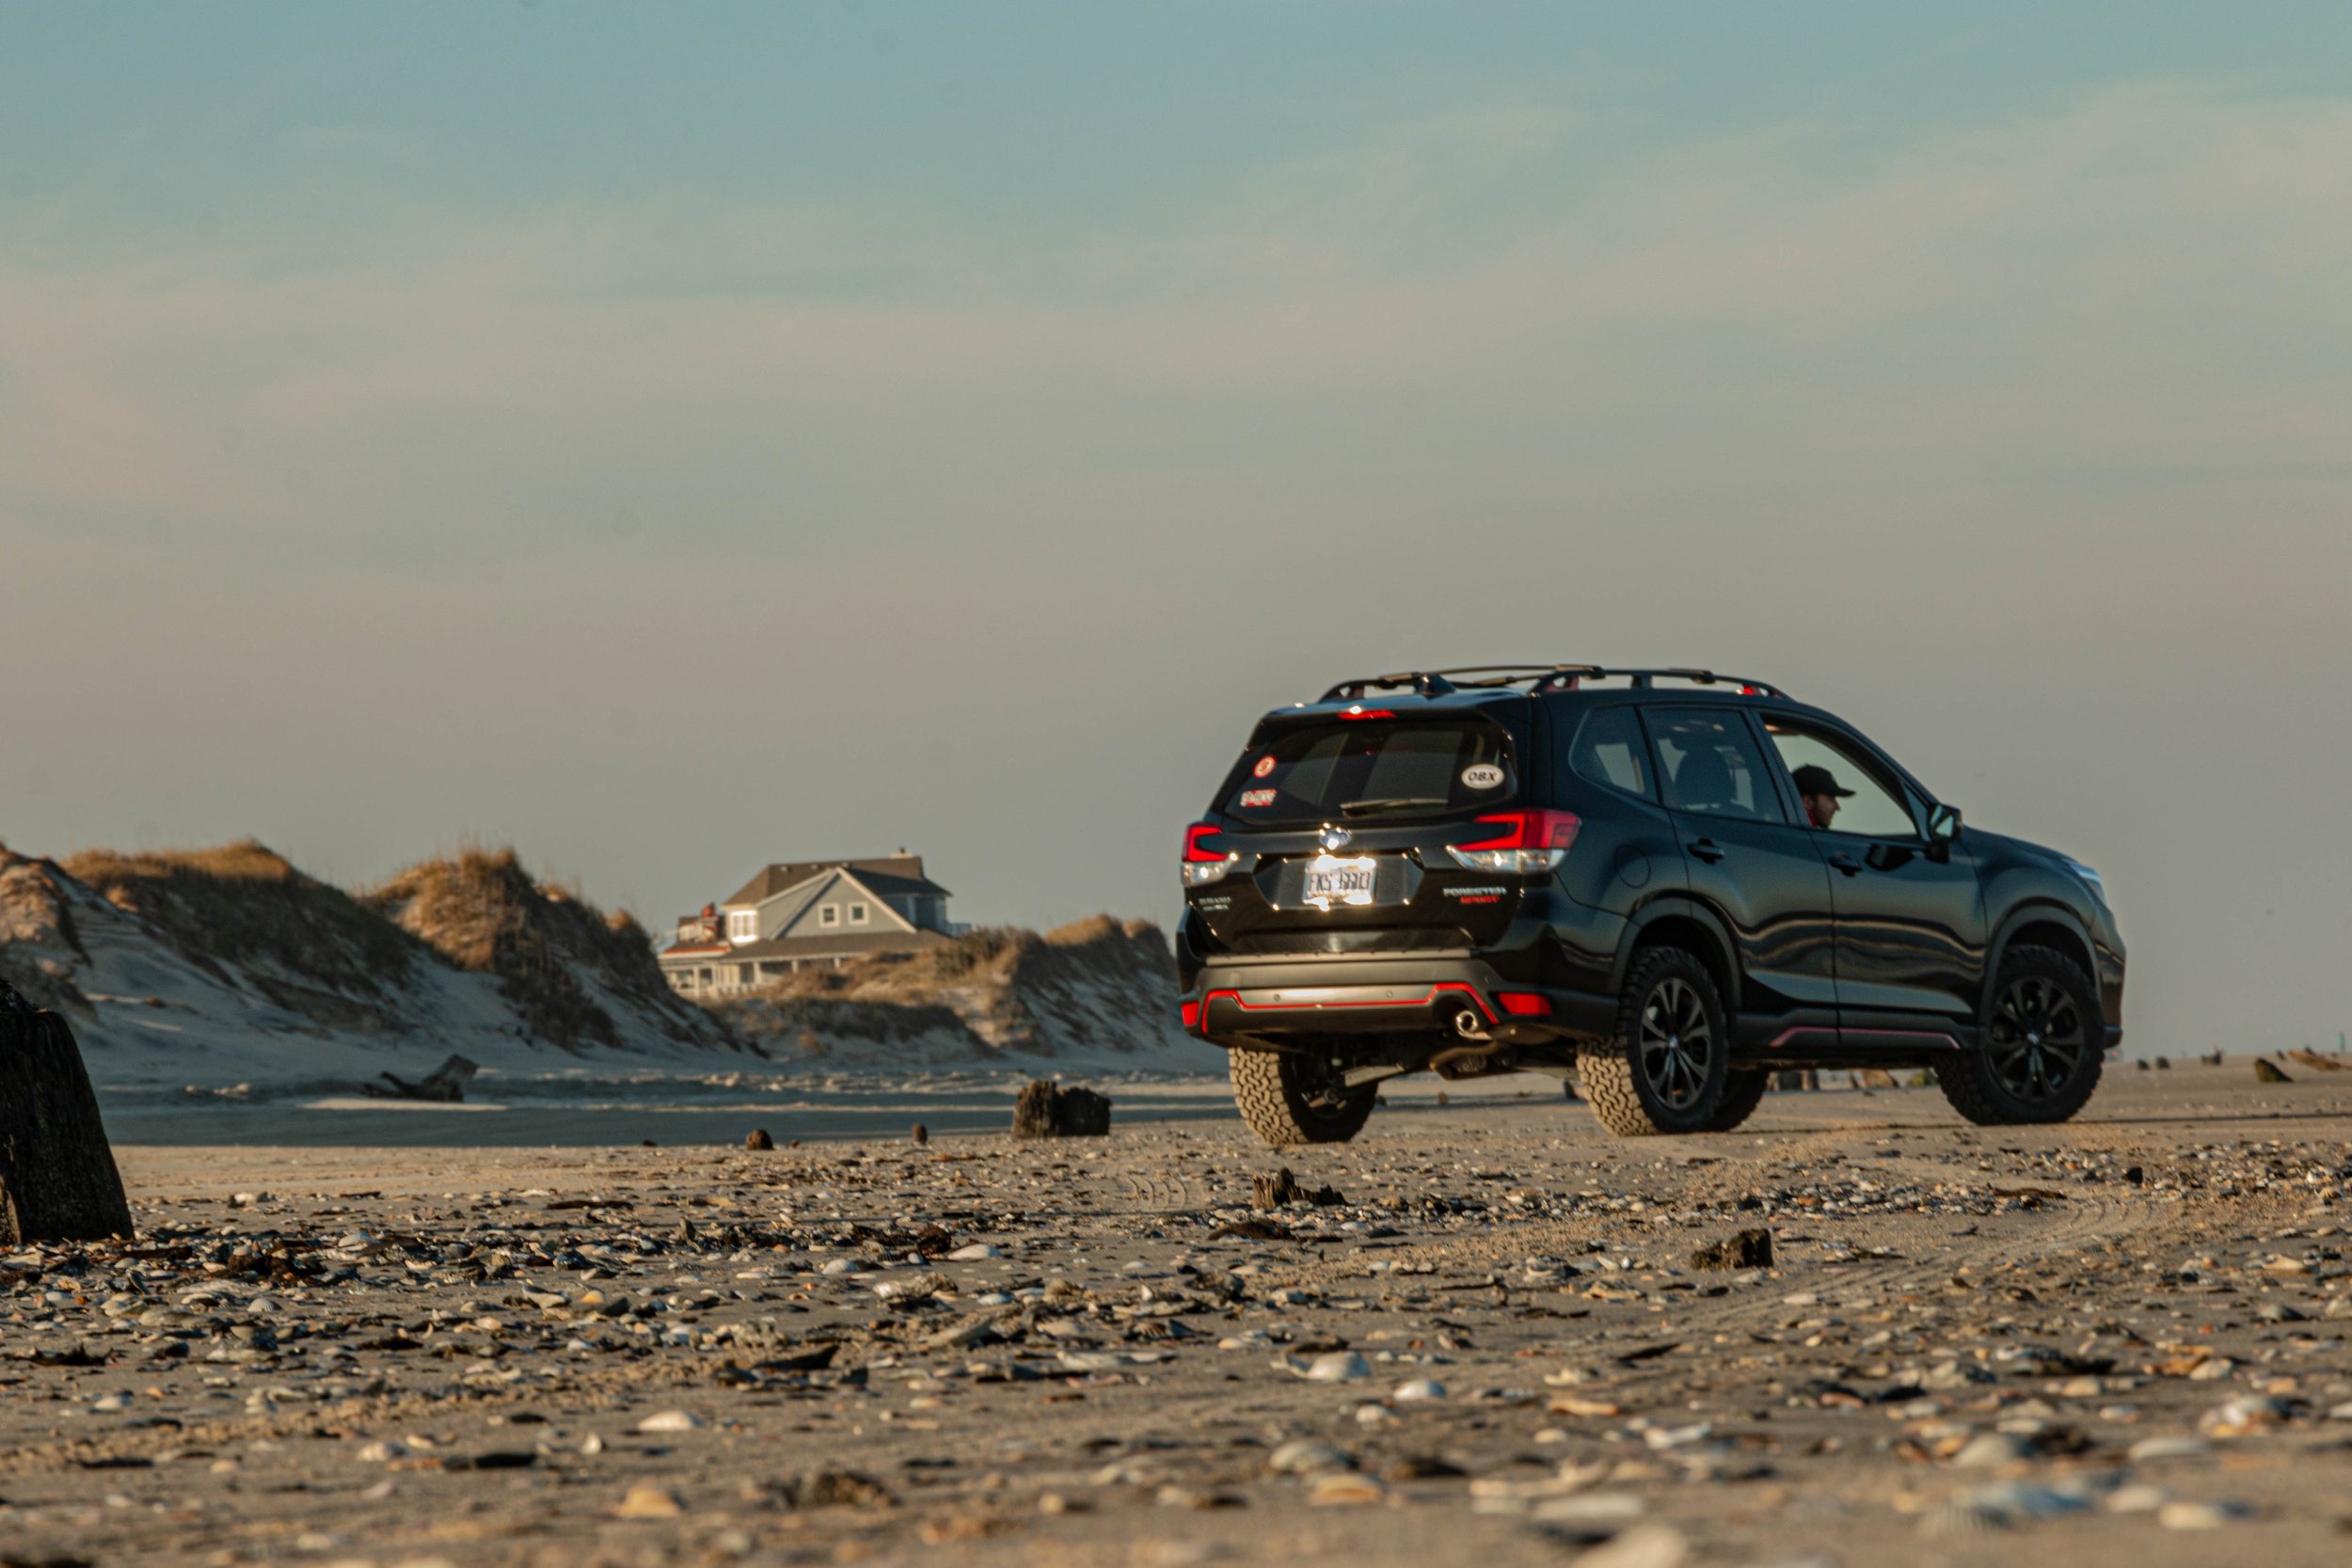
Going to Ocracoke from Raleigh is an ACTUAL trek. Our friend Will lived at North Carolina’s Outer Banks that year and we figured the 6 hour trip from Raleigh to Ocracoke would be best if we split it up by driving 3 hours to Kill Devil Hills, NC and then 3 hours to Ocracoke. We got to Kill Devil Hills on a Friday, and that Saturday morning we packed up the Subaru to catch the ferry in Hatteras, NC. The one hour Ferry Ride took us to Ocracoke, NC and since we had some time to kill so I got some other great shots.
The island was beautiful, and I would highly recommend everyone to go visit. The Ocracoke Island light house is a MUST see. However, I want you to look at this photo and ask yourself “do you see the sky”. No, you don’t…. you see clouds, and clouds are the enemy when it comes to Astro-photography.
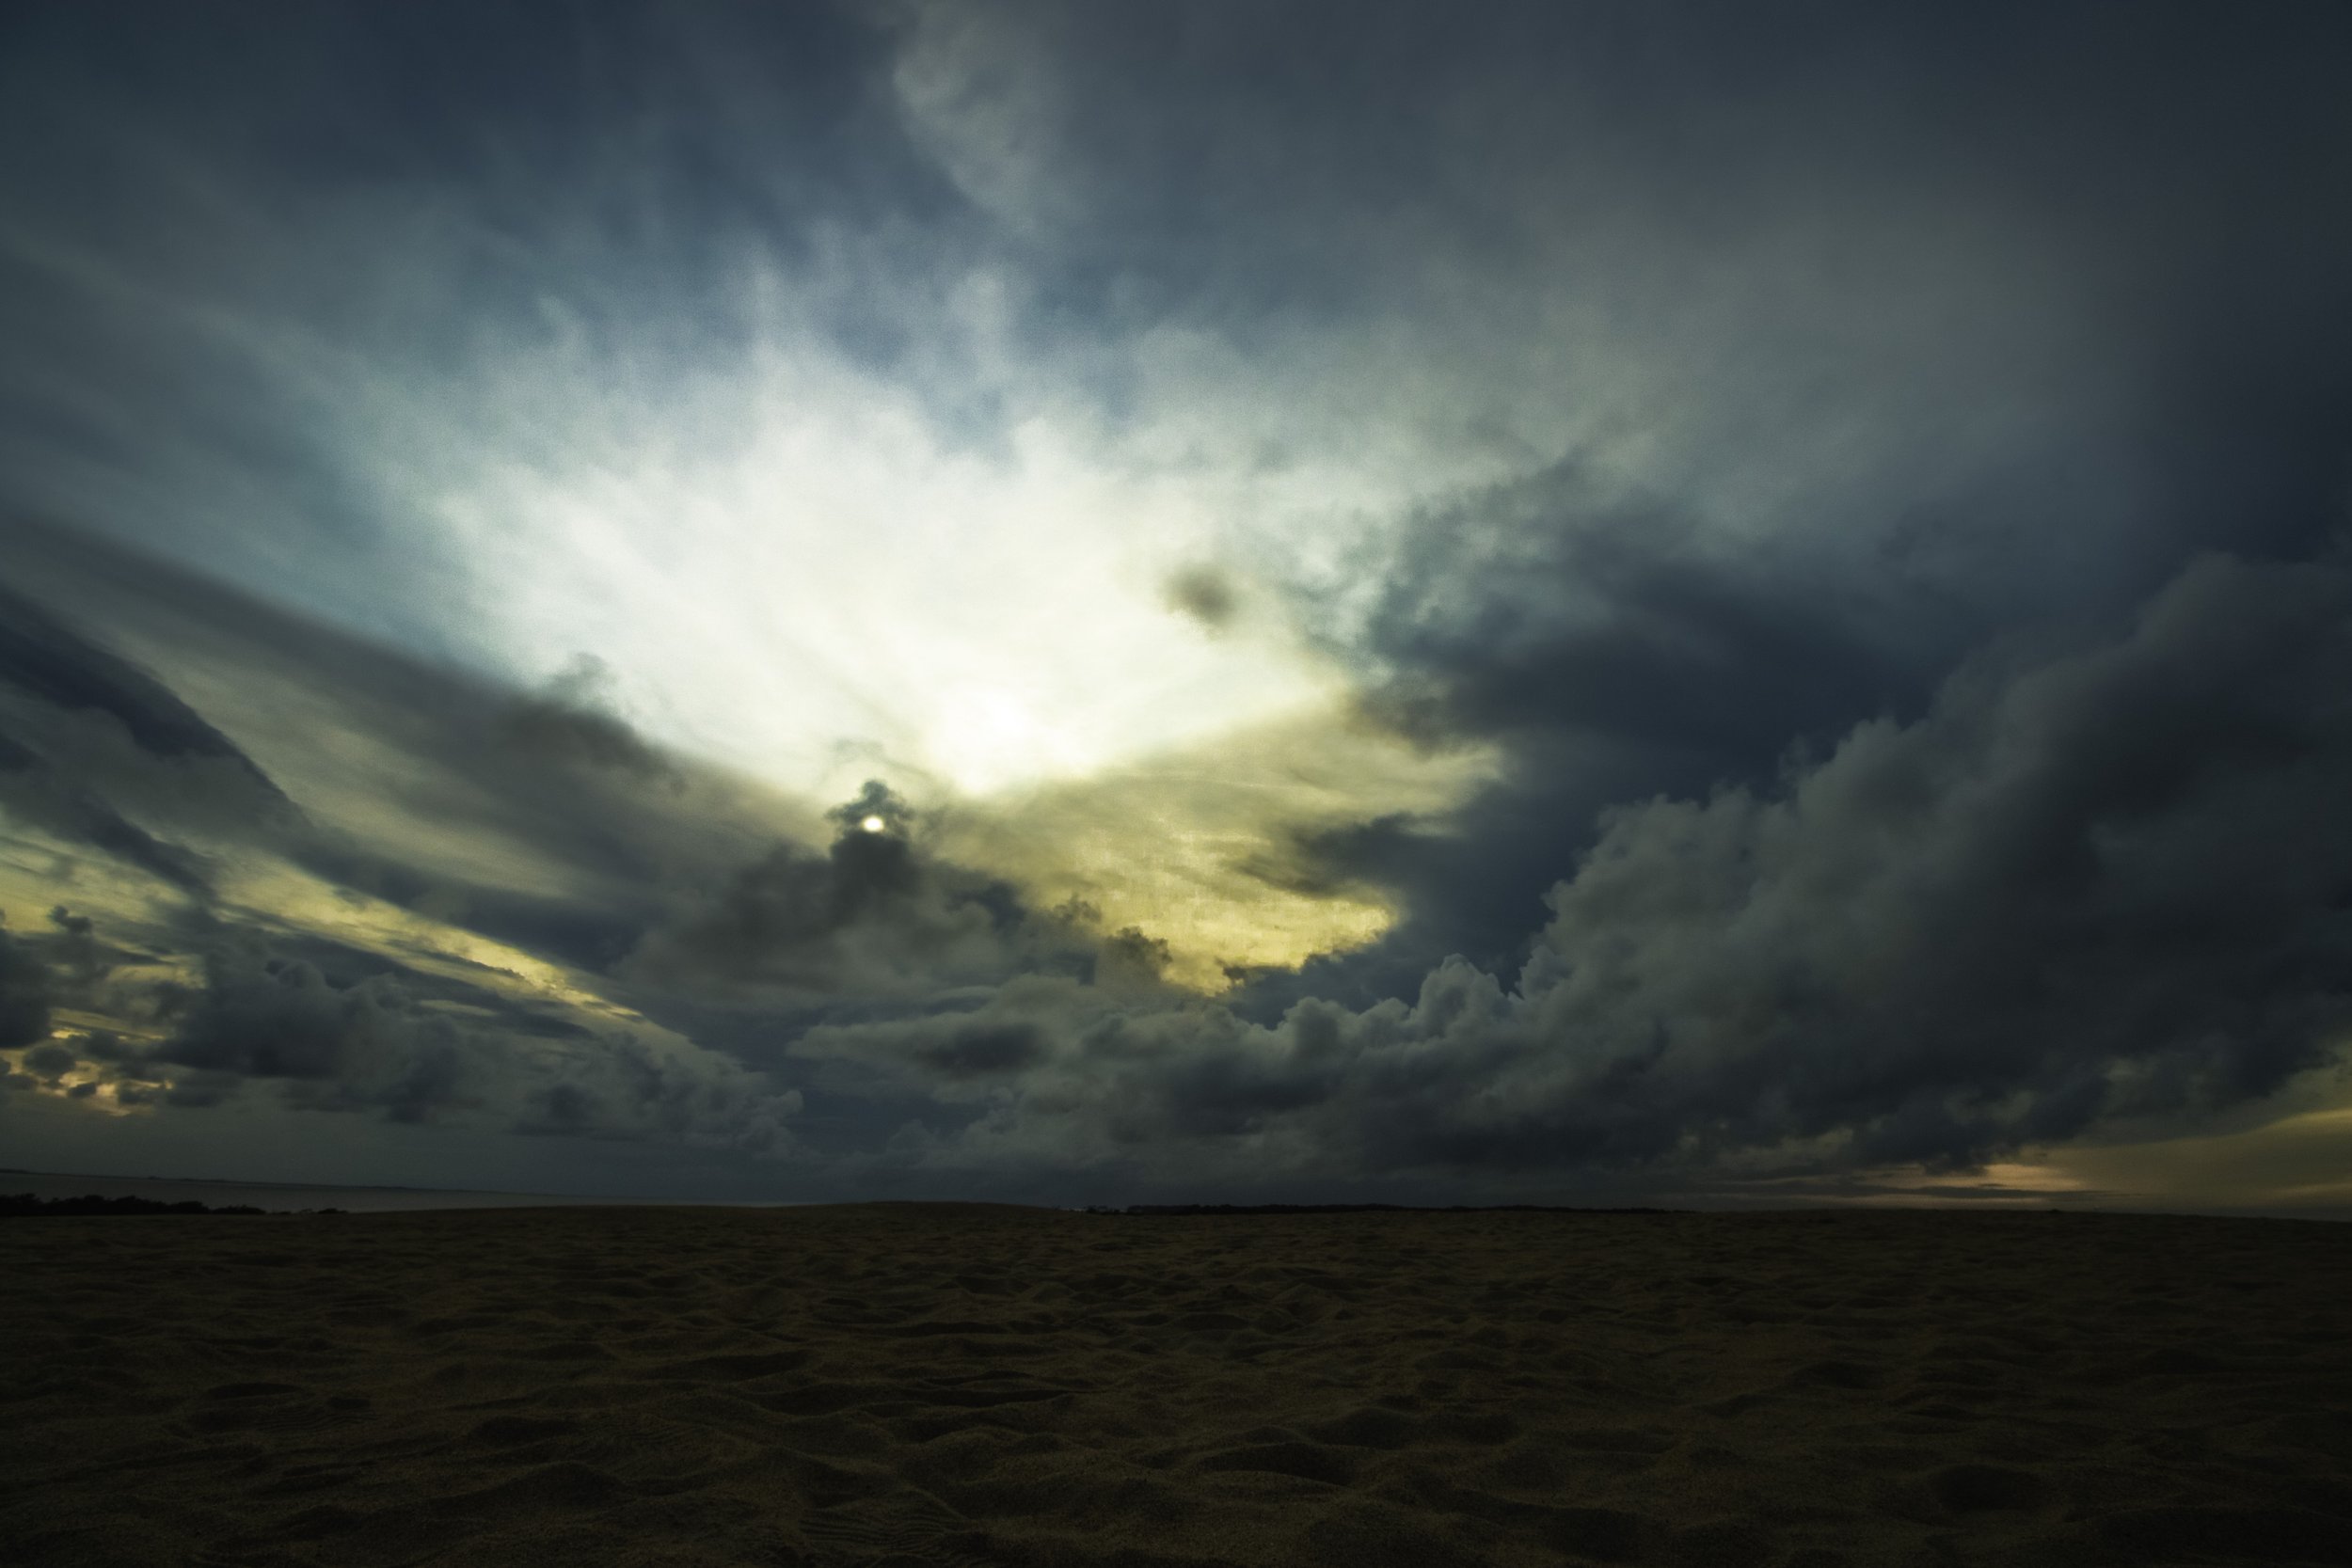
Sometimes the Best Laid Plans Fall Apart

Those clouds were not just passing through either. The clouds were just a precursor to the chilly October cold front passing through that weekend. Yes, all the planning to make this weekend happen was nearly in vain, and we were worried all that effort was going to be wasted. We sat in the back of my Subara, drinking beer saying “well, it can’t get much worse. At least we’re here”…. oh but did it get worse.
The cold front brought 30+ mph wind with it, and setting up in a tent was not a smart decision… so I set up in my Subaru! Unfortunately for Will, Bob, and Todd, the weather wasn’t on their side. Bob and Todd did relatively well, but Will on the other hand… well the picture will speak for itself. Man slept with a collapsed tent in 30+ mph wind… and most of us were Eagle scouts… so the scout motto “Be Prepared” wasn’t well received that weekend.
Nevertheless, we persevered, thanks to Blue Moon, and in my case, a rear seat that folds down to turn your car into a tent. That night was cold, relentless, and rather upsetting. Even with months of planning, the trip was falling apart, my mission to get a photo of the milky way was slipping through my fingers and there was nothing I could do, but wait…
Then 5am Came
Bzzz Bzzzzzzzzzzzzzzzzzzzzzzz
“Garrett, STARS” - Bob
I scratched my eyes, looked out of the sunroof and with my bare eyes, I saw it. A celestial conglomerate of light. Beautiful streaks of light crossing the sky, flashing just for a brief moment. The wind seemed to have calmed down, and the clouds were floating off the coast at this point. Now was my chance! I rolled out of the car, camera and tripod in hand, knowing I had only a short window of time to get the tripod and timer set up to just get whatever I could. I knew the sun would start washing the sky out around 6 am, so I had to move fast. Todd and Will were still asleep, Bob and I were racing to get the shot.
“Are you sure you want to set up there?” - Bob
“No, but I have to” - Me
No time to frame my shot, no time to get a foreground photo, my only focus was getting that sky captured.
Click *20 seconds pass* Click, Repeat.
I looked down at the camera, and I got it. I finally got it, after YEARS of chasing it, I got the shot!
Where Do I Go From Here?
Will and Todd woke up several hours later, albeit I’m not sure you can call it “sleep” since we were all in-and-out of sleep that night. We packed up the tents and bags and went back to Kill Devil Hills, NC to spend a couple day’s relaxing and taking in the ocean, but that left me wondering, where do I go from there. How do I get better?
Well, I guess my next step is to go out west! Try it all again, but maybe this time at the Grand Canyon? So my challenge to you is to take a look at Dark Sky Finder and see where you can go to get an amazing milky way shot!
If you like this story, and would like to hear more, Subscribe to my newsletter! And if you want to hear me tell these stories, Check out my YouTube video below and be sure to subscribe to my channel for more stories and great content! I’ll see you all next week! Cheers! - Garrett
How to ‘Turn on’ the Lights Using Adobe Photoshop
So you’re editing a photo, and you’re looking over everything and you spot it… that one light pole with a burnt out bulb. It’s so frustrating… like, doesn’t the utility company know that I’m out here taking photos and I NEED every light on??? But all jokes aside, it can be frustrating when you’re capturing a beautiful night shot and there’s a pesky light out. OR, you could be taking a photo in broad daylight and you want to artificially turn on lights for dramatic effect. Whatever your reason is, this tutorial will show you how to turn on lights using Adobe Photoshop!
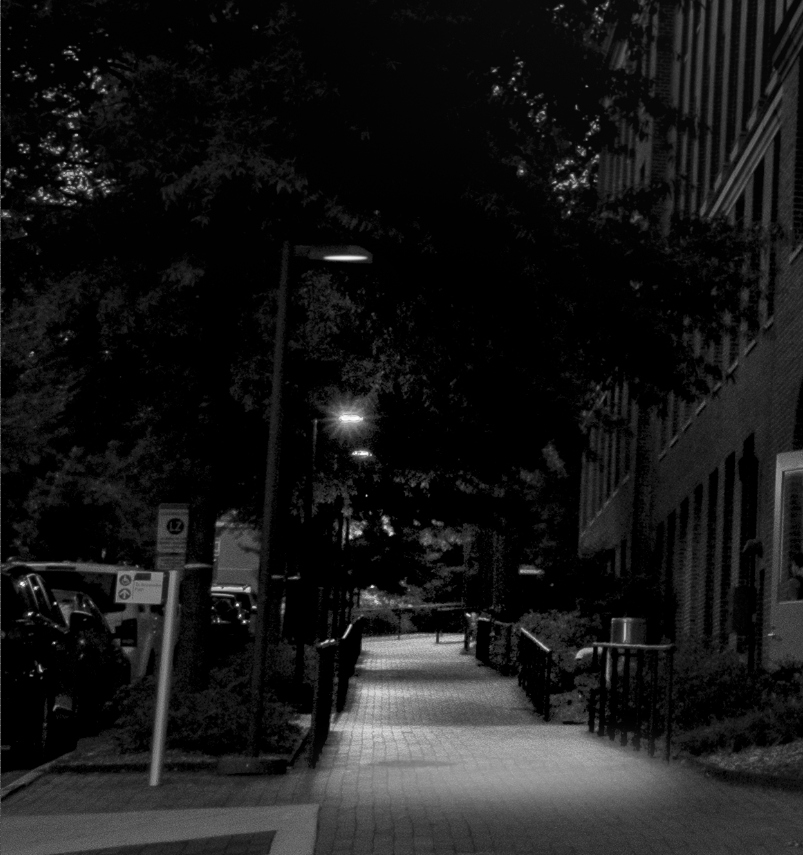
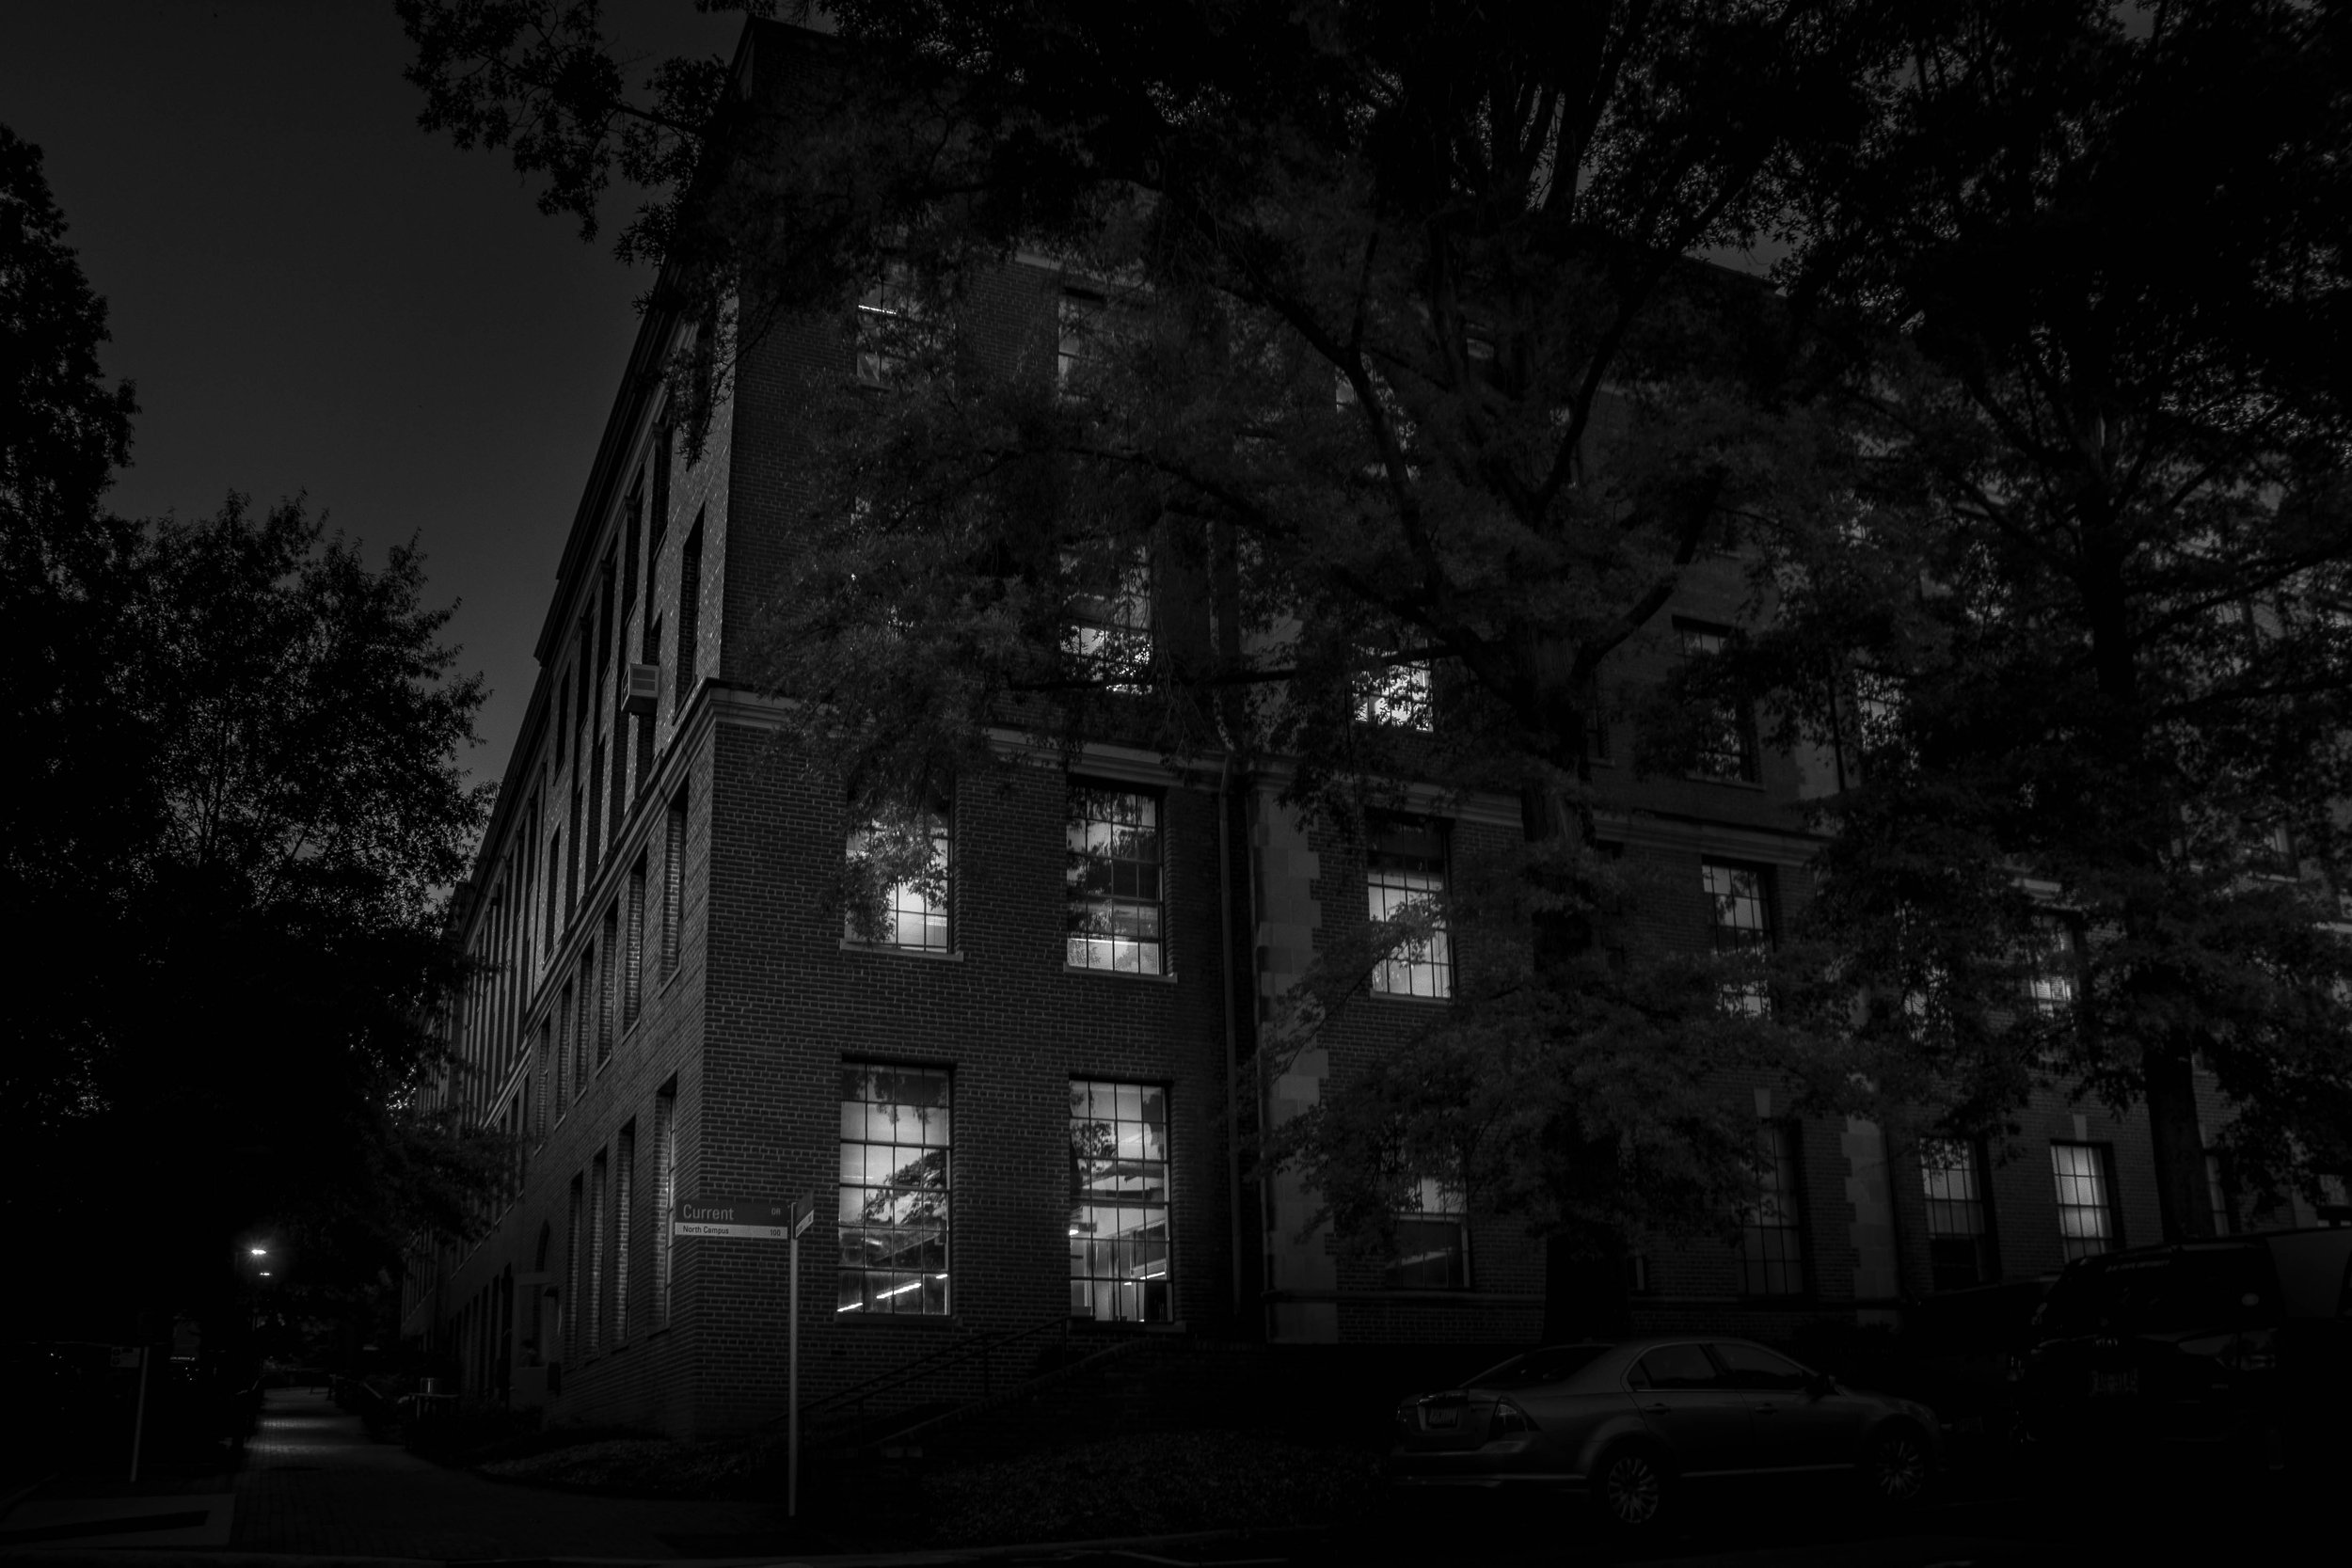
First, let’s take this picture…


…pretty cool, pretty dramatic, except one thing. This one street light is out! Now, what’s the big deal, it’s just one street light, you probably didn’t notice it at first. But that’s the thing, YOU DIDN’T NOTICE IT. Imagine having those three street lights on. The way this photo is framed gives use to vanishing points, one down that brick path alongside the left side of the building, and one off the right side of the photo. I want to really SELL that vanishing point, and having those streetlights on helps guide the viewer’s attention down that vanishing point, almost like having the view imagining that they are walking down that path.
What’s at the end of the path? Nobody knows, but having the streetlights on certainly makes it more welcoming and less sketchy, right?
In fact, look at how more open that brick path looks when we ‘turn on’ that street light! You can actually tell that there is a light pole there now! It helps define our perspective and guides our eye down that path. This is why we would want to turn on the lights, to help us tell the story!
Let’s get to it and learn how to turn on our streetlights!
Start by creating a new layer and drawing where the light will hit the ground
The first thing you want to do is create a new layers. You do this by clicking the “+” button under the '“Layers” tab at the bottom right of Photoshop. From here, click the elliptical marquee tool in the tool bar on the left of the screen. The elliptical marquee tool and the rectangular marquee tool share a button so you may have to right-click on the image of the rectangle to select the elliptical marquee tool. Once you have selected the elliptical marquee tool, find the spot on the image where you think the light would hit the ground under the light pole, and click-and-drag your elliptical marquee tool to select that section of the image.
Once you have your selection, go down to the half filled circle to the left of the “+” button you clicked earlier, and click that circle. A dropdown menu will pop up, and you will select “Solid Color…” and make your color white. You’ll get this incredibly unrealistic circle like you see below, but the next step will help us clear that up!

2. Add gaussian blur to your selection

To make the spot more realistic, we have to add blur to it. Light isn’t at it’s full intensity all the time, it tends to soften over distance. To make the light softer, we’re going to add a gaussian blur. At the top of Photoshop, select “Filter”.
The following steps will lead you to Gaussian Blur: Filter>Blur>Gaussian Blur…
Photoshop may ask if you would like to convert your selection to a Smart Object, and if so, click '“yes”. The Gaussian Blur tool will pop up, and generally speaking, I usually like to select a radius of about 30px for this part of the light. It helps soften up the intensity, but doesn’t completely blur out the light.
.
3. Repeat steps 1 and 2 for the light source

To create the light source, you will follow the exact same process for steps one and two except that your elliptical selection will be much smaller and you’ll want to fill in where the light bulb will be.
For blurring the light source, I go with a much smaller radius, such as 1-2px. Light is strongest at it’s source, so we want to help the viewer perceive this selection as being very bright. The more blur you add, the softer the light appears, so add minimal blur.
4. Create your selection for the light beam and add gaussian blur

We are once again going to follow a similar process to steps 1 and 2, except we are ditching the elliptical marquee tool, and picking up the polygonal lasso tool. We want to create a faint light beam that goes from the edges of the light source to the edges of where the light hits the ground. I use the polygonal lasso tool to click on the edges of the light source and where the light hit’s the ground and hit enter to create my selection. Don’t forget to do this in a new layer!!
Once you’ve made your selection, fill with a solid color, and add gaussian blur.

You probably hate me at this point because this looks SO unrealistic, but trust the process!!
Side note, sometimes working in Photoshop is having a bad feeling about a project all the way through and then in the end it turns out beautiful. Working in Photoshop can be scary sometimes, but you got this!!!
We’re almost done. For this gaussian blur, I usually stick to around 30-40px to get some decent feathering, but by all means do what you like! We’re going to have to blend this light beam next.
5. Change your blend mode for the light beam layer
The final step of this tutorial is to blend your light beam into your background layer. This step is actually the easiest of all the other steps. Under the “Layers” tab on the right side of Photoshop, you will see a box that say’s “Normal” (boxed in red). Change that box to “Overlay”. This will overlay the light beam on top of your background layer and help with blending. I will sometime play with the opacity to the right of the box to soften the light beam further.
Now, lets compare the before and after to see the difference!

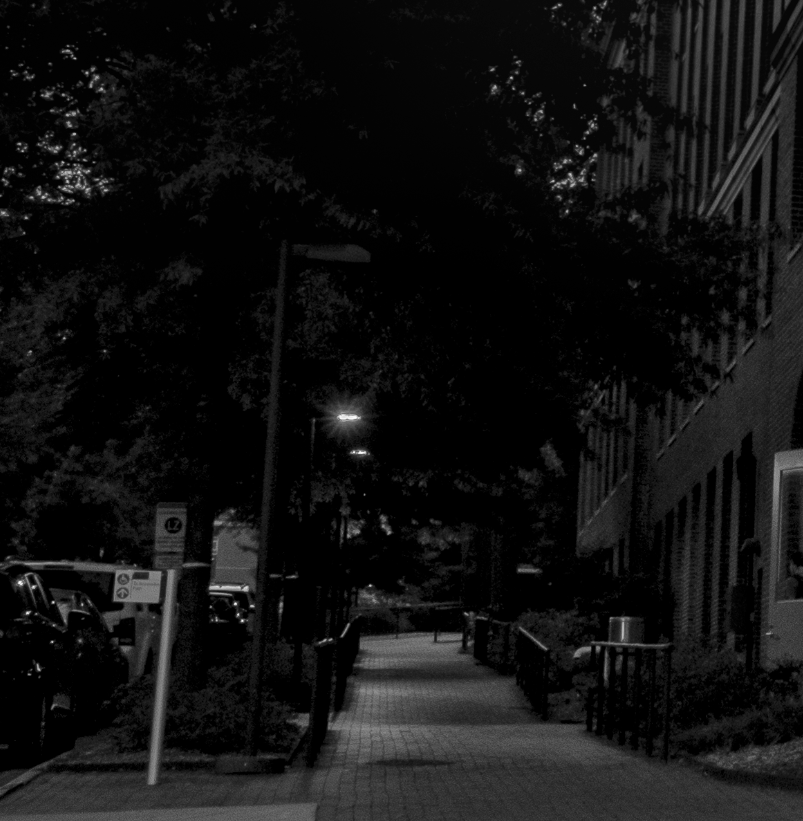

And that’s how you turn on lights using Adobe Photoshop! Look at how that helps us clean up the perspective of this photo! After doing some more touchup, we have a beautiful piece of fine art. If you’d like to follow along in real time, I have made a tutorial on YouTube at the bottom of this page that you can see. Be sure to like and subscribe to my channel and sign up for my newsletter for more tutorials and updates! Cheers! - Garrett

My Top 5 OBX Photography Locations
Looking through my portfolio, there is one things very clear…. I LOVE THE OUTER BANKS! Personally, if I could live there full time, I would! There’s something special about driving down NC HWY 12, windows rolled down, beach music playing, and taking in all the NC coast has to offer. I spent much of the COVID-19 Pandemic visiting the OBX, and when I lived in Norfolk, VA, I was down at the beach most weekends! Having driven the entire length of NC HWY 12, from Ocracoke to Carova, I’ve collected a nice collection of shots and locations to visit. These are my top 5 photography stops that you MUST SEE when you travel to the Outer Banks!
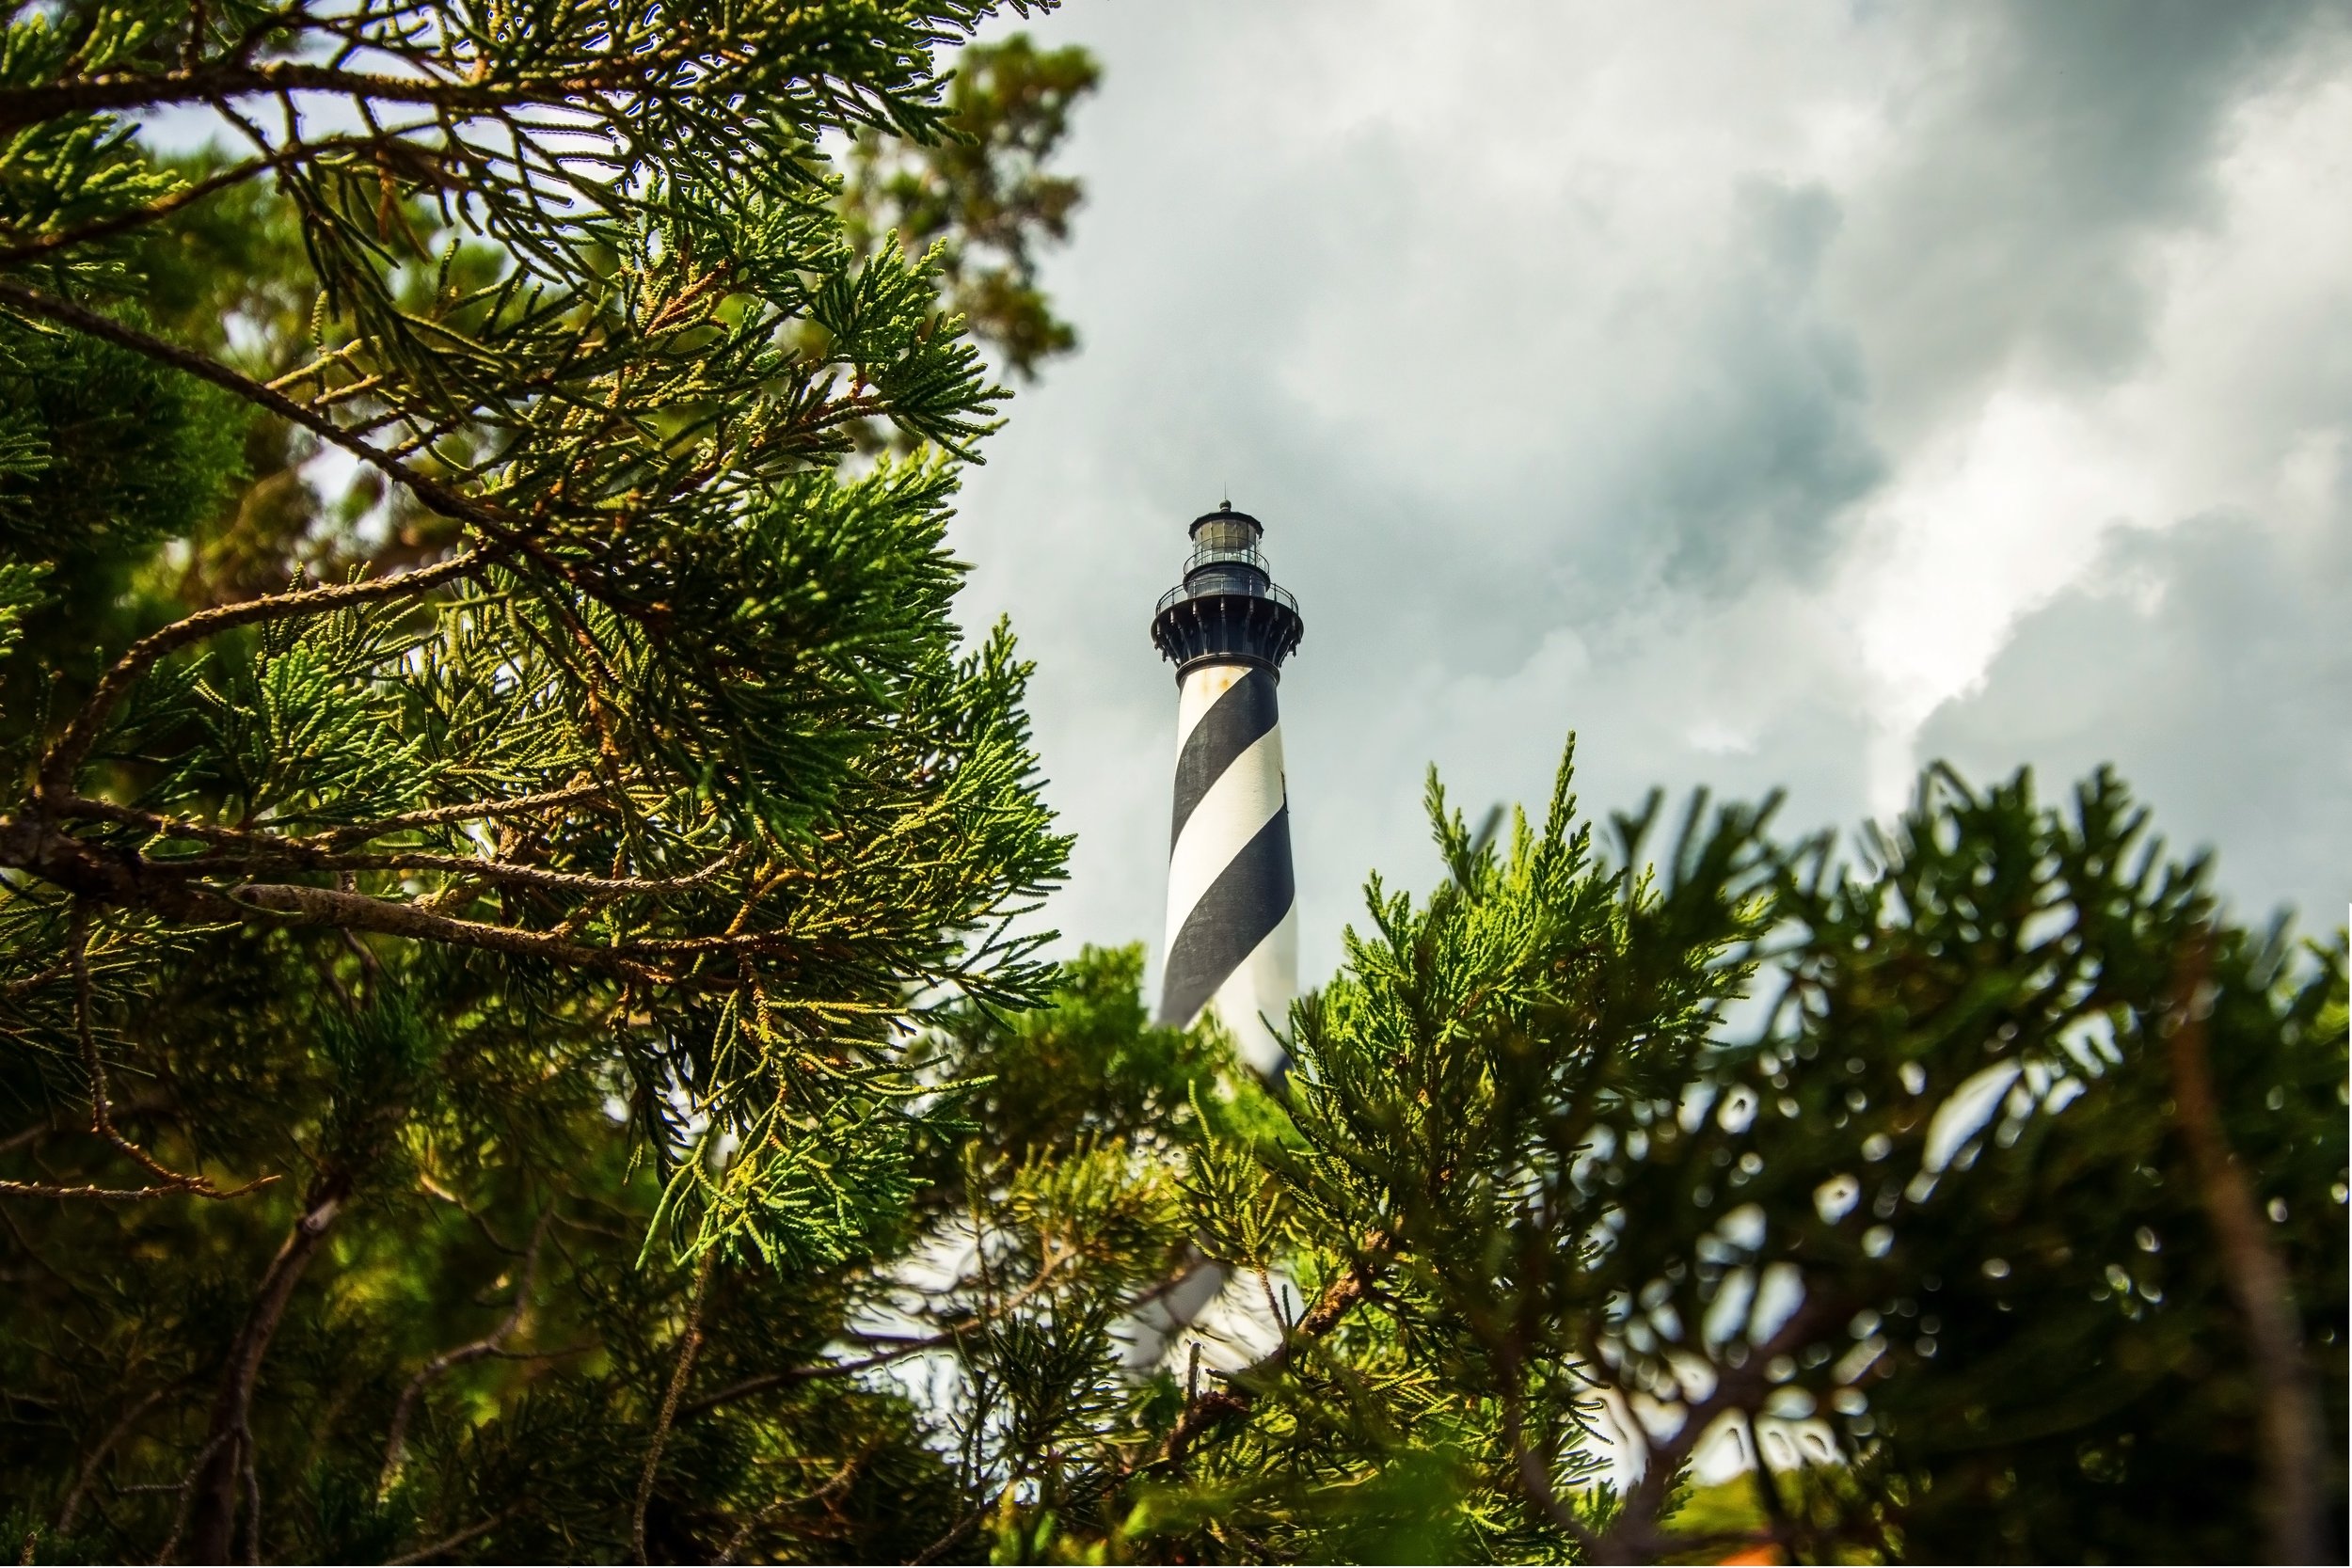
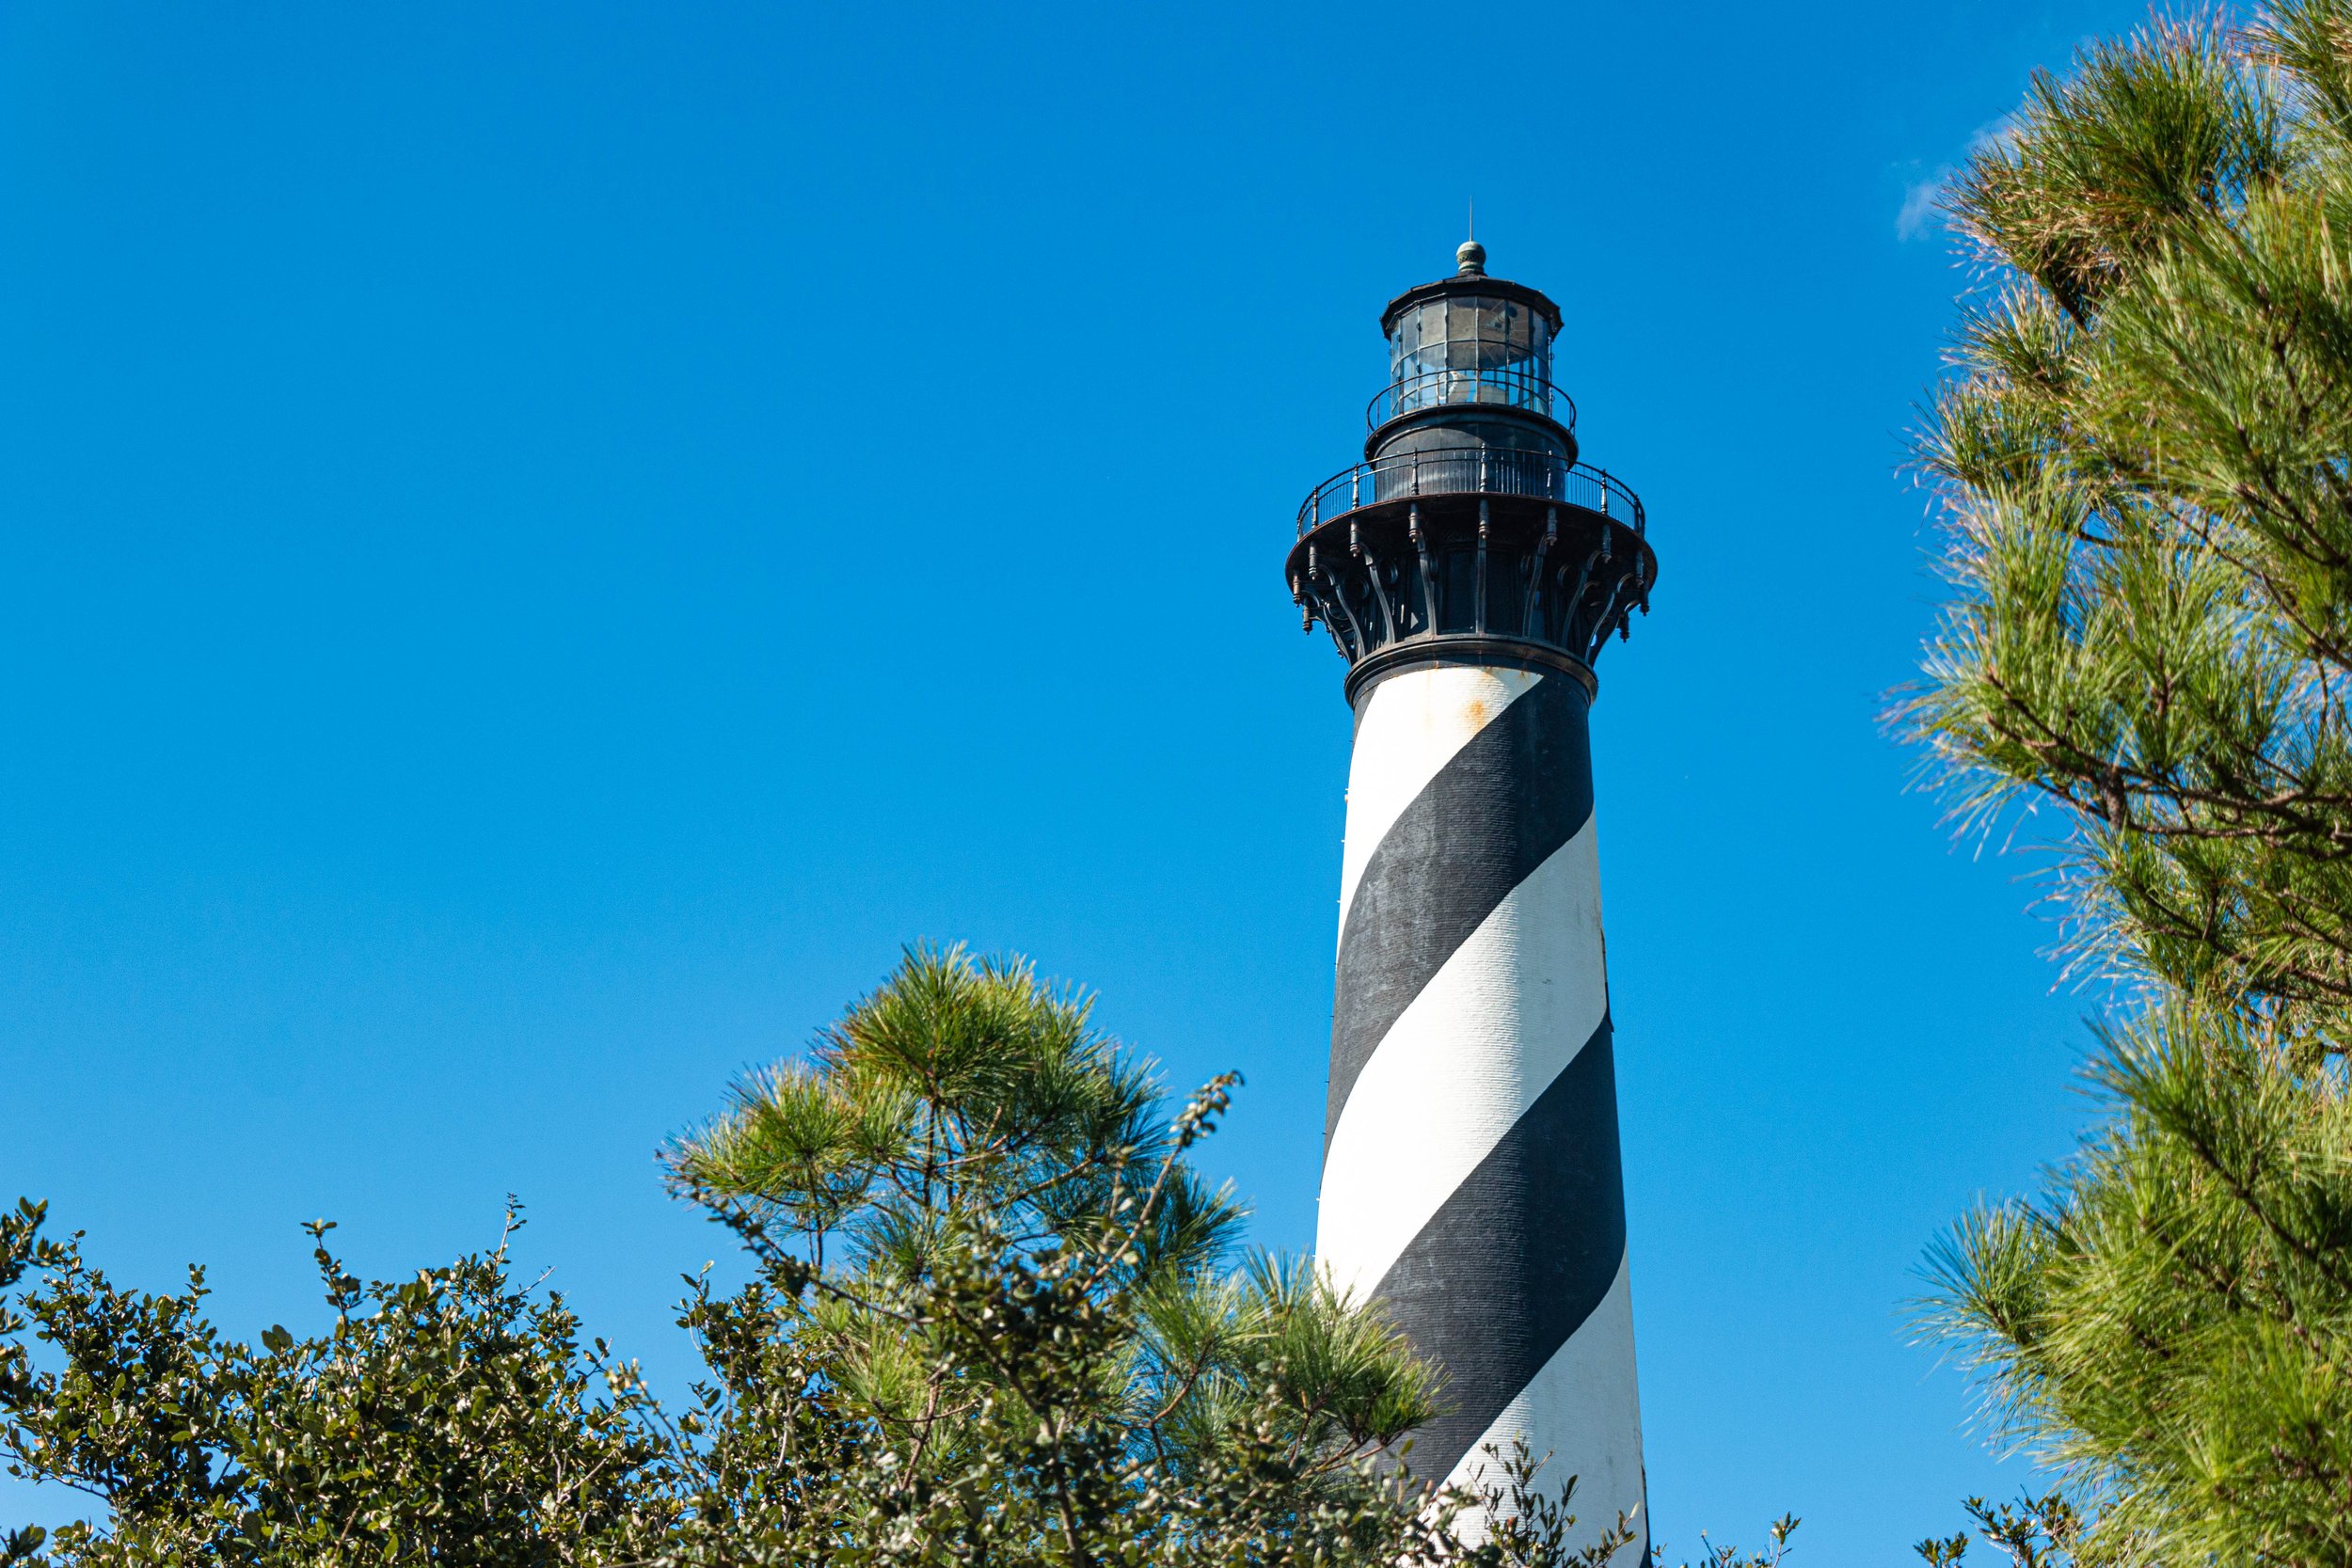
5. Cape Hatteras Lighthouse
Who doesn’t love the fact that the tallest lighthouse on the East Coast is located in NC along the Outer Banks? The Cape Hatteras Lighthouse is truly remarkable, especially considering that the lighthouse was physically moved 2,900 ft in 1999. I love getting shots of this lighthouse, however, this lighthouse is a popular tourist destination, so getting “original” shots are hard to come by. The property is also well maintained so getting off the path for a unique shot could be tricky. Nevertheless, it’s worth the trip. Take you camera to the beach while you’re there, as the lighthouse towers high above the dunes and with the right editing, you can get a truly remarkable shot.
4. Corolla, NC (cor-ah-lah)
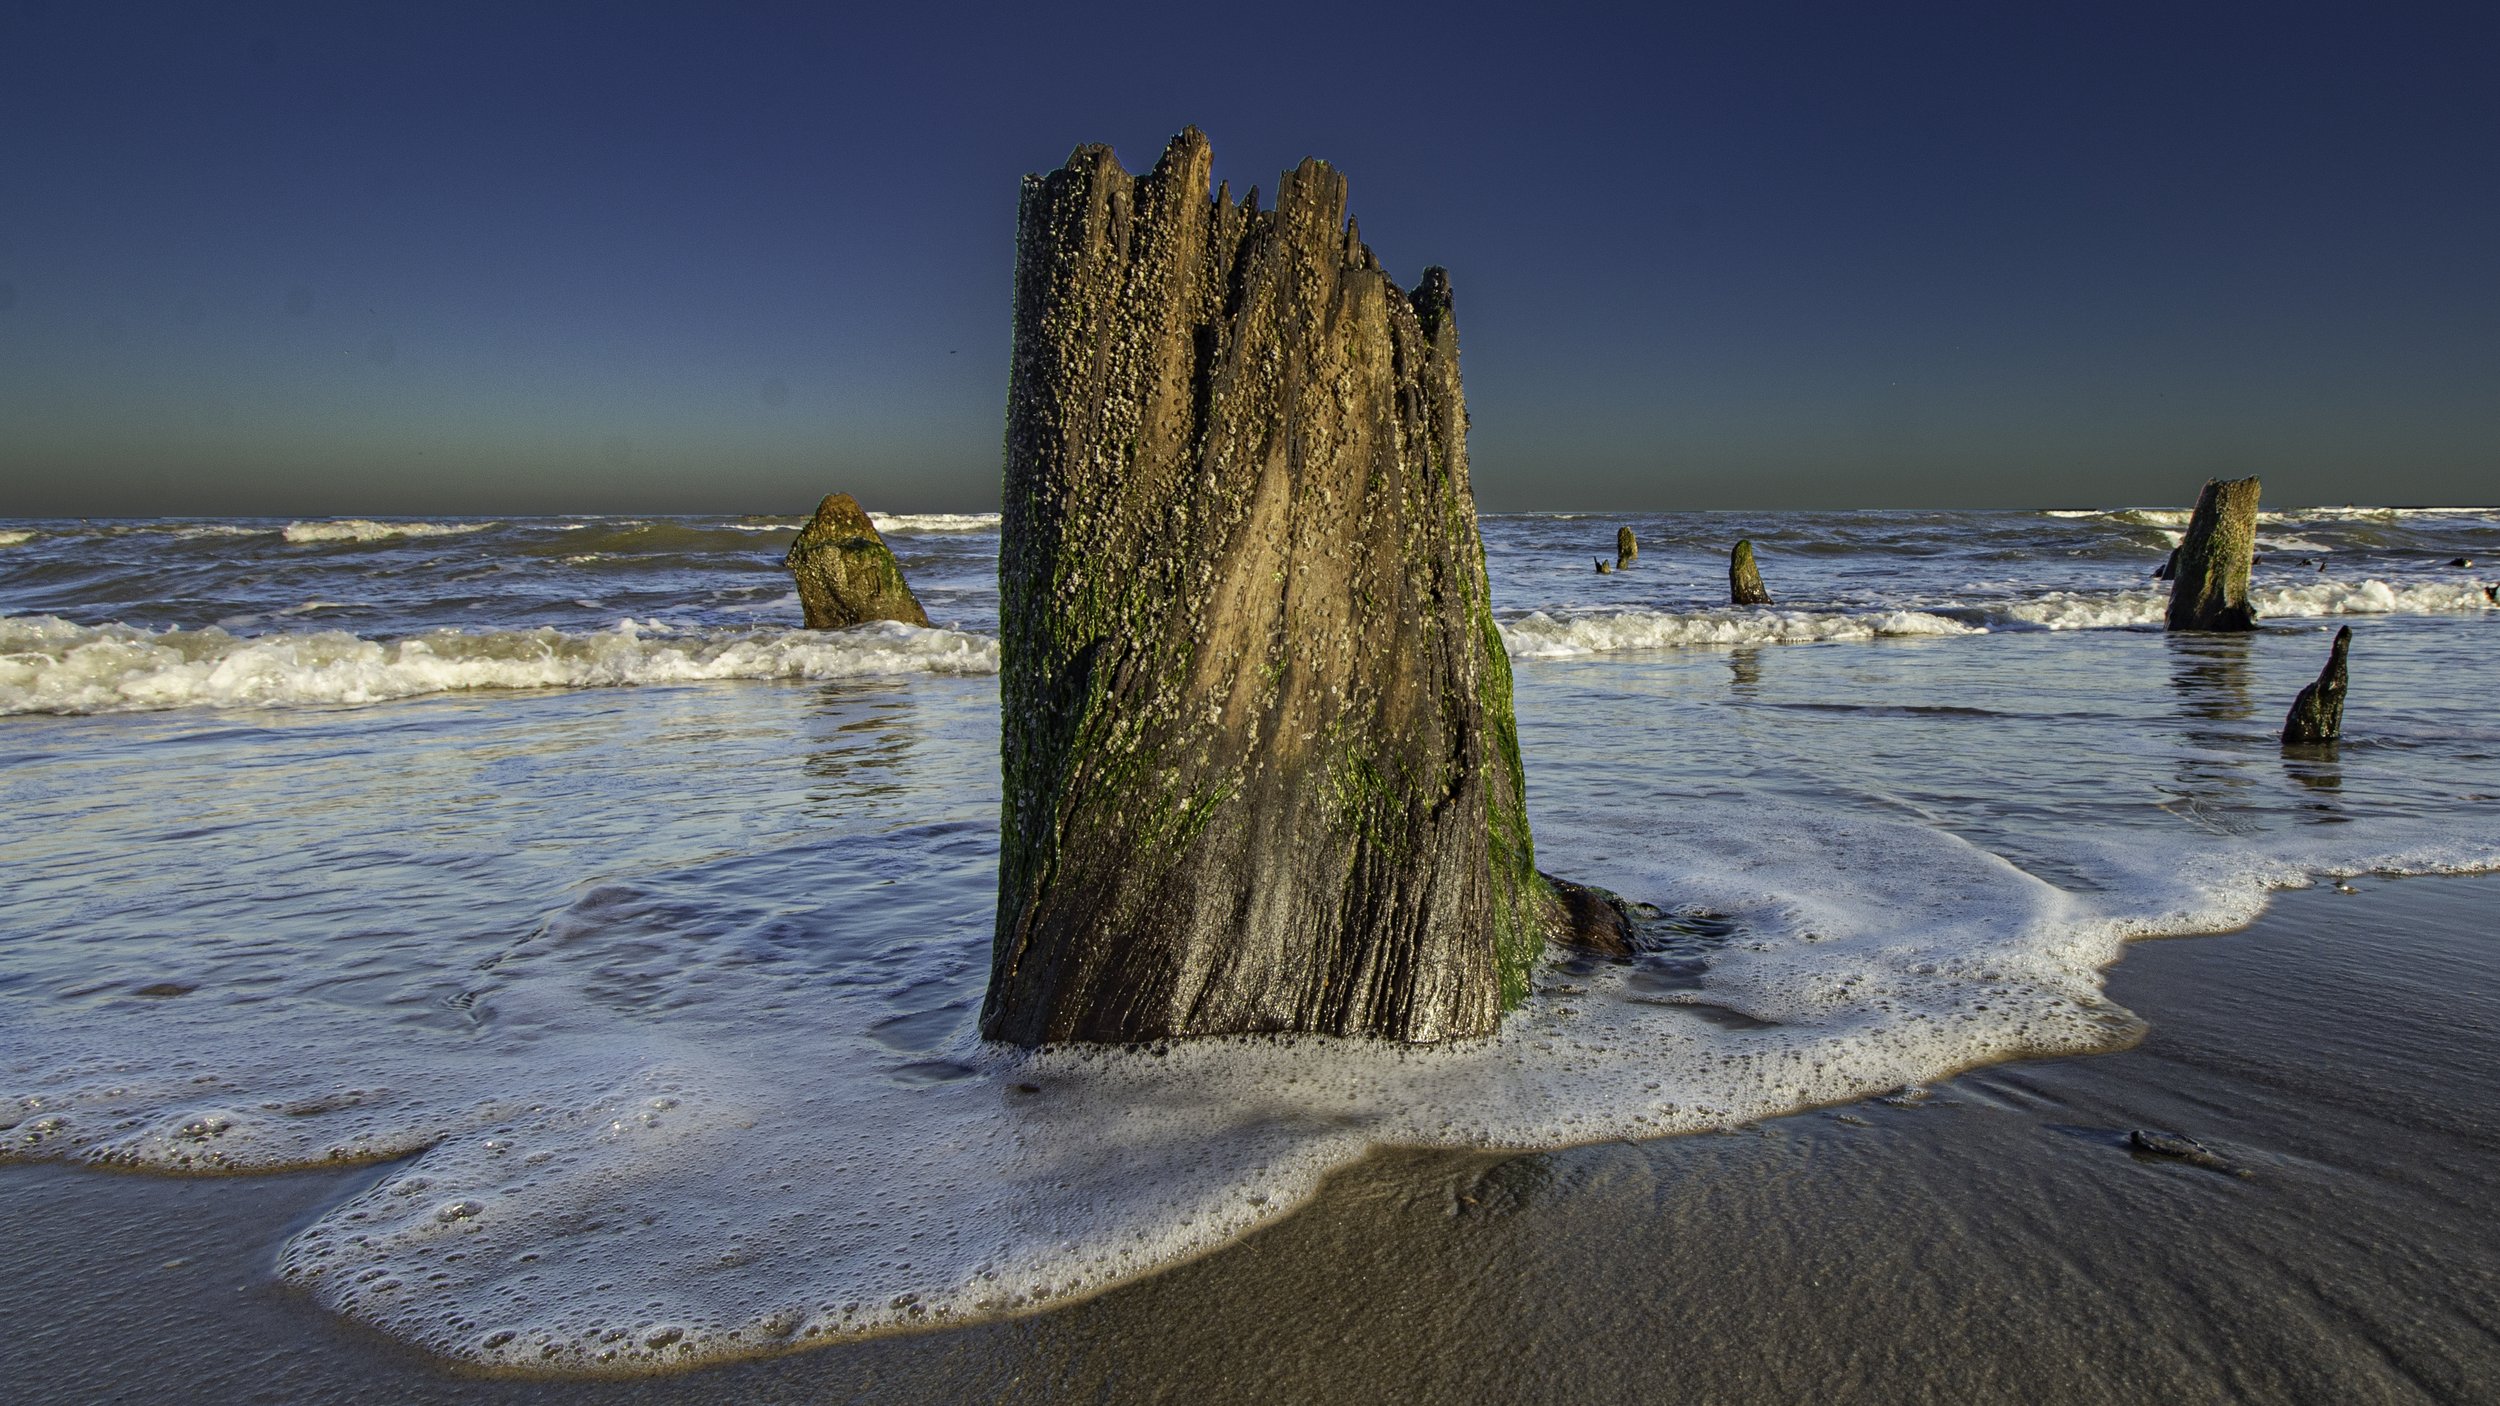
Corolla, NC is where the NC HWY 12 “ends” (the asphalt part anyways). Corolla is as far north along the Outer Banks you can go without a 4X4 Vehicle. During my trips in 2020, I had my lifted Subaru Forester so I was able to get past Corolla and drive up to Carova, right at the border on NC and VA. A few of the shots I took on the beach in Corolla were taken ONLY because I had AWD on the Forester, so please do not drive on the beach if you don’t have an off-roading vehicle! Just along the coast of Corolla sits an ancient forest. The apparent “rocky” beach actually consists of thousands of ancient cedar and oak stumps, thousands of years old. These stumps serve as a reminder to us, that these barrier islands dance off our coast, moving ever closer to the mainland of North Carolina.
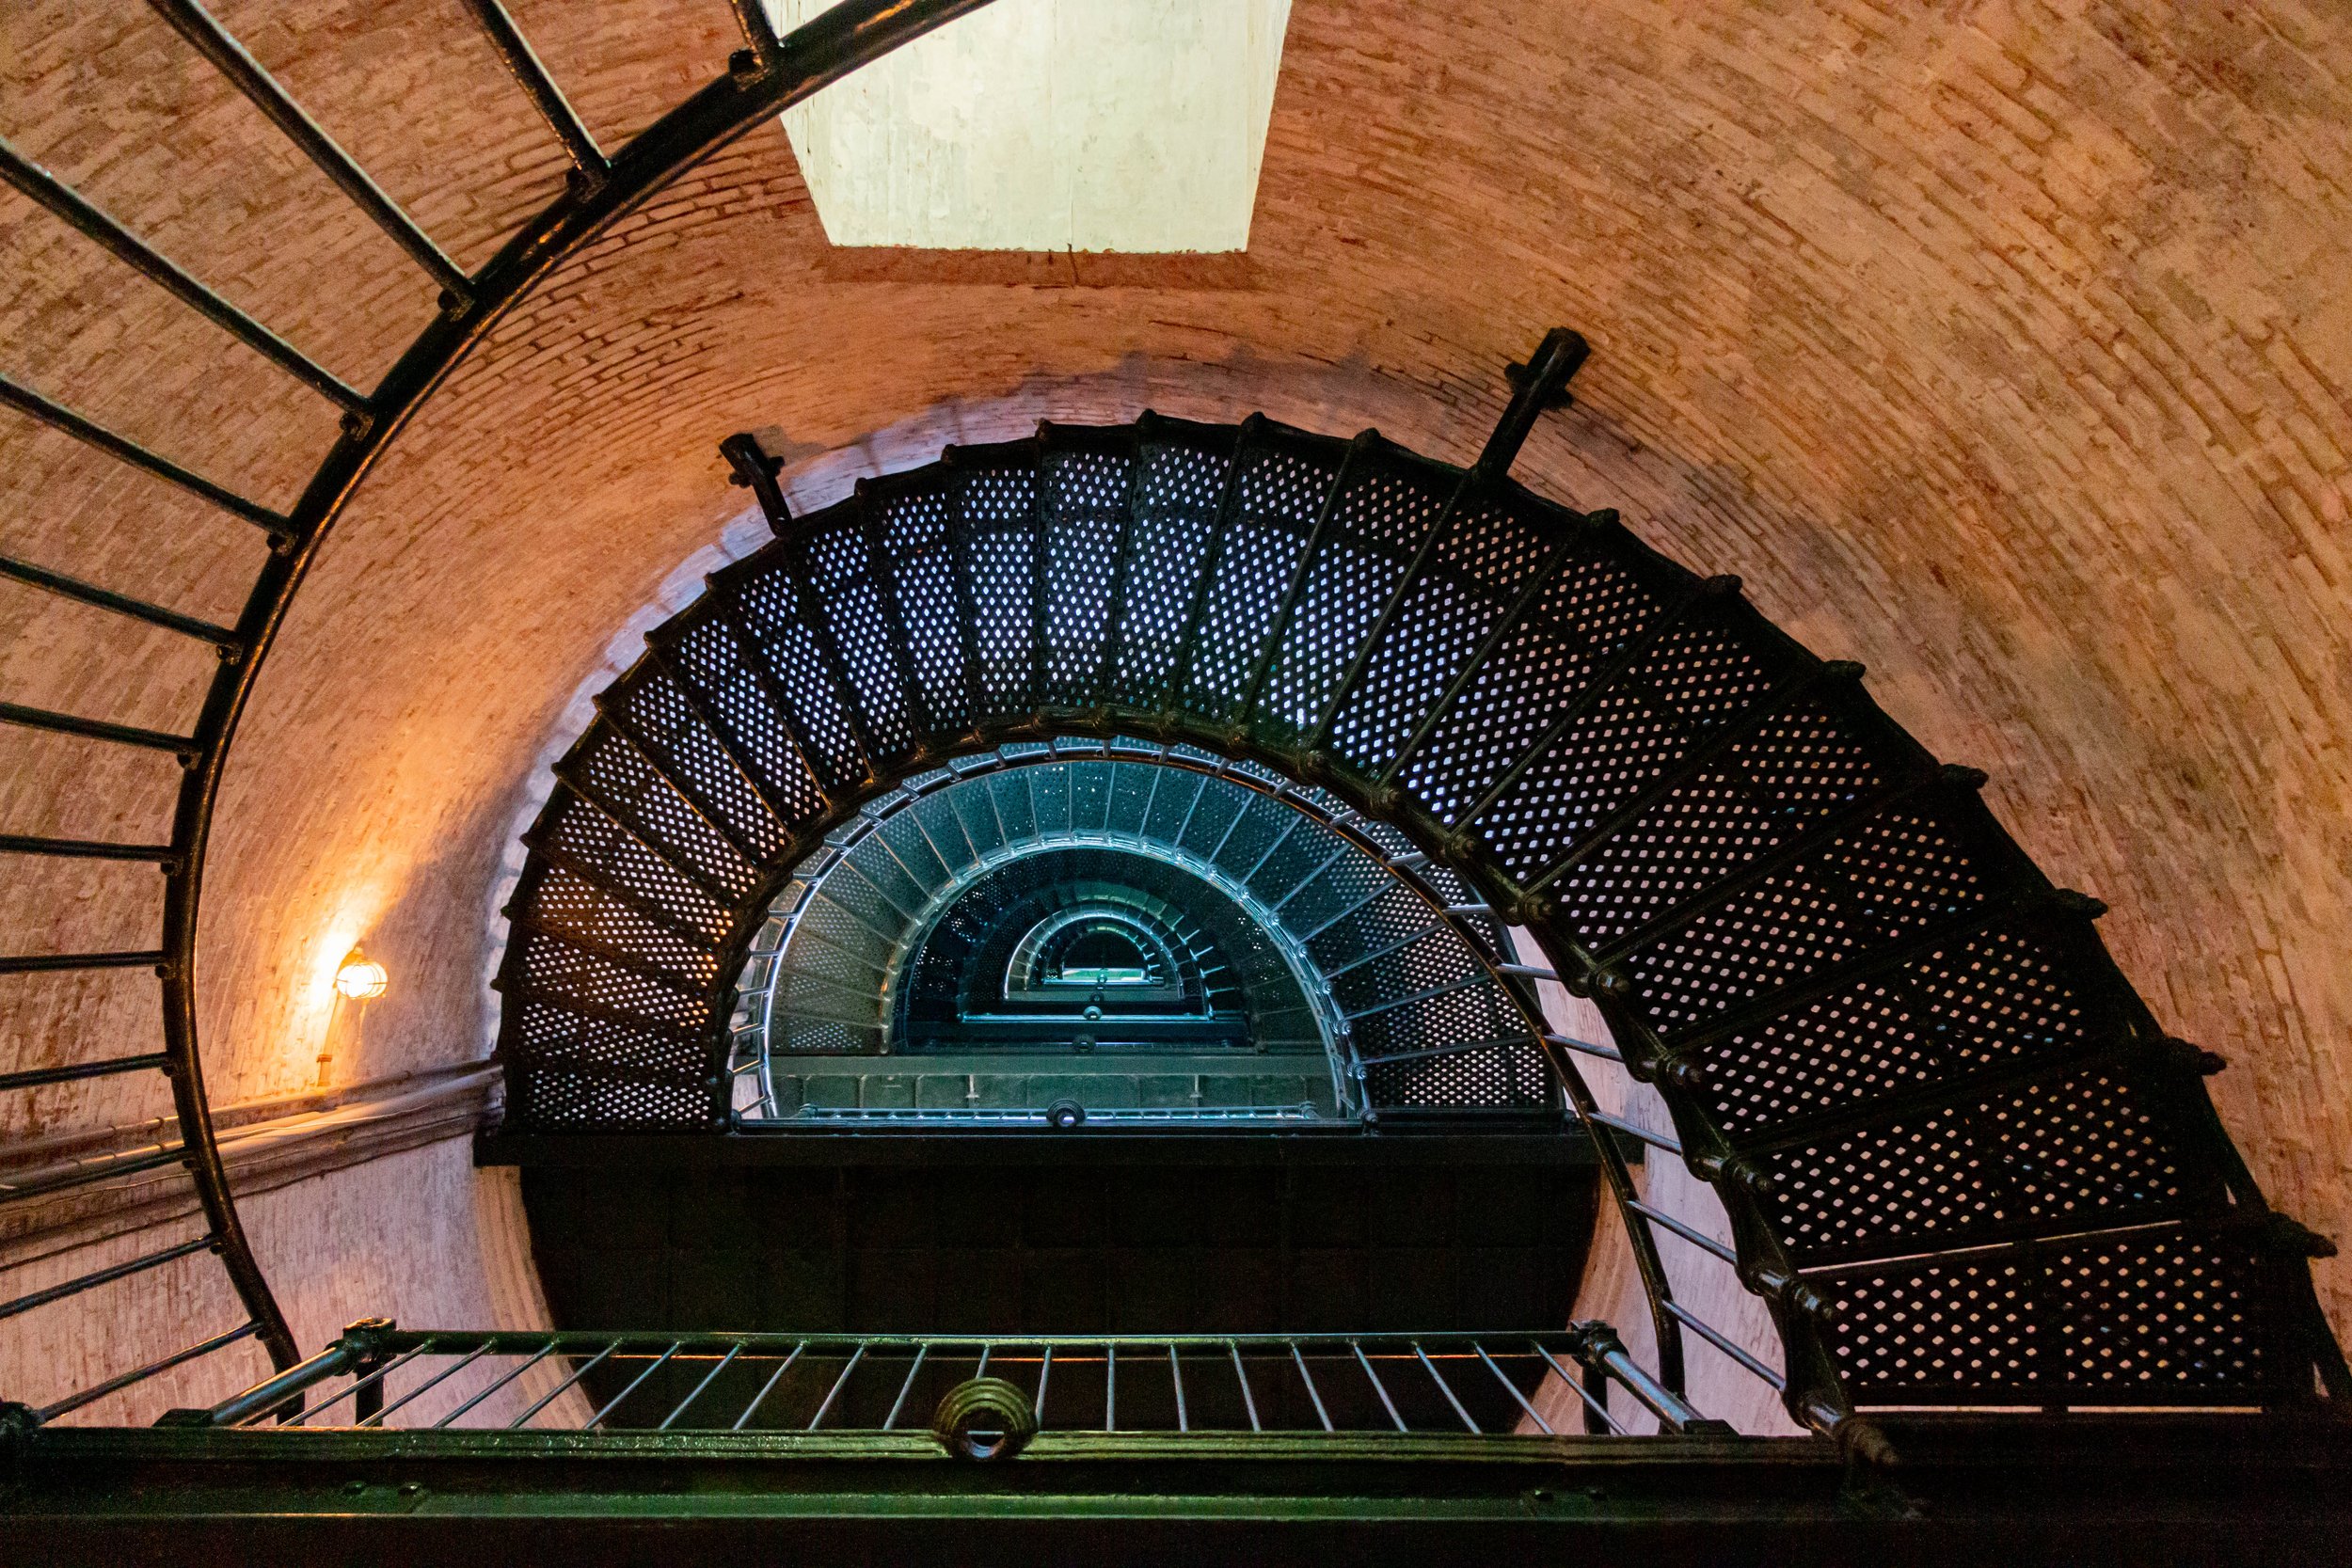
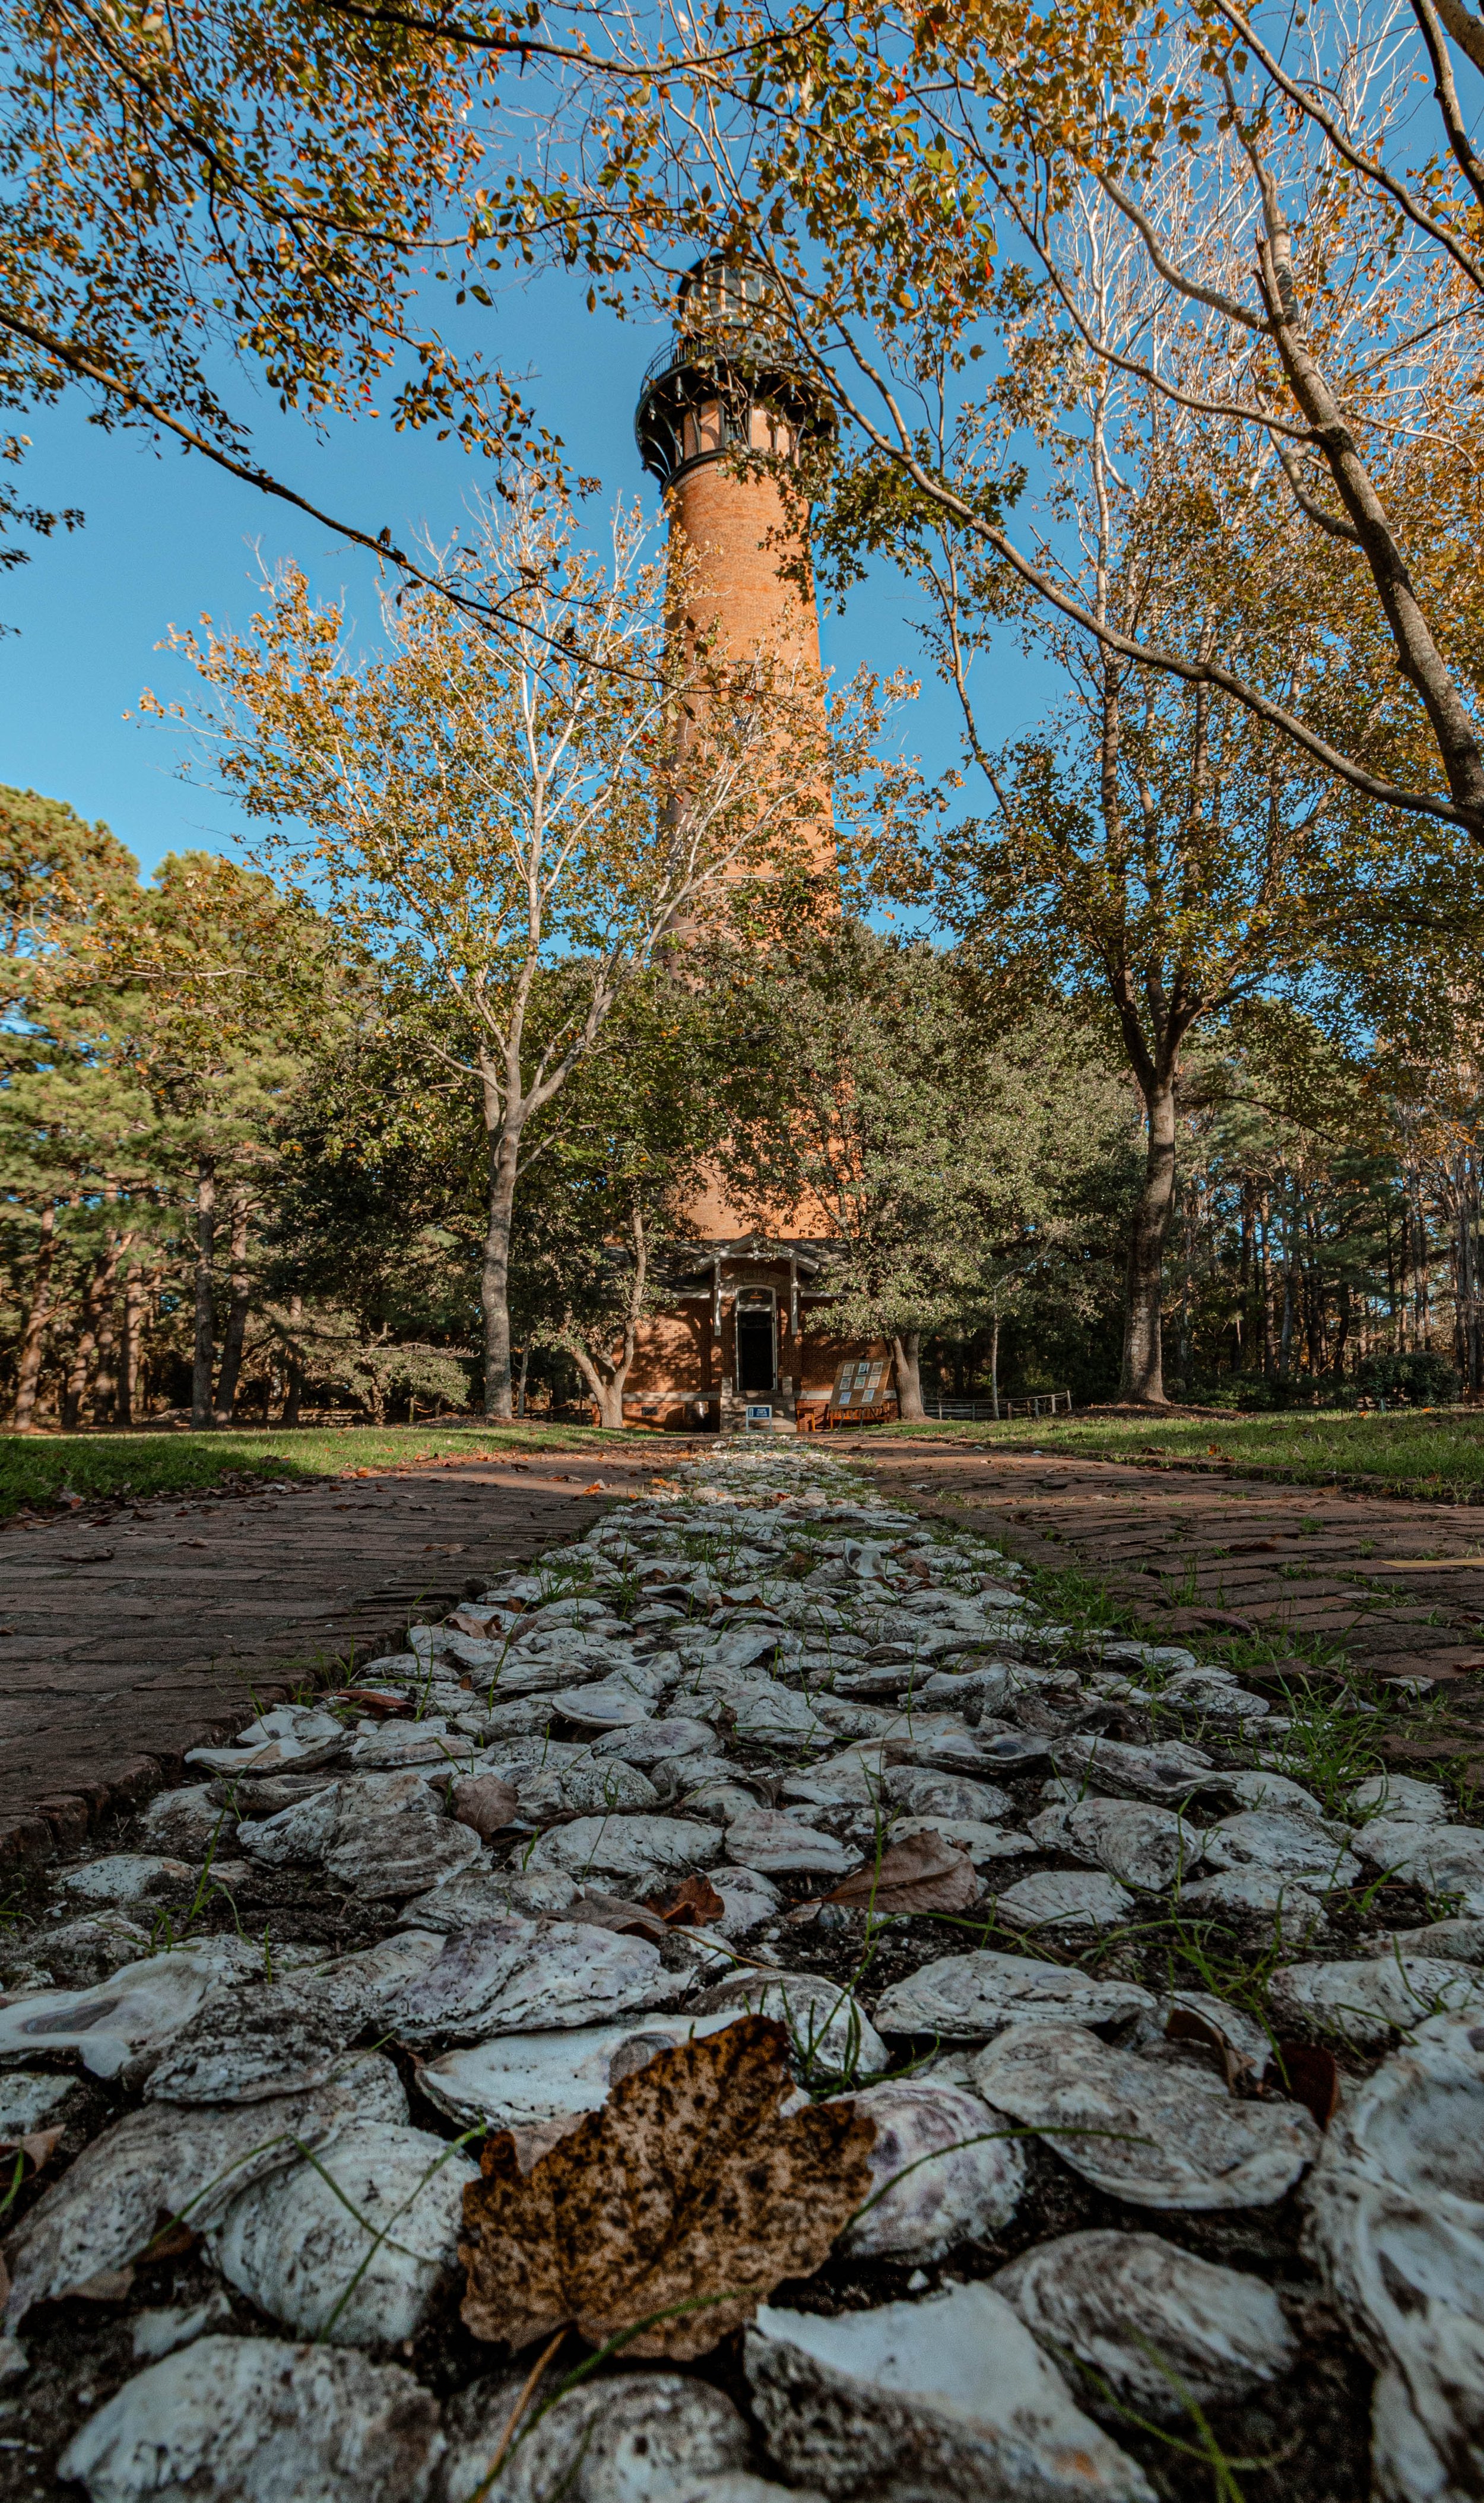
If you don’t have an off-roading vehicle, don’t worry! There’s still plenty to do in Corolla, such as the Currituck Lighthouse. While not as tall as it’s sister lighthouse like Hatteras, Bodie, or Bald Head Island, the Currituck Lighthouse isn’t painted like the others! Luckily, the Currituck lighthouse is typically open to visitors and you’ll be able to climb to the top and see both the Currituck Sound and the Atlantic Ocean at the same time! My photography advice here is to capture the architecture of the property. The park where the lighthouse stands is quite colonial, which is a rare site on the OBX, so make the most of those designs!

3. Jockey’s Ridge State Park
Being on Jockey’s Ridge will make you feel like you’re on the sands of Tatooine. In some spots, all you can see are the towering dunes and nothing else. Jockey’s Ridge is certainly a favorite spot of mine… but how’s the photography? Well, you have to play around with the angles and time of day a bit to get a unique shot. Also, if you’re at Jockey’s Ridge during the peak season, you’ll have to do quite a bit of editing to remove tourists from your photos. However, the sunsets are STUNNING, and worth the trek. Just make sure you’re leaving the park as soon as the sun is down, or the park rangers will escort you off as the park closes at sundown! Personally, I believe the best angles for shots here are down by the sound, where there’s plenty of reeds and other brush that help add definition to the foreground. Go out to Jockey’s ridge and see for yourself!

2. Ocracoke
Ocracoke Island comes in at number two on my list for one MAJOR reason… the night skies are perfectly pitch black. In fact, if you look at this light pollution map, you can see just how void of light pollution the island is. No light pollution means a clearer sky to see the Milky Way Galaxy. In fact, it is so dark that between March and October, you can see the Milky Way with the naked eye!
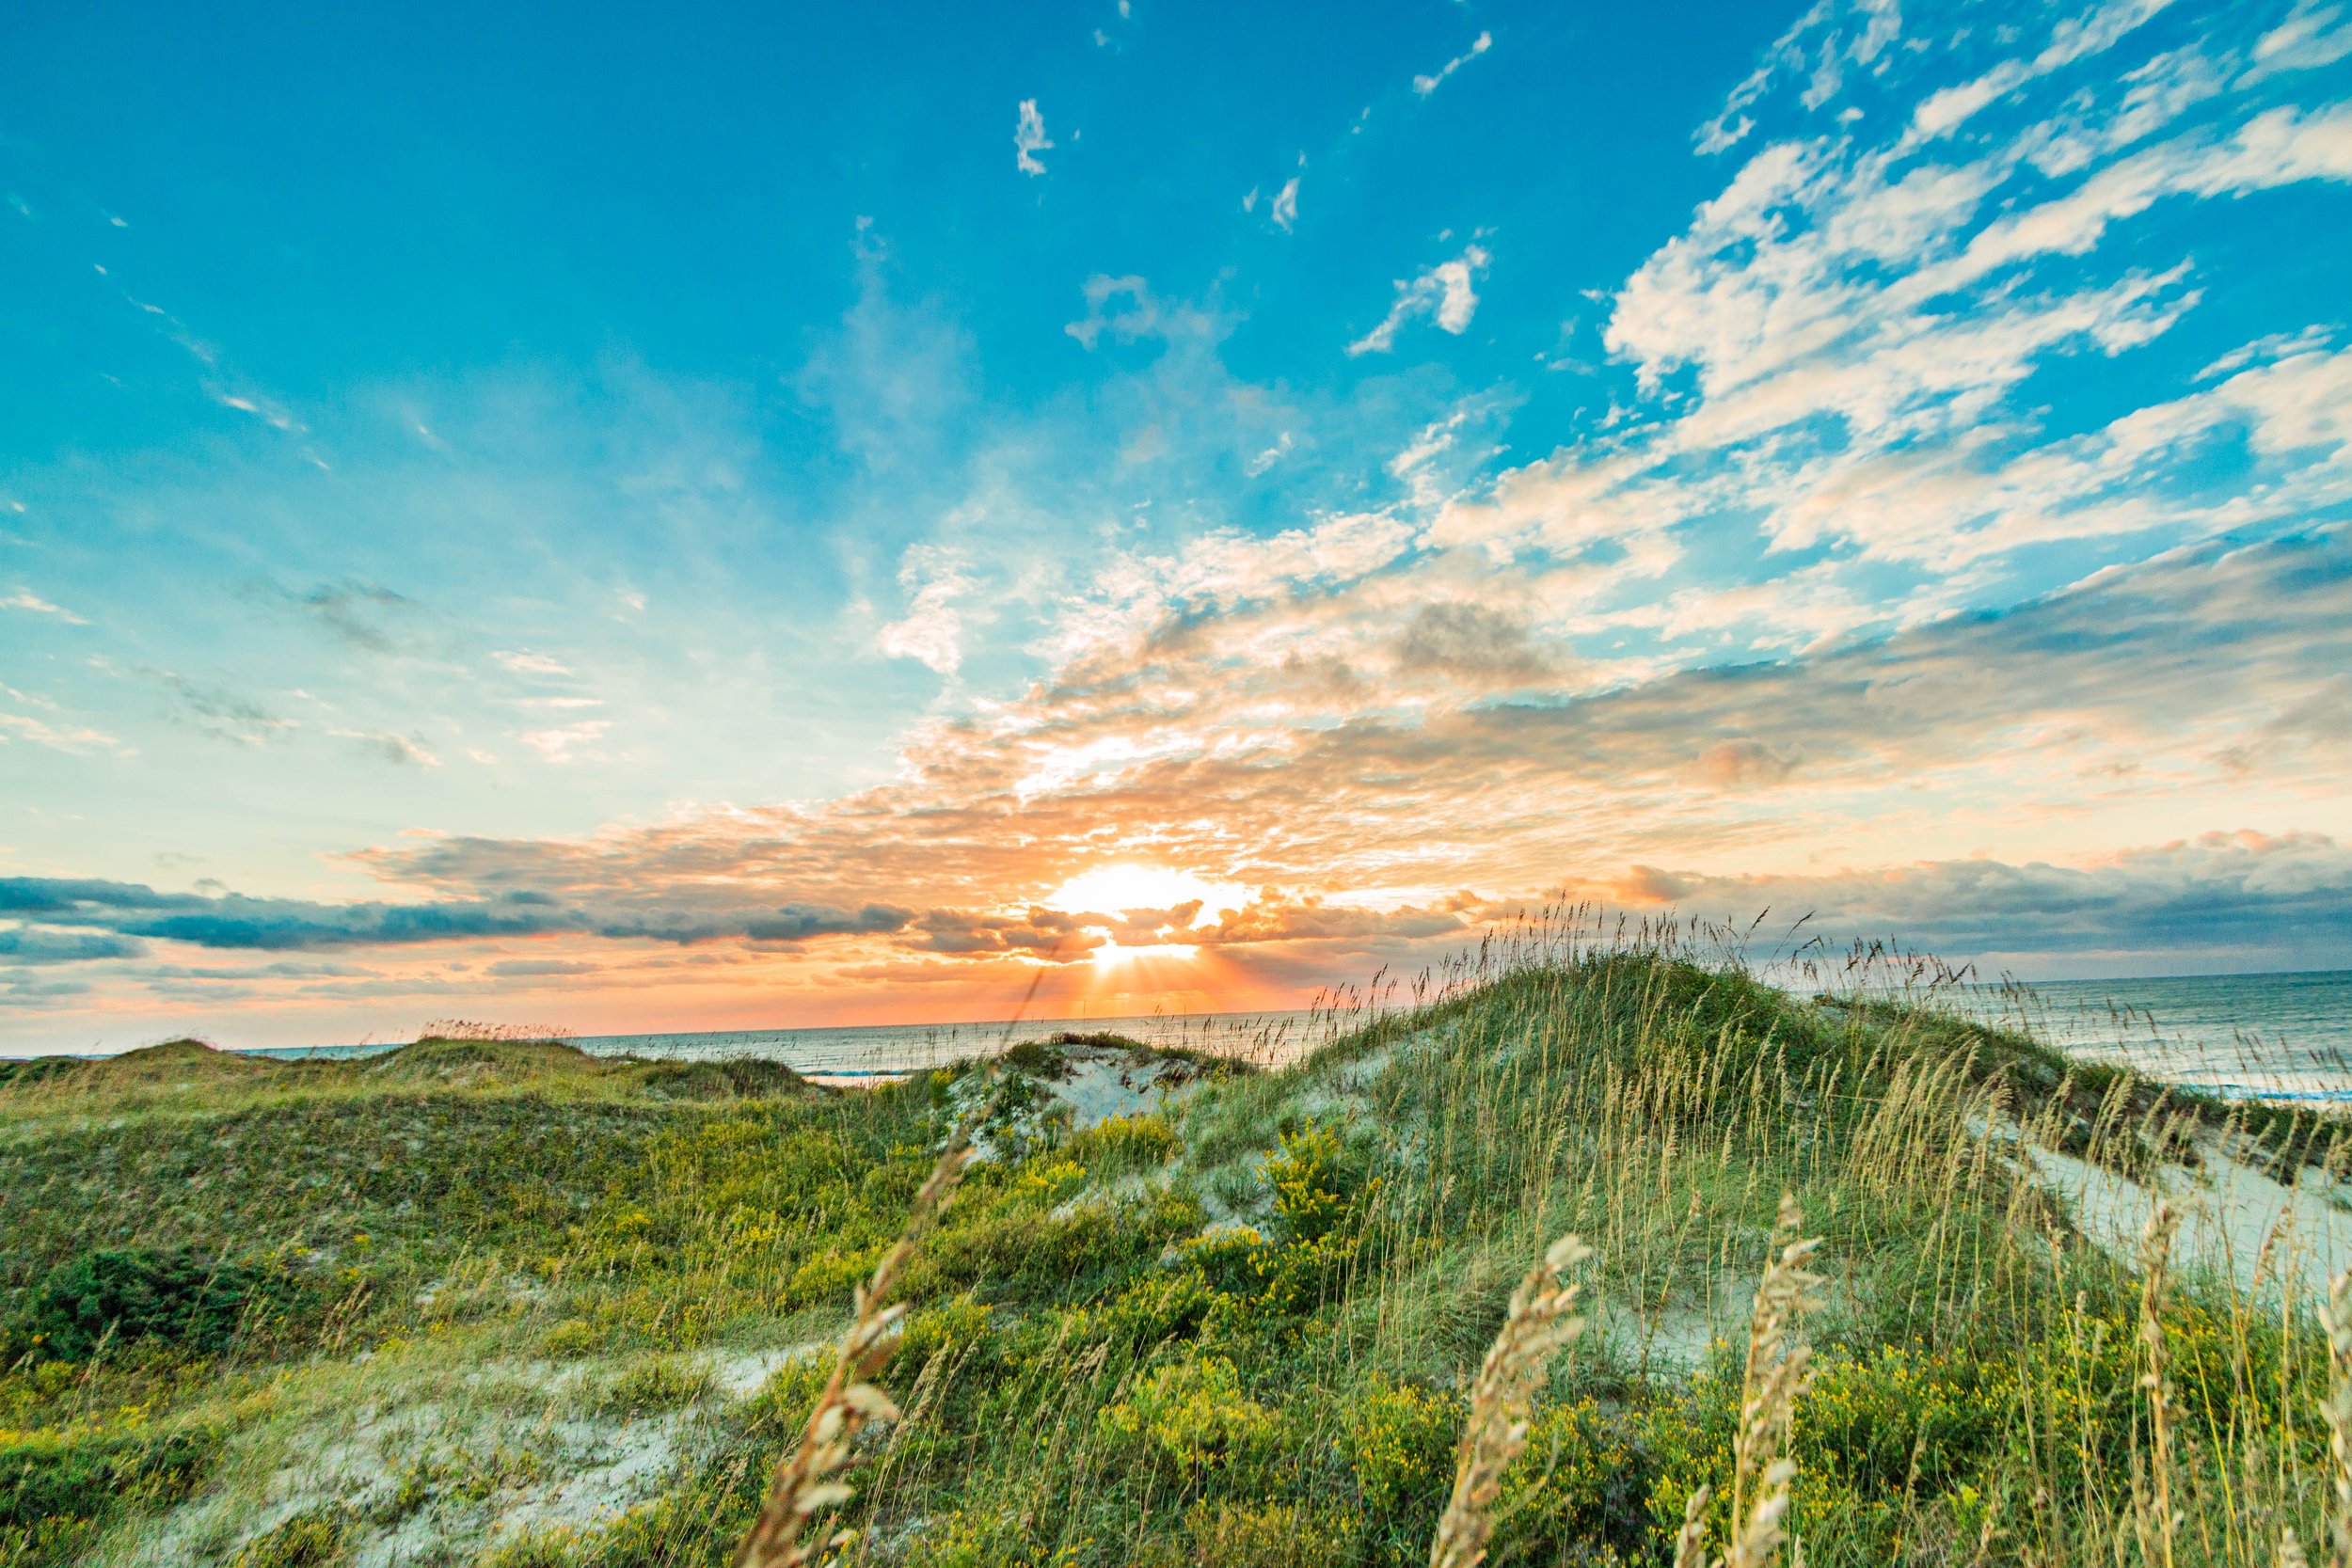
Ocracoke has more than just open skies though! Some of the most beautiful, untouched beaches are on this island, and the island is only accessible by boat or plane, making it even more remote. The dunes are dramatic, and the sunrises are breathtaking! Good luck staying on the island though, Ocracoke is a small fishing village, so you will probably be better off bringing a tent and camping at the state park. My advice for any photographer looking to check out this truly unique place is to be ready for a late night and early morning. My friends and I woke up at 5am to get this shot of the Milky Way, and the morning shot of the dunes. Also, the island is very windy, so make sure your bring a sturdy tripod and a remote for your camera so you can set it into “bulb” mode to capture the milky way! Slow shutter speeds are important to making the most of Ocracoke’s dramatic mornings and nights.
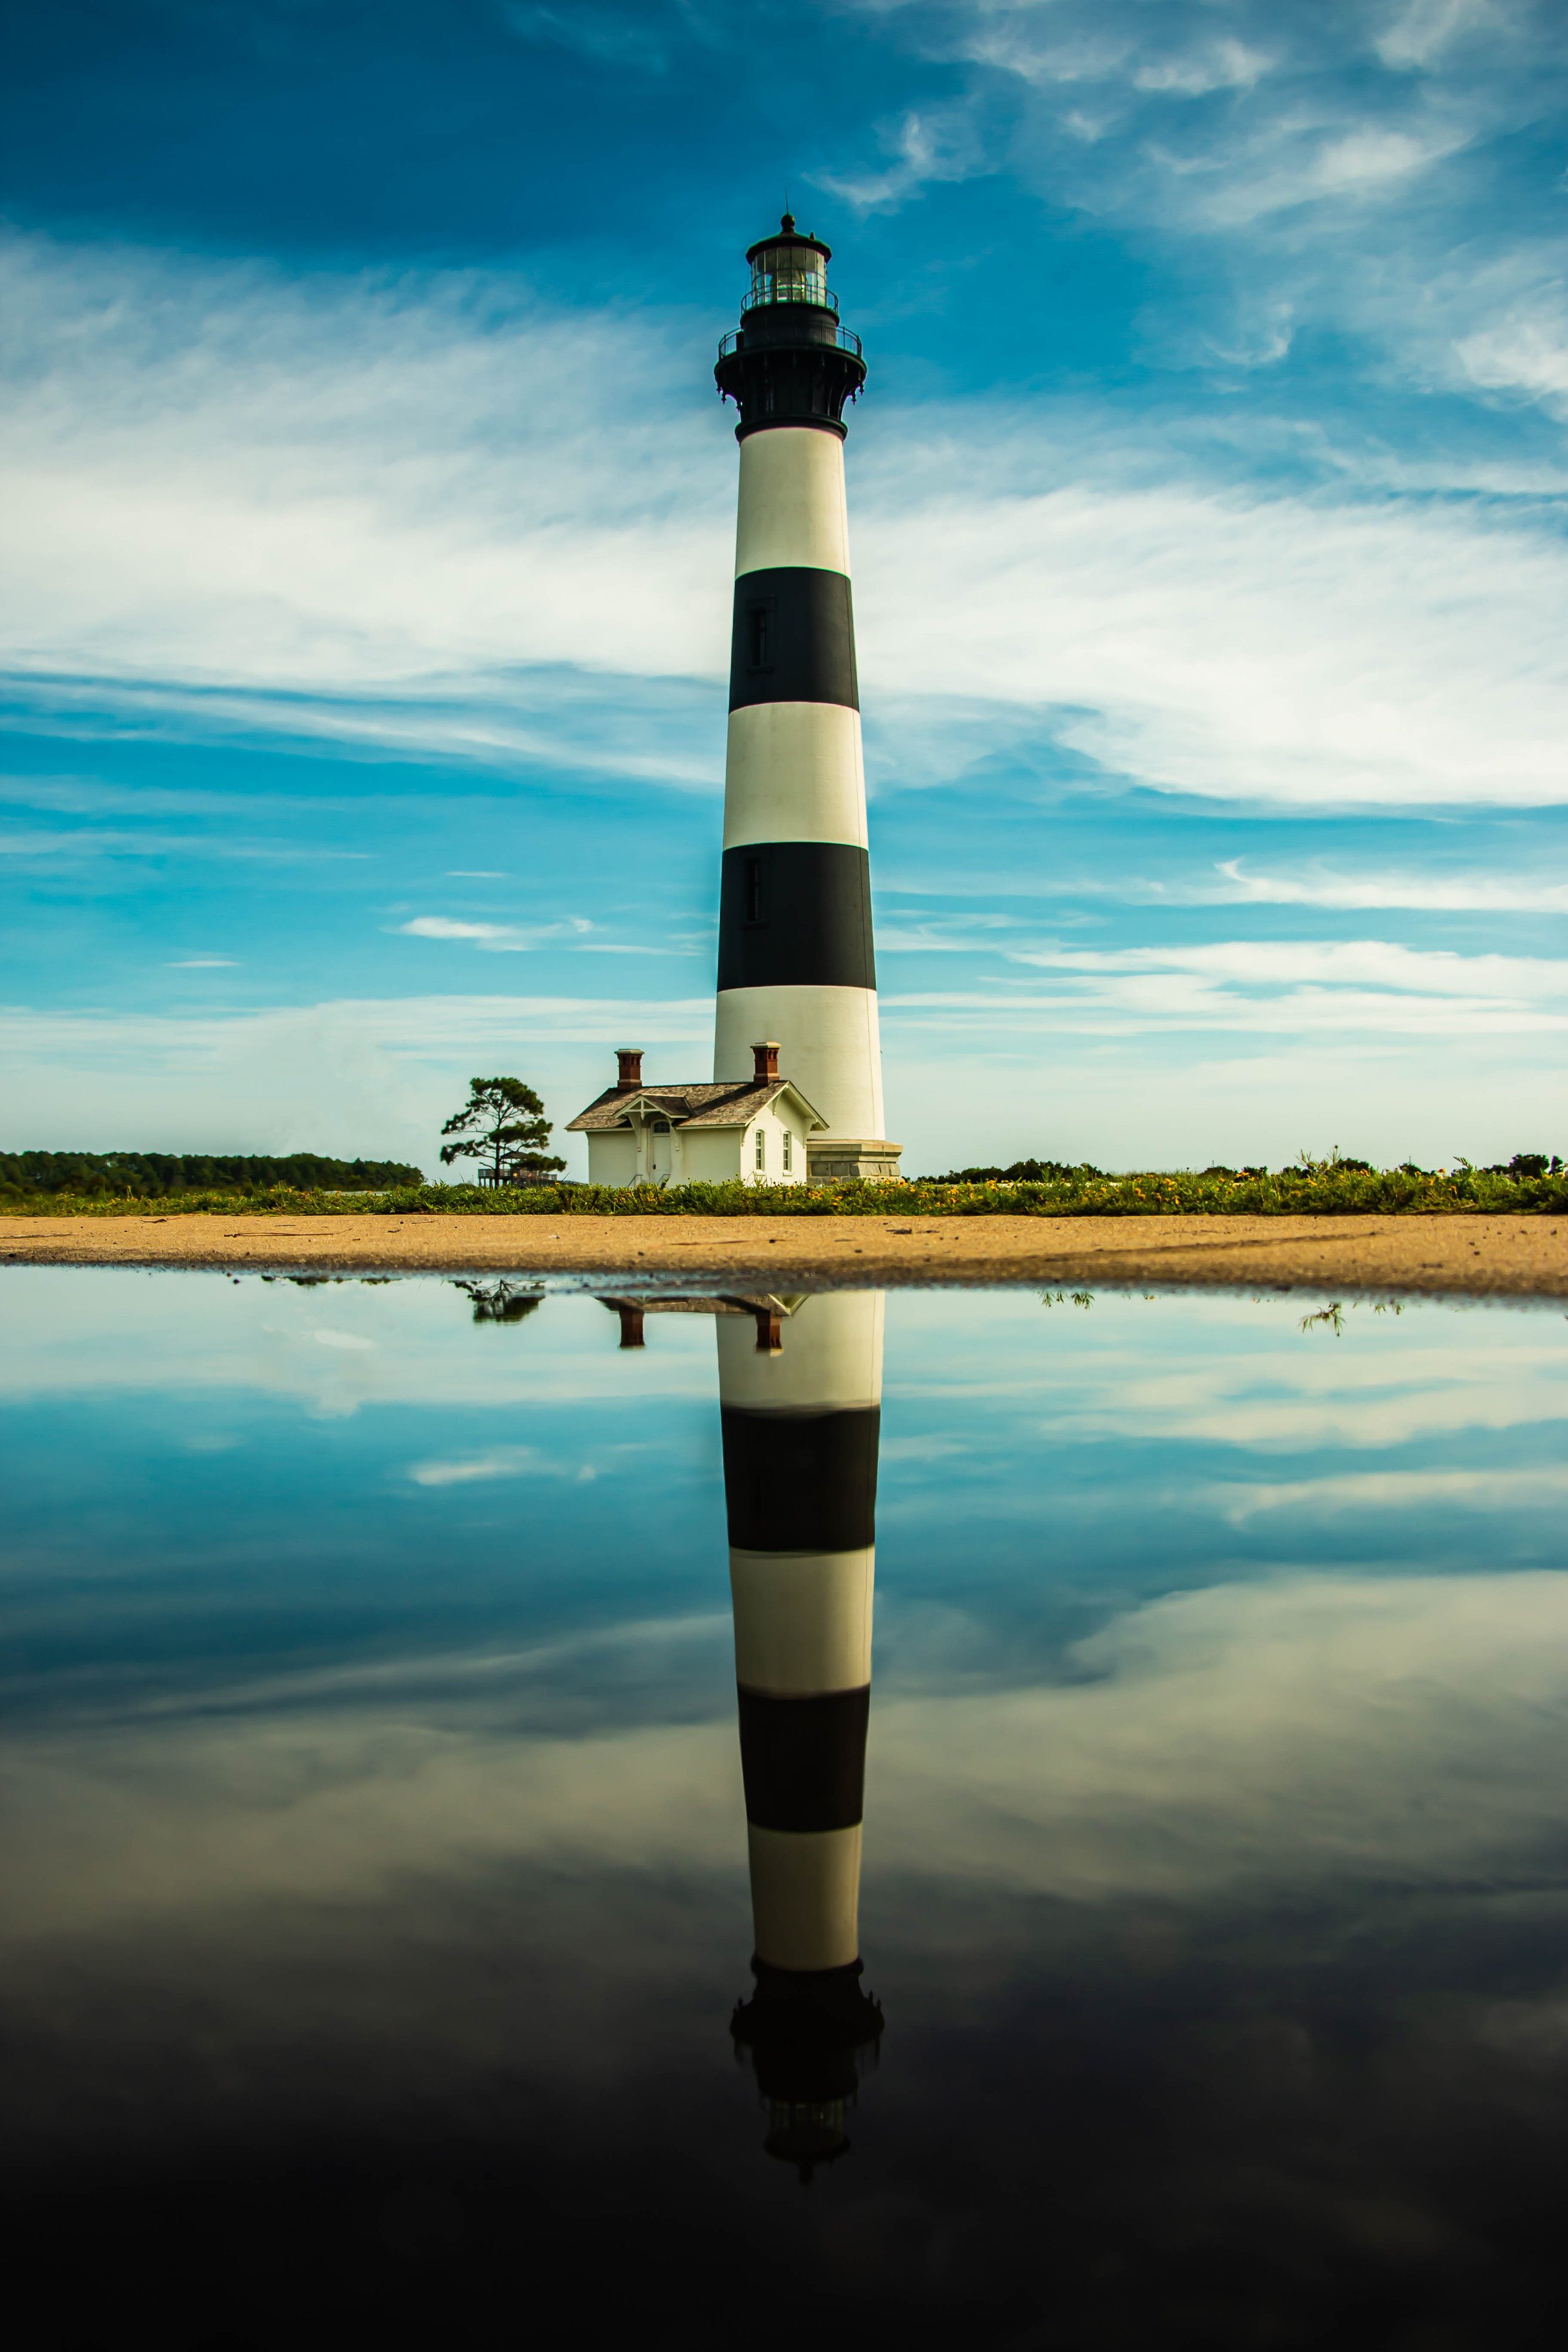
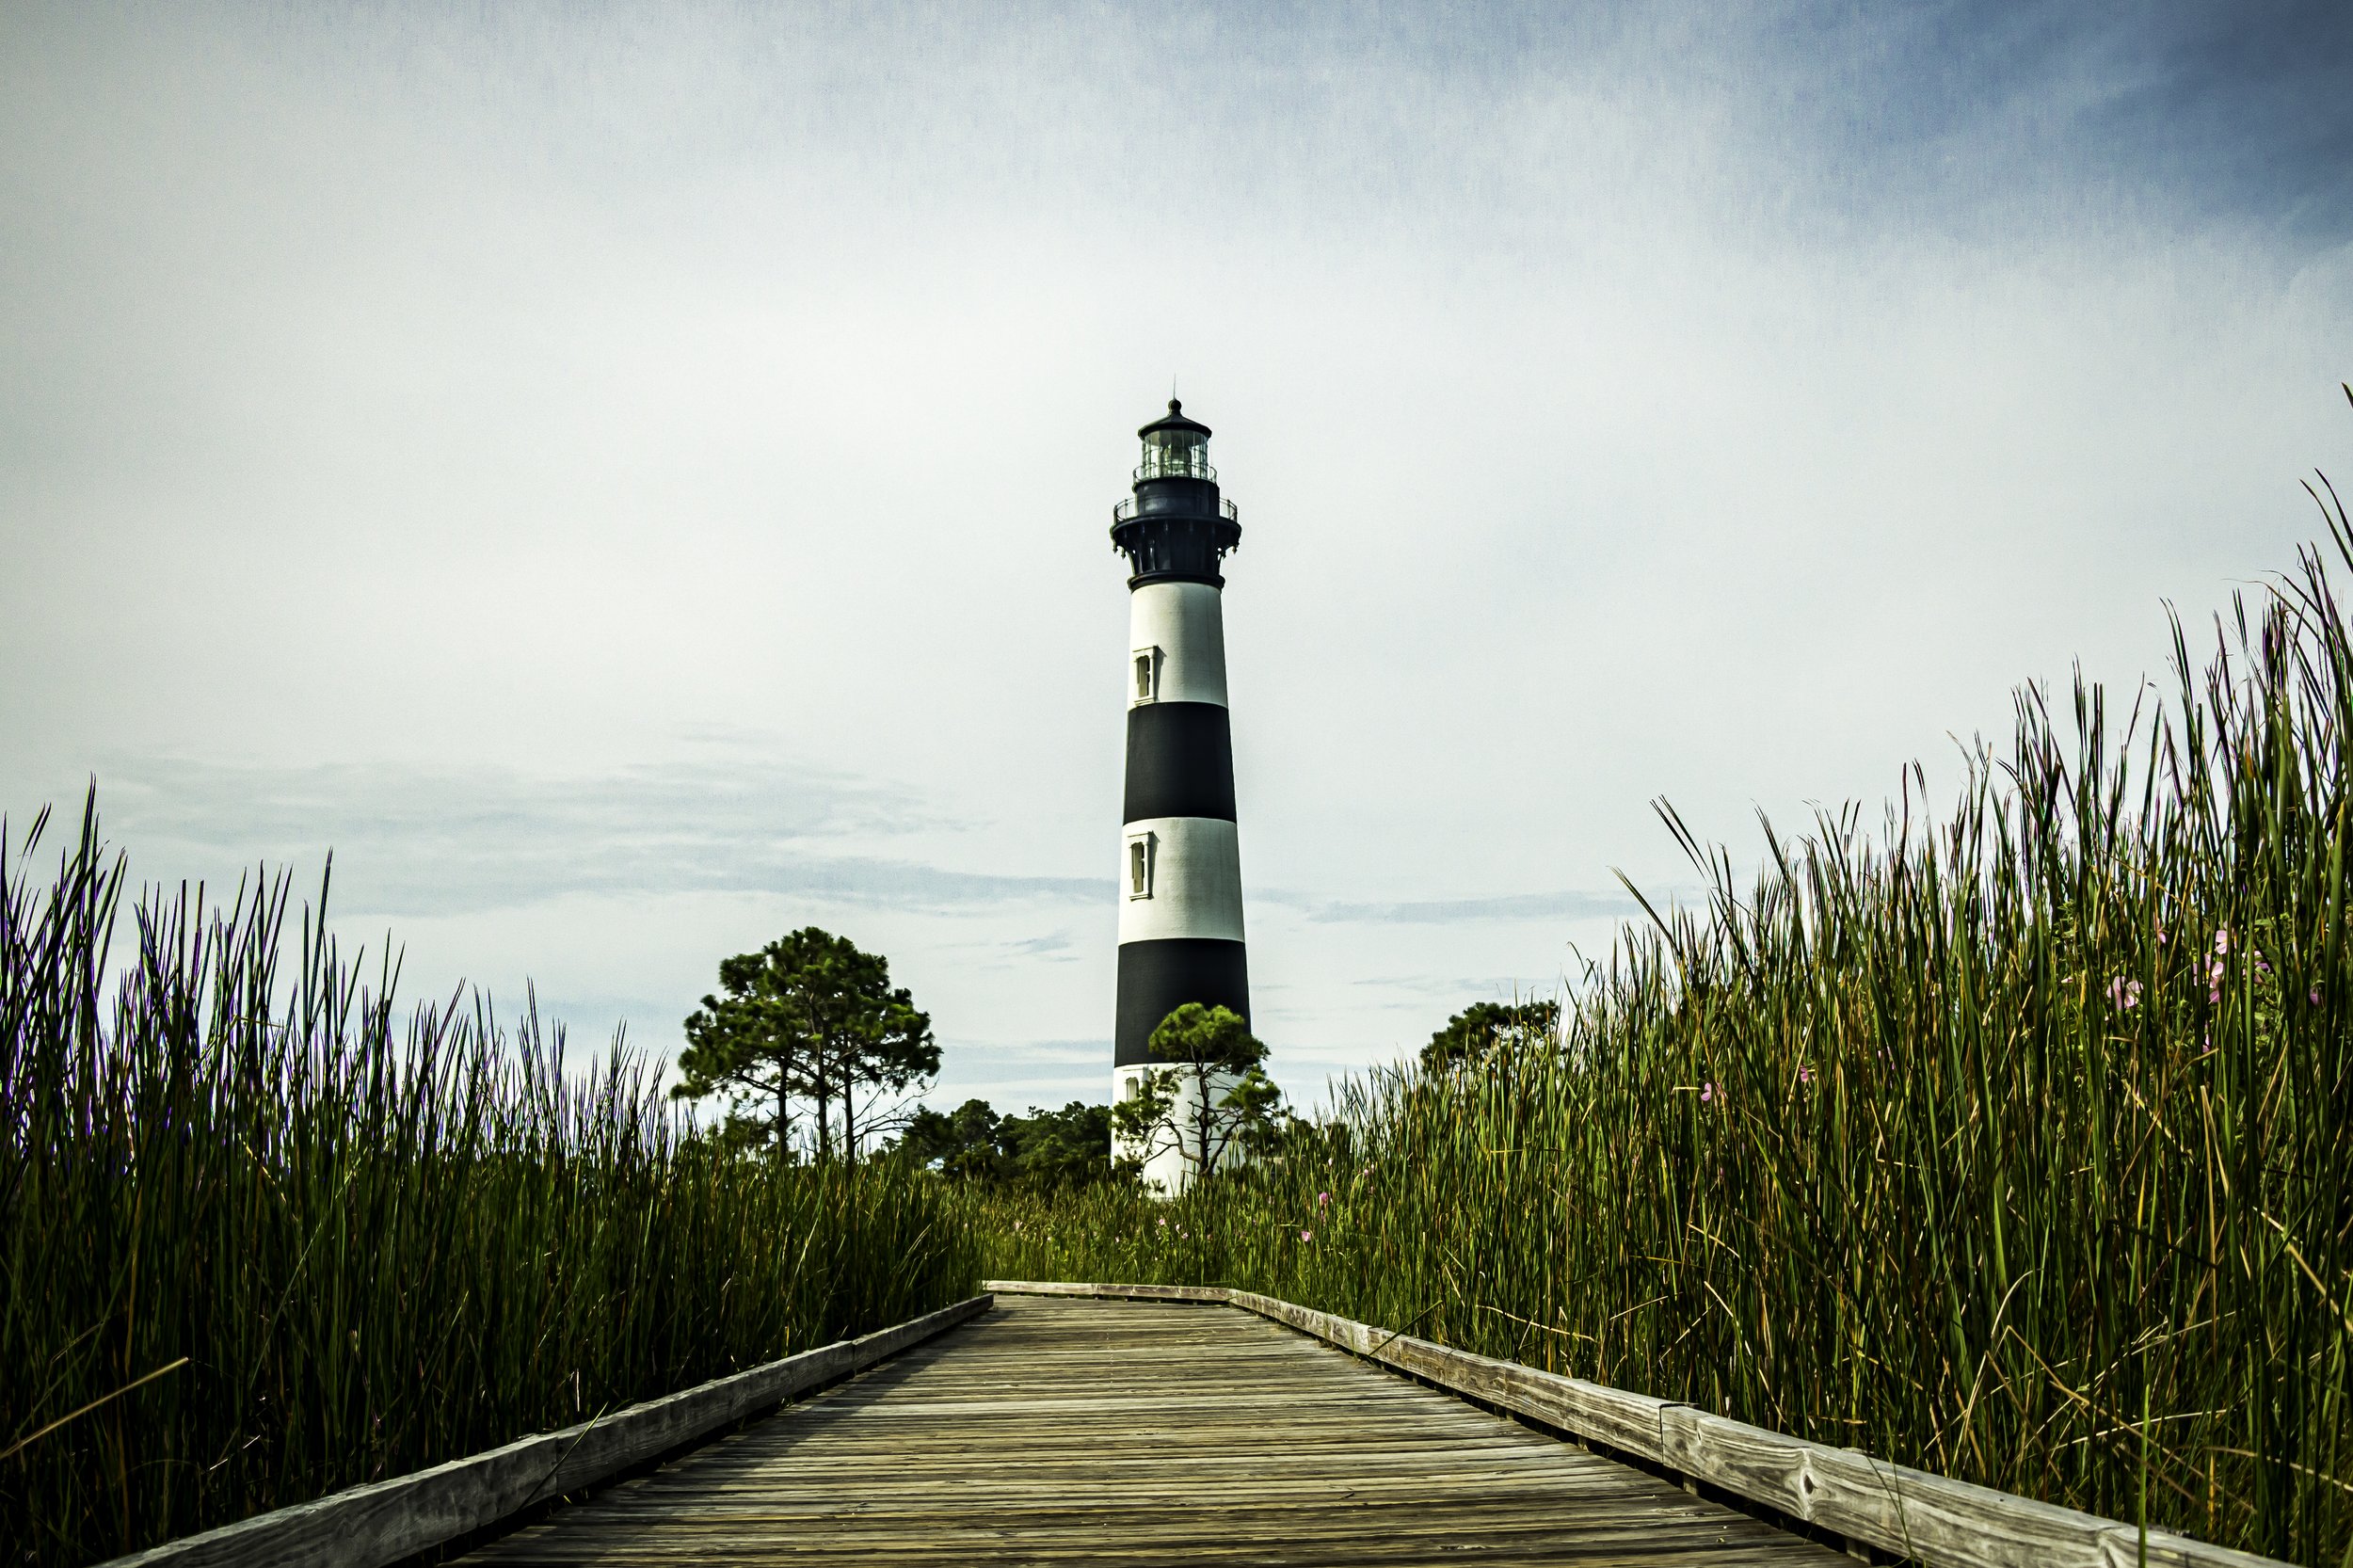
Bodie Island Lighthouse
The Bodie Island Lighthouse is BY FAR my favorite place on the Outer Banks. It’s close proximity to Nags Head and Manteo makes it an easy trek for a couple hours worth of shots. The property that the lighthouse sits on is perfect… set back from the road and sitting on a marsh. As you walk around the property, follow the boardwalk to get an amazing wide angle shot of the lighthouse. My pro-tip for any photographer looking to get a print-worthy shot… get to the lighthouse after a moderate rain so the parking lot fills with about an inch of water. When the parking lot is full of water, and there’s no wind, you can get a beautiful reflective picture like the one below! Be ready to edit out people though, as this is an easy-to-get-to tourist destination, it’s hard to get some private time with the lighthouse. The lighthouse is open 24/7 so there are some amazing opportunities for some night shots if you’re willing to work with the mosquitoes.
If you enjoyed the photographs, consider browsing my three Outer Banks Collections!
Explore Your Community

My first publication… it feels wonderful!
Honestly, getting the opportunity to contribute to a magazine was much harder than I anticipated. A major developmental goal for my was to contribute to a magazine… and the dream is to contribute to National Geographic! It was exhilarating getting the call from Cityview Magazine in Fayetteville, NC asking me to contribute to the cover story of the January 2022 edition. The task… to seek out hidden gems of Fayetteville, places where family can spend time outdoors and enjoy nature! The title of the article Welcome the New Year with Beauty, Tranquility, and Fresh Air does a great job summarizing the sights I saw while on assignment. I grew up in Fayetteville, and it was first time I had seen some of the spots I photographed in my life! Sometimes we become so complacent to our communities, that we forget what amazing things we have in our backyard! I often find myself getting lost in dreams of going to New York, or going out west, that I often forget that there’s amazing places to visit just an hour away!
Below are some of the photographs from my assignment in Fayetteville. My challenge for you this week… explore your community, and find your hidden gem!

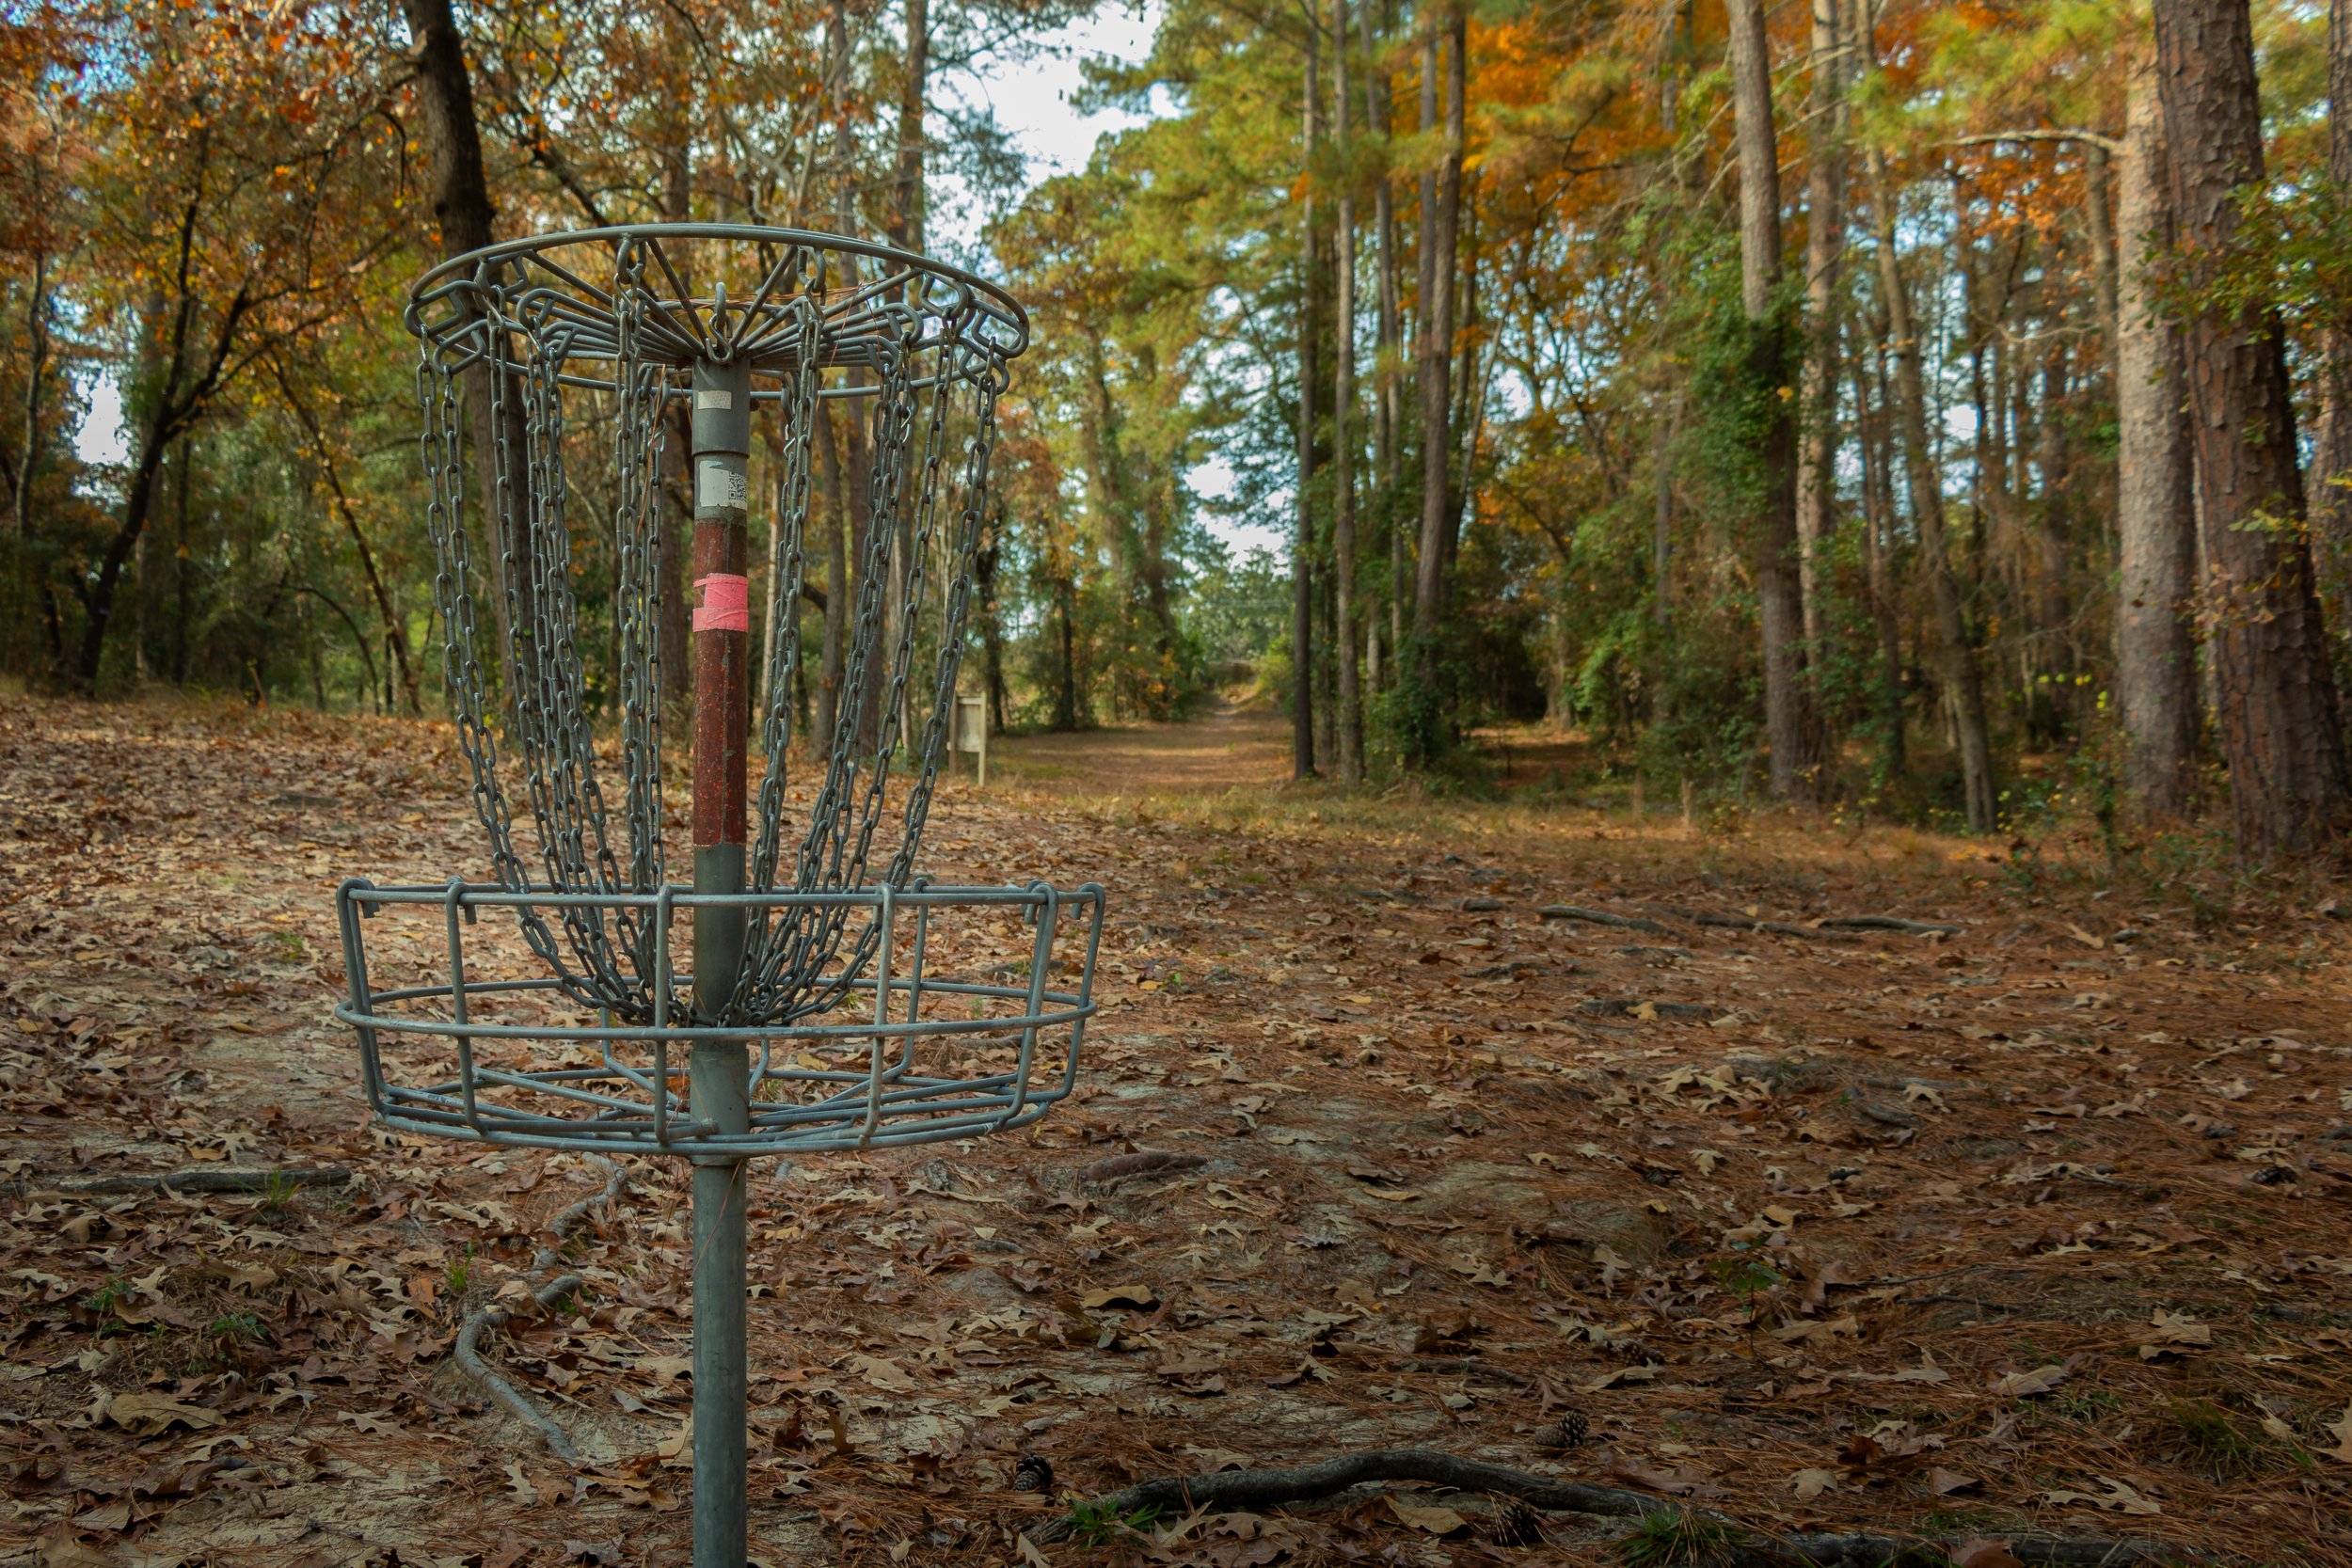
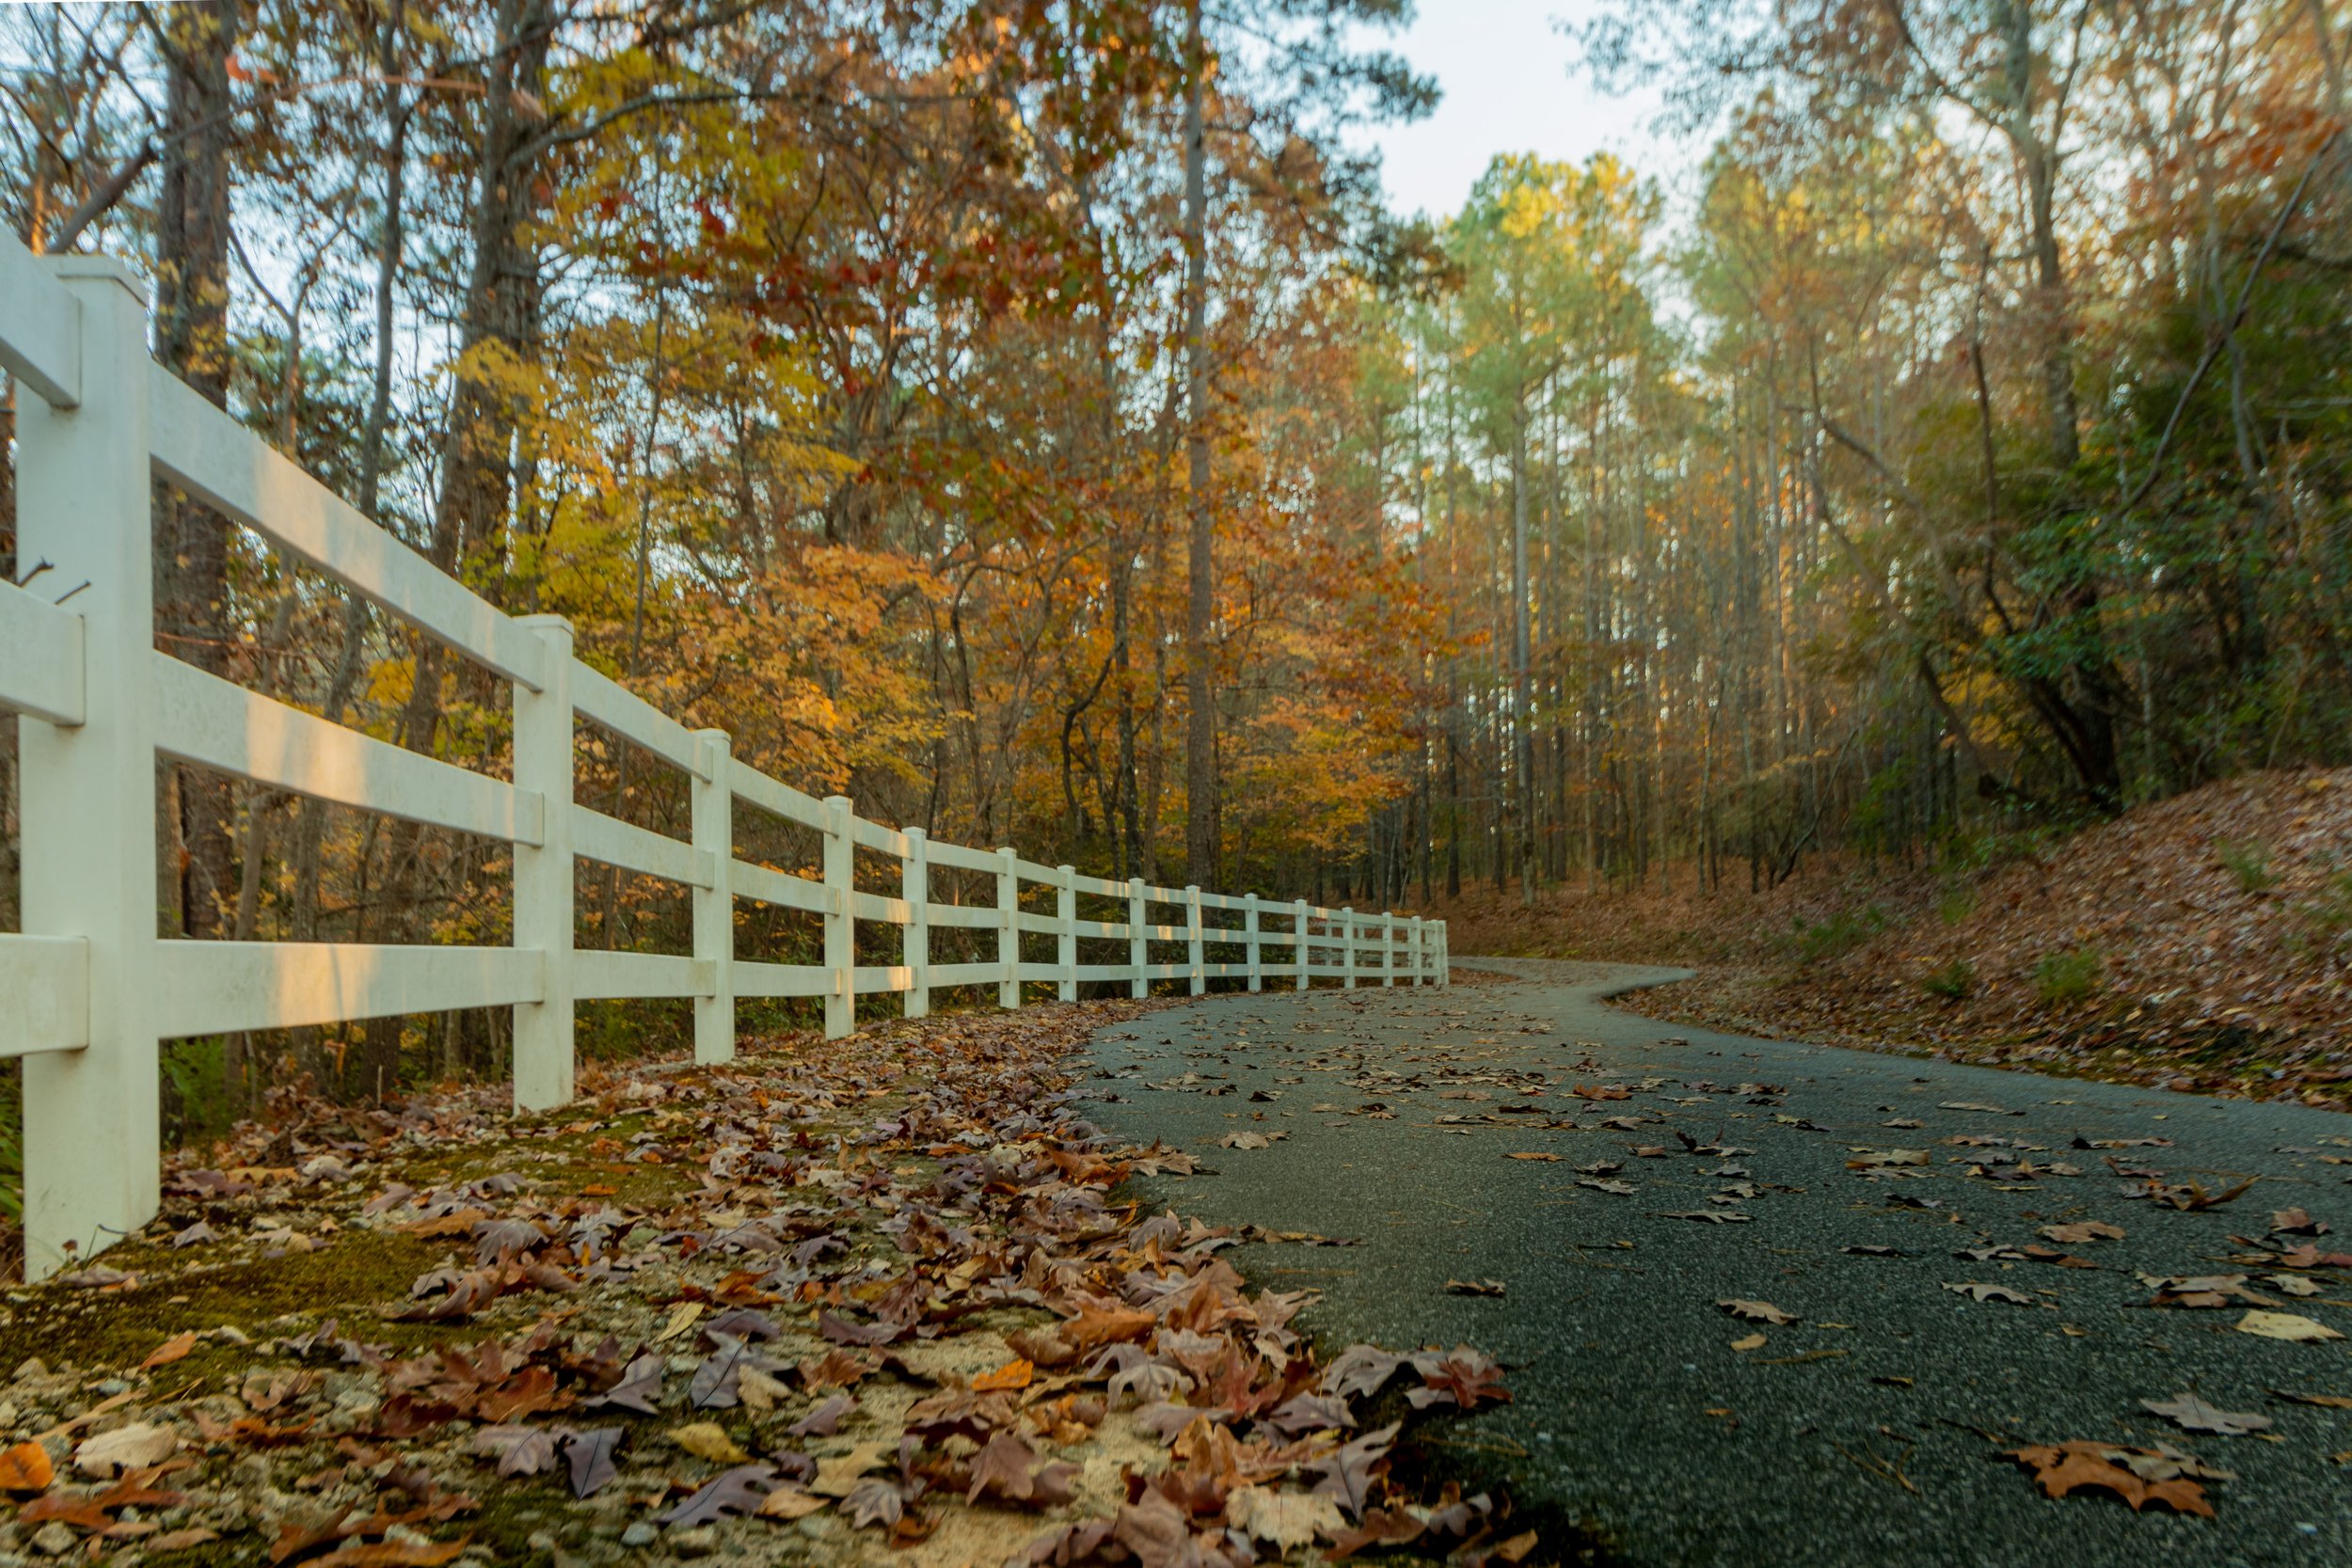
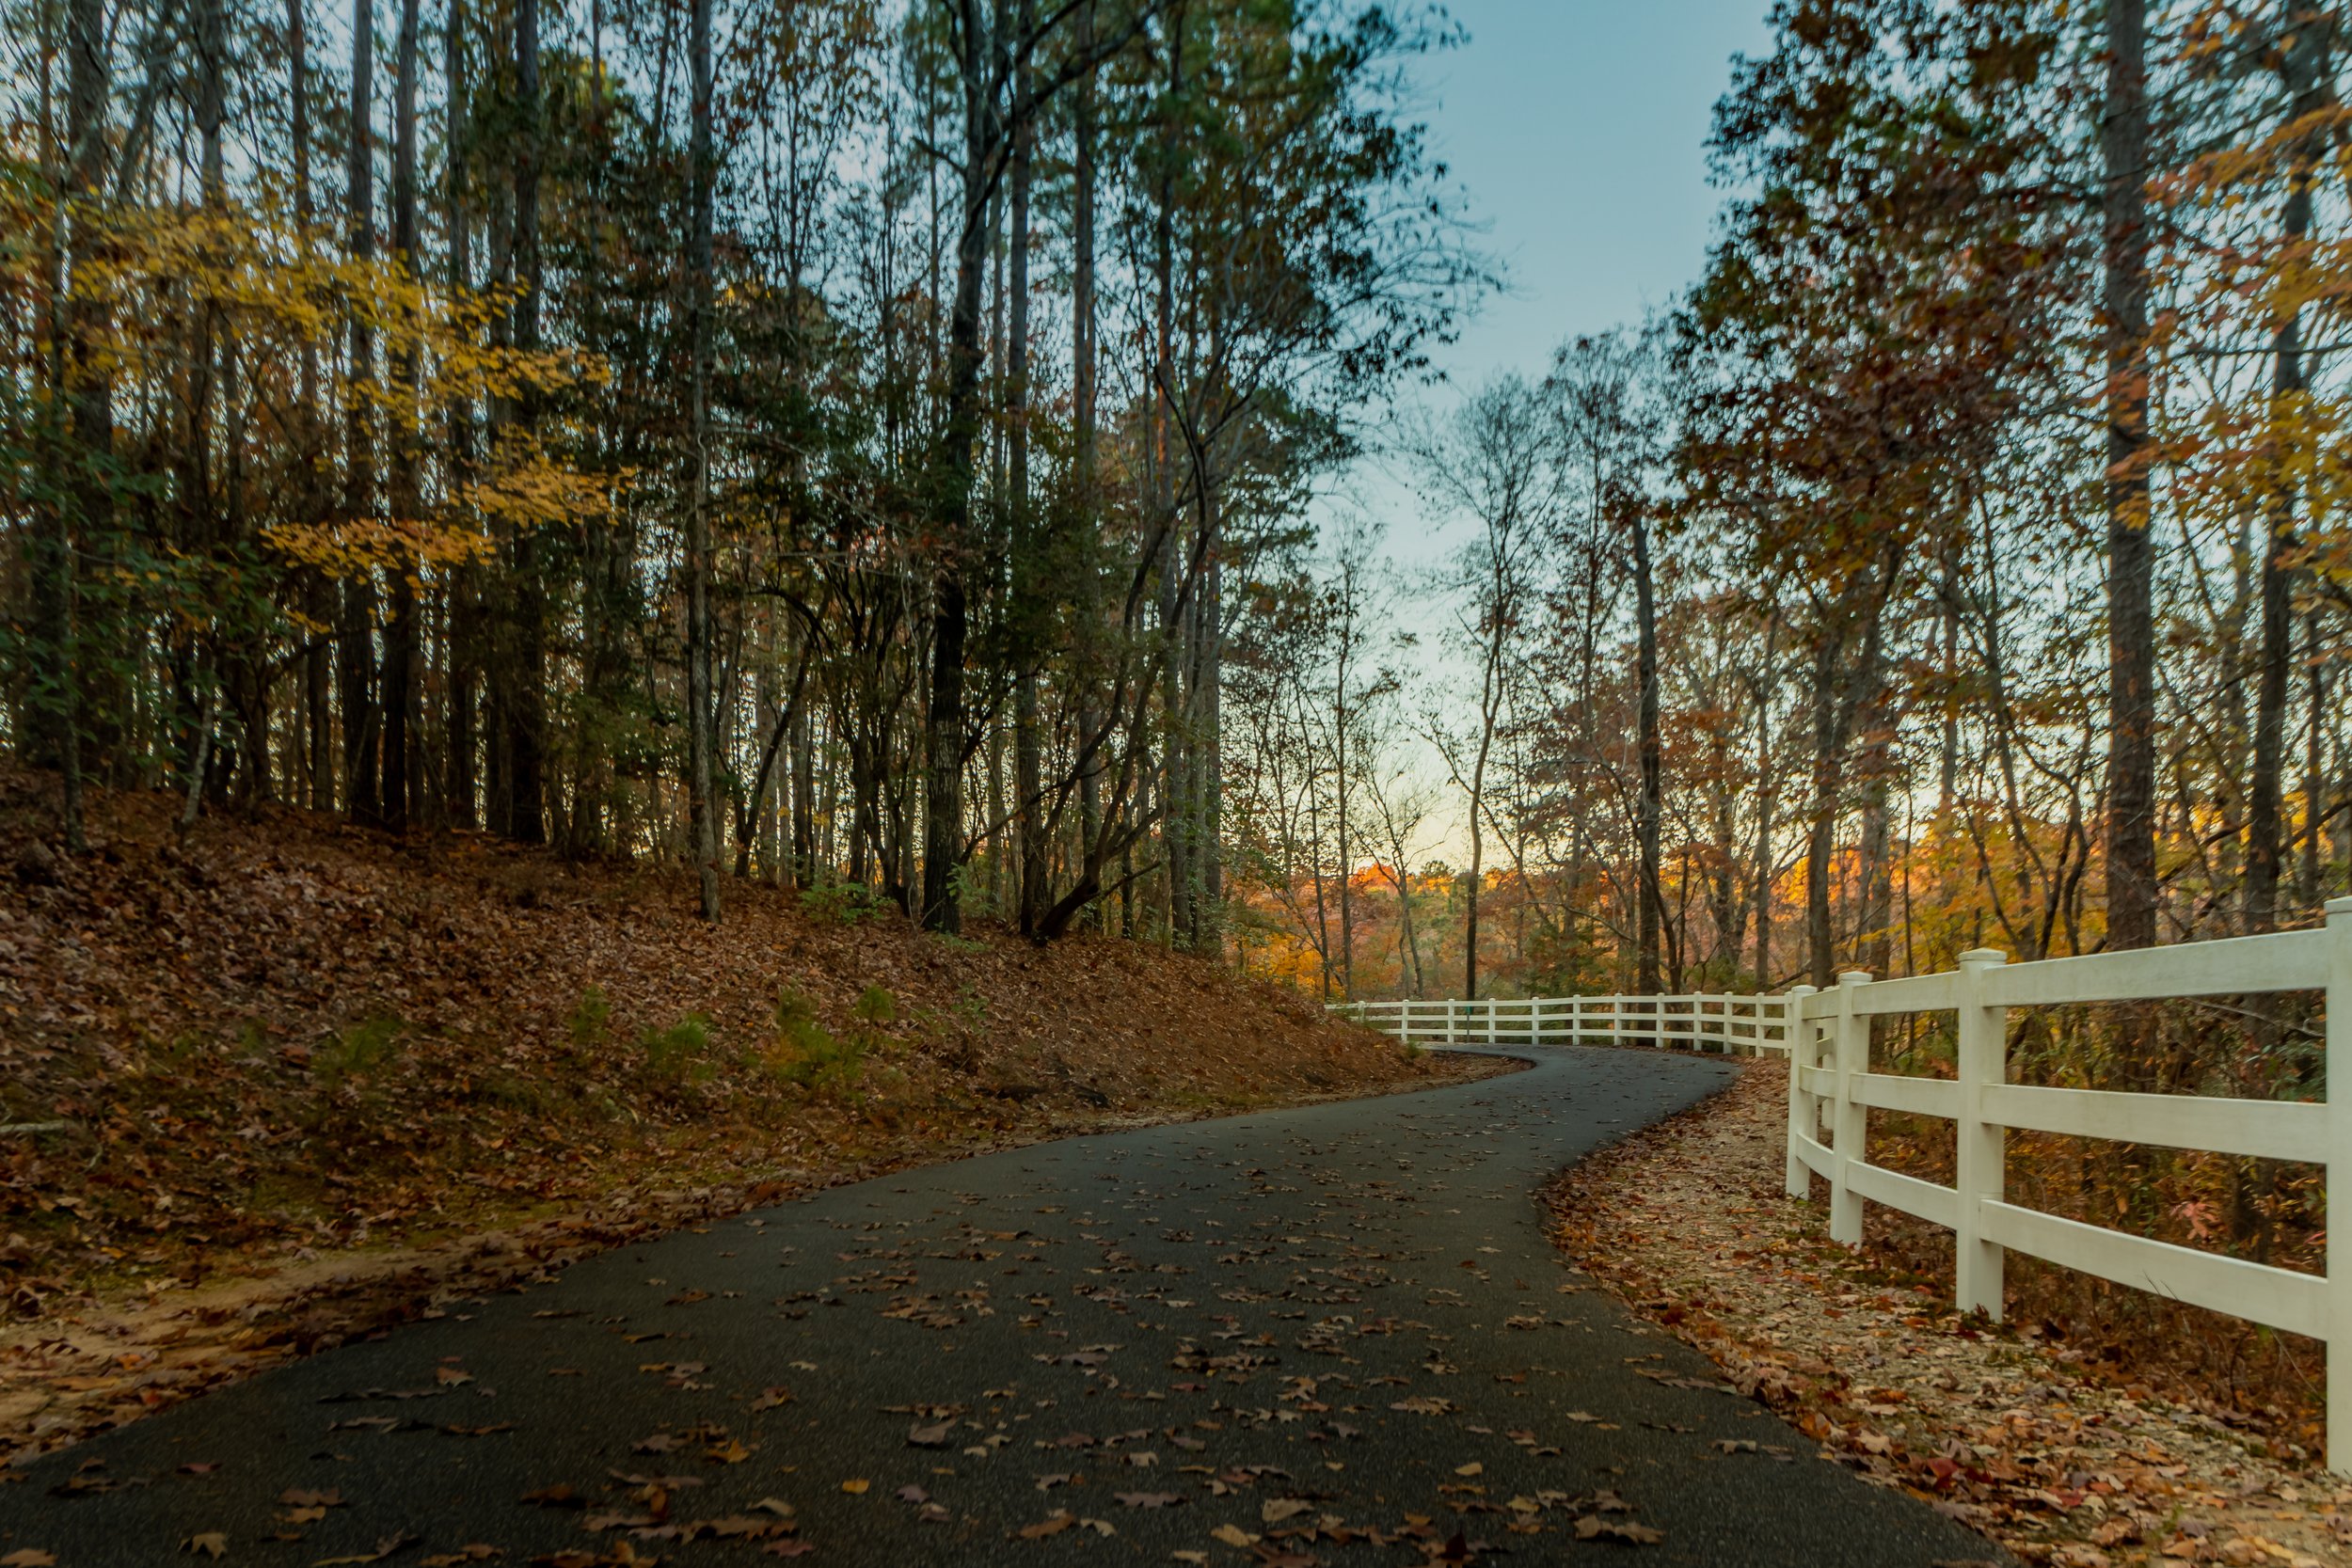
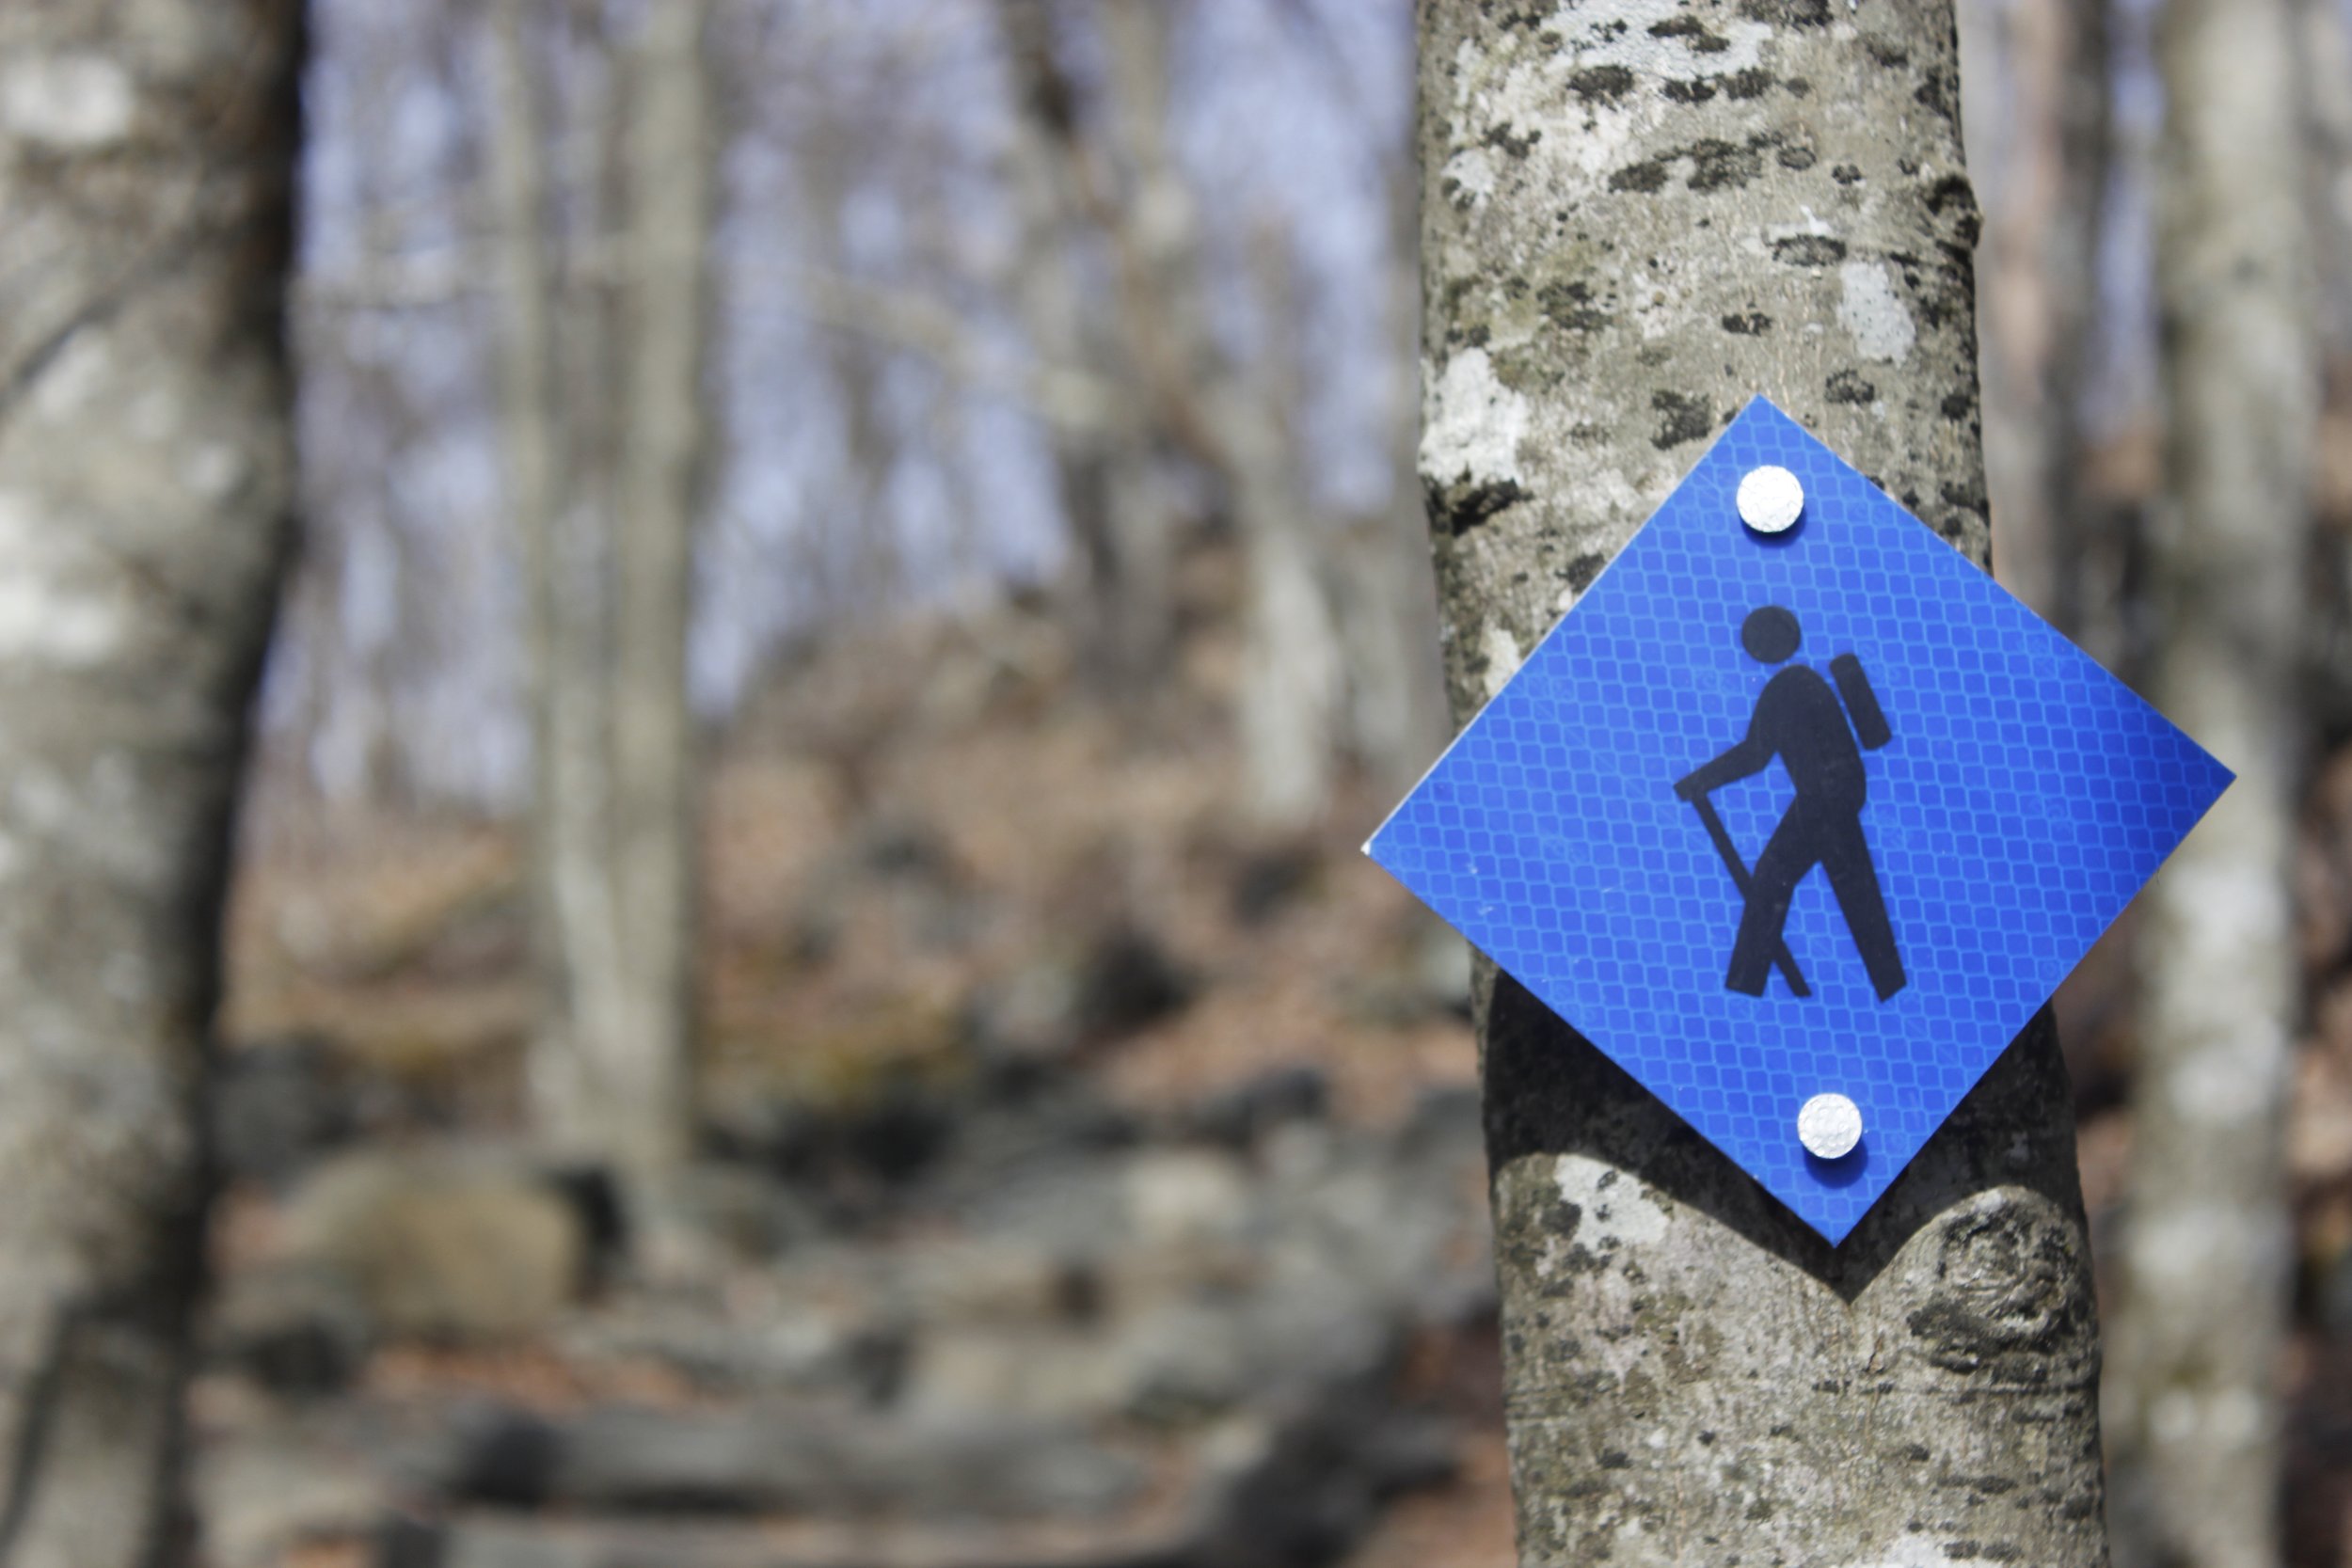
The light shines through the trees at sunset on the Cape Fear River Trail.

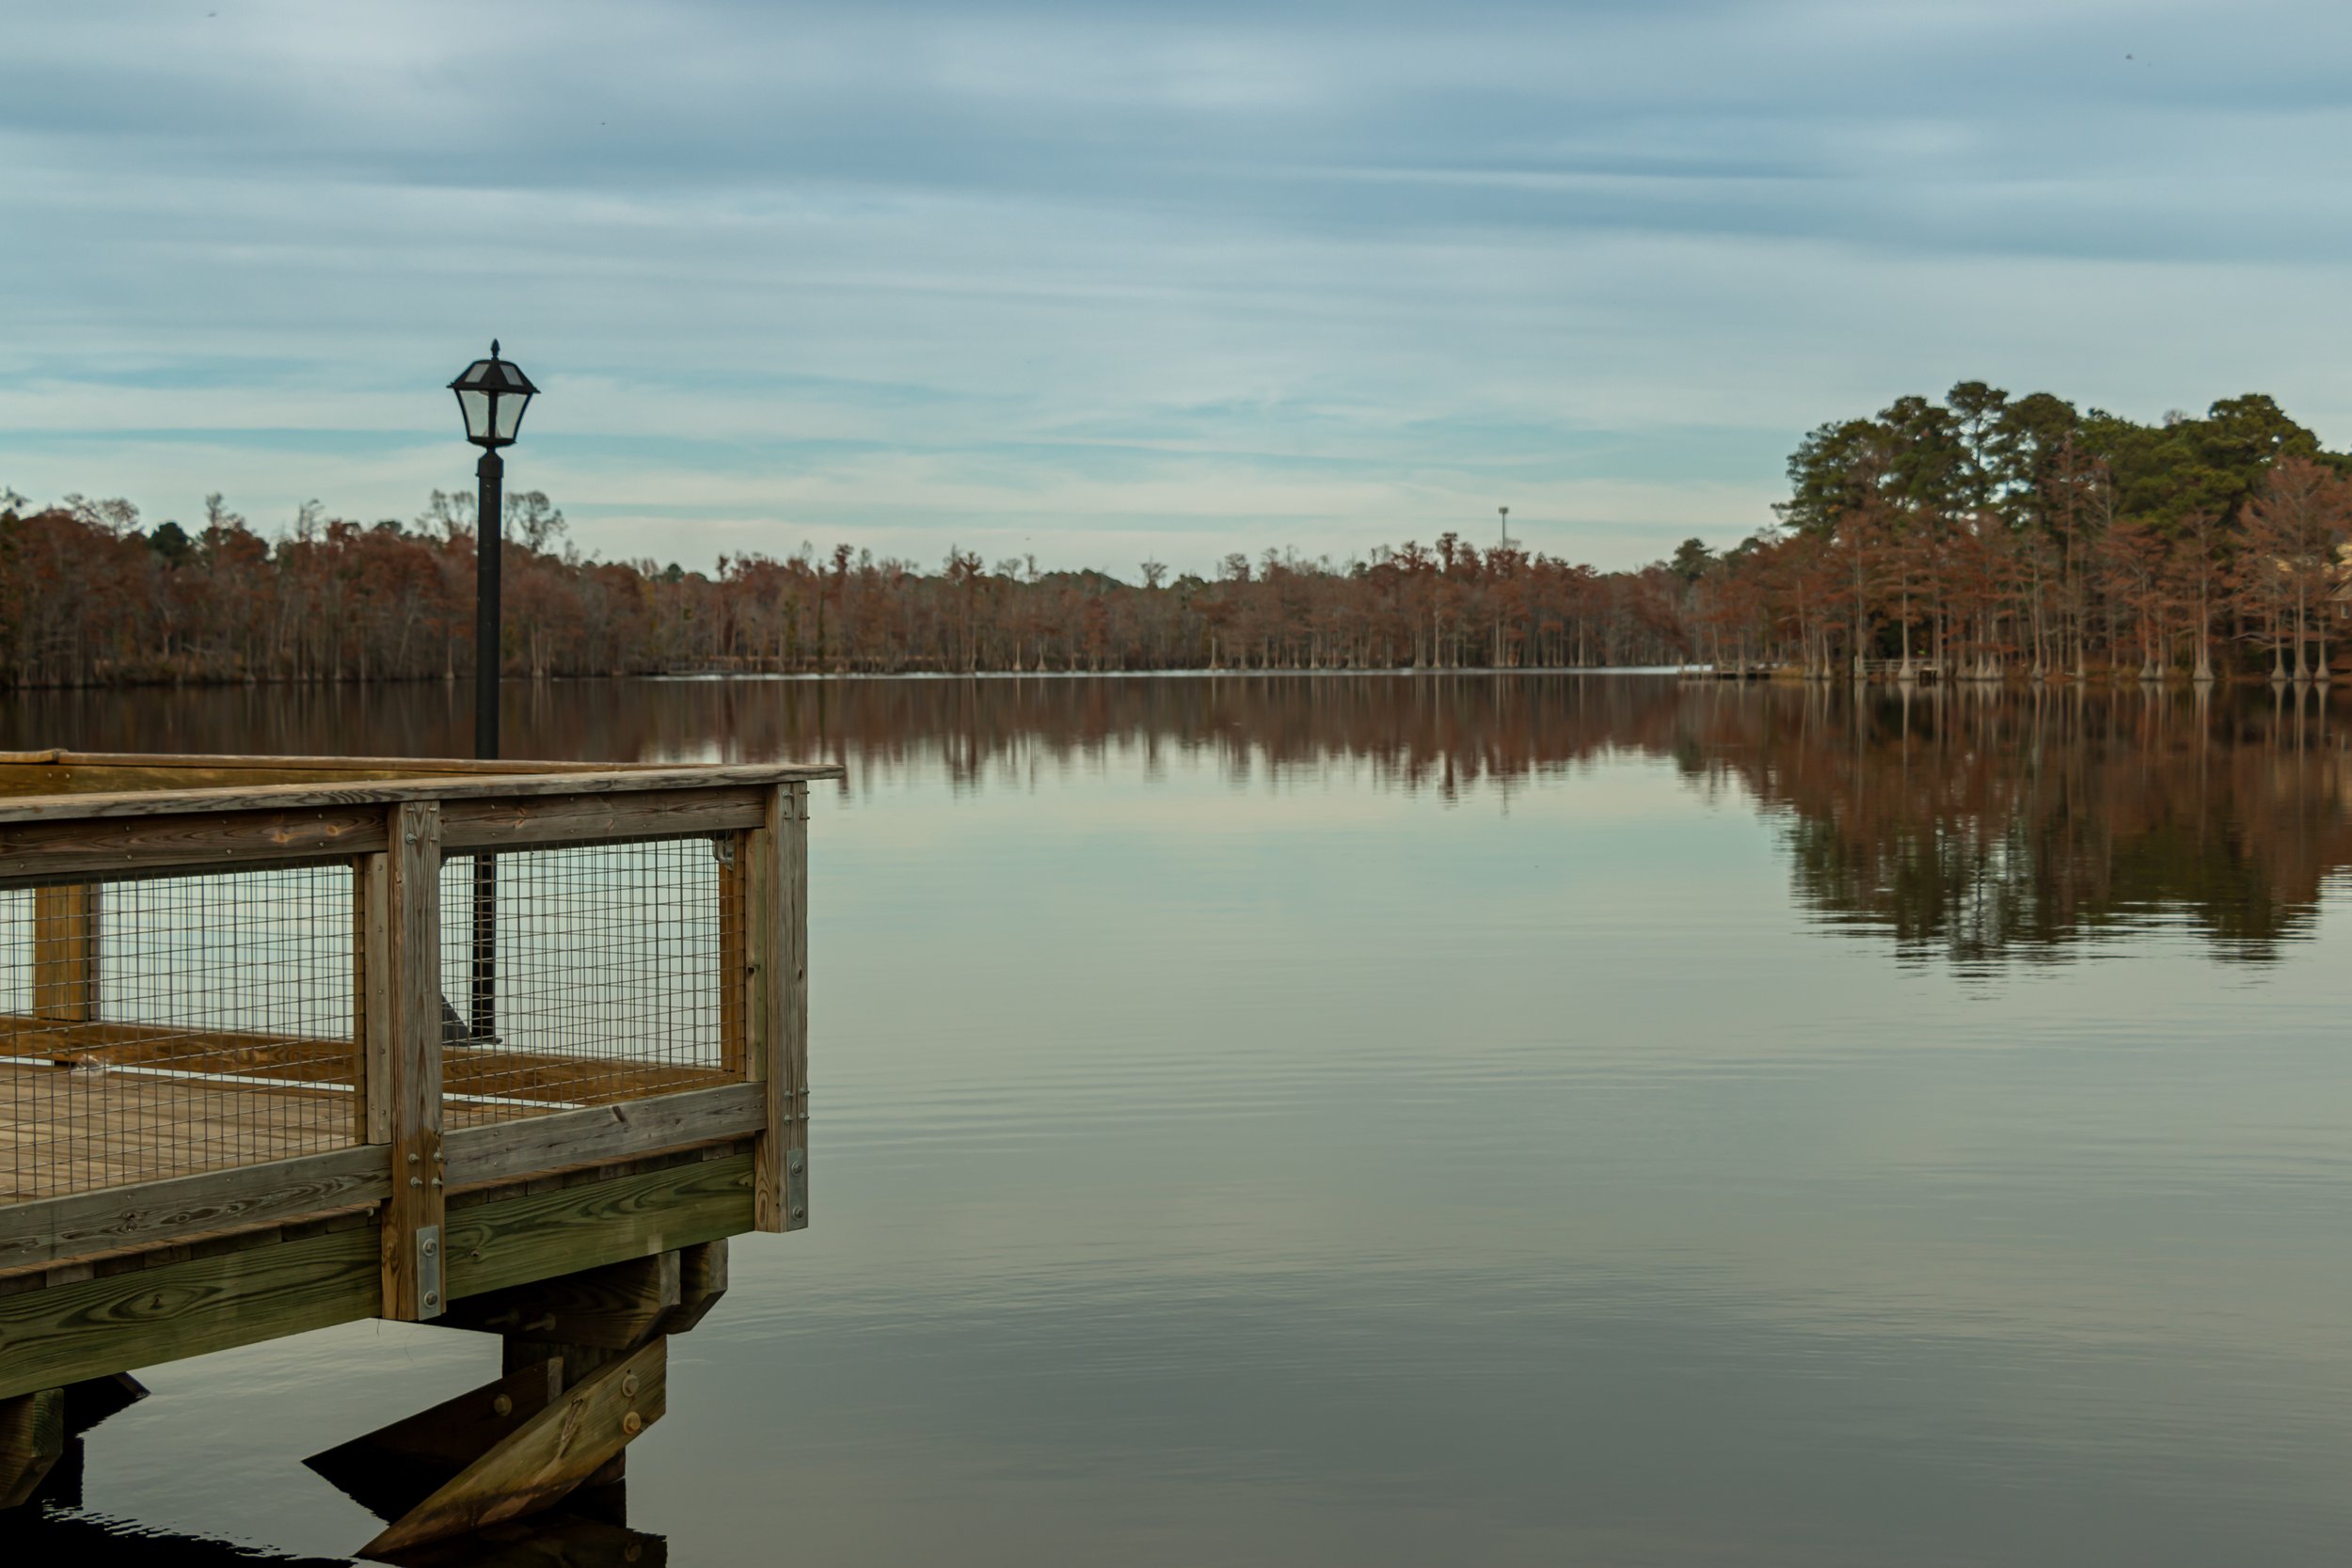
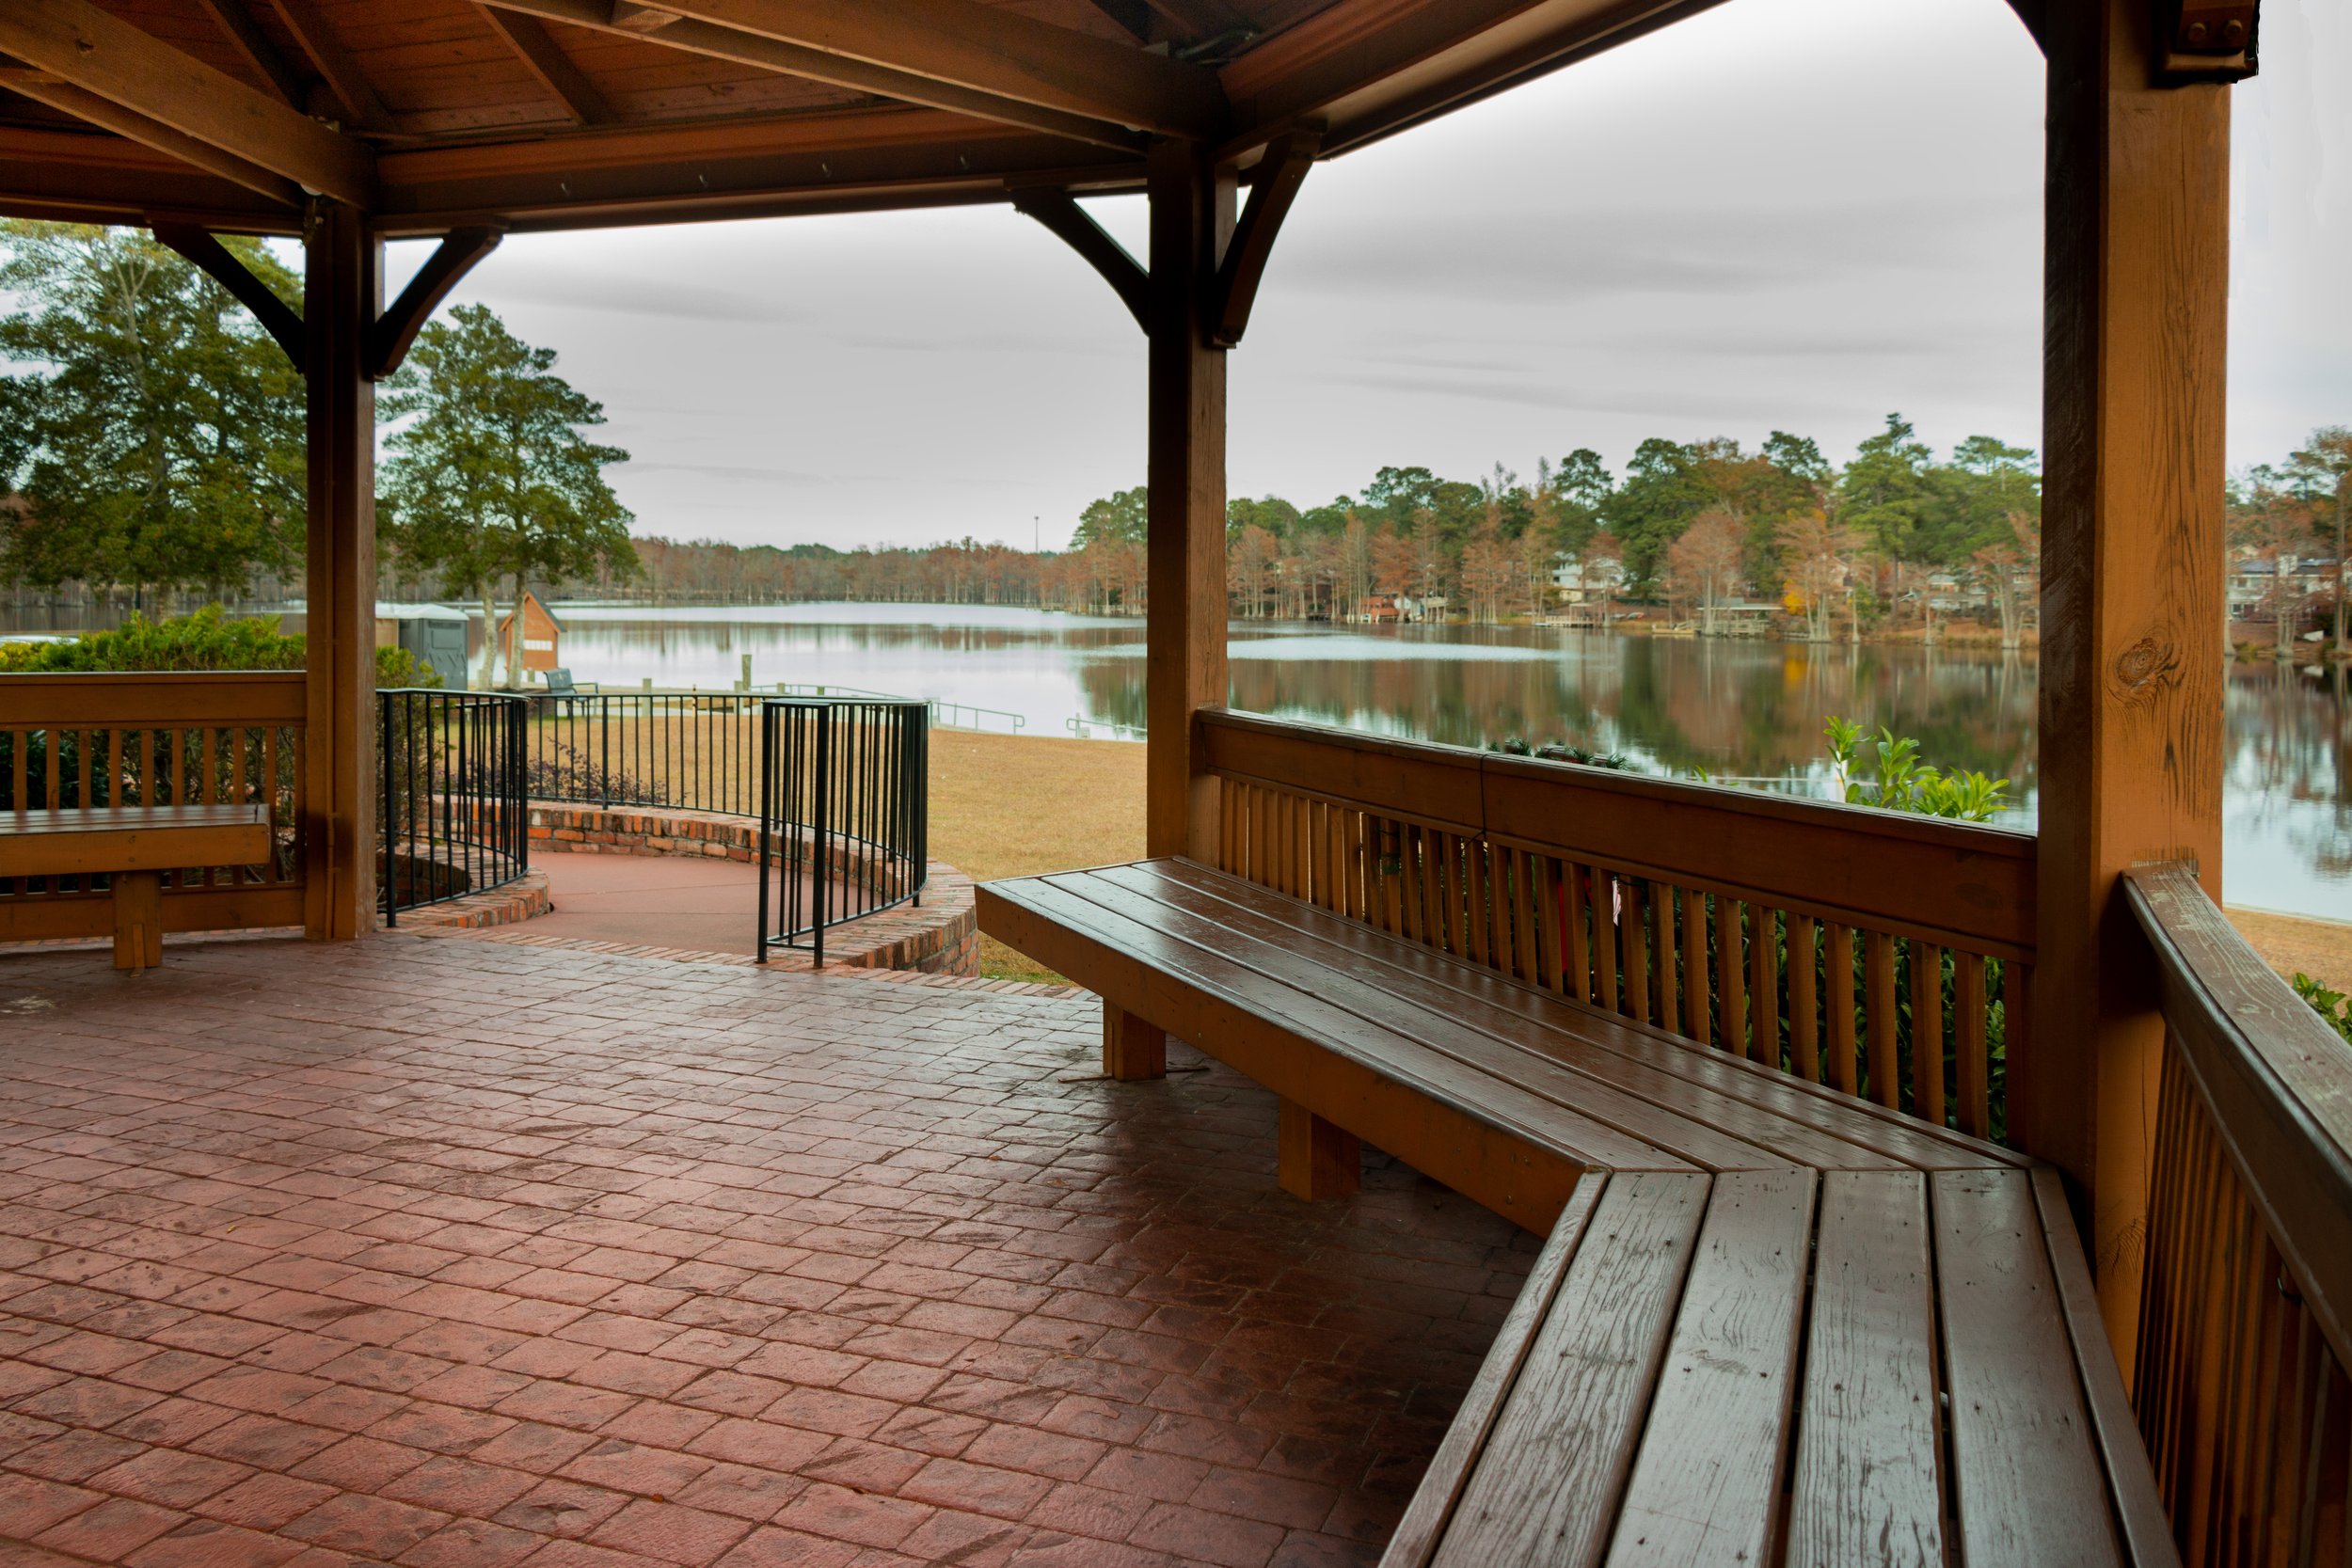
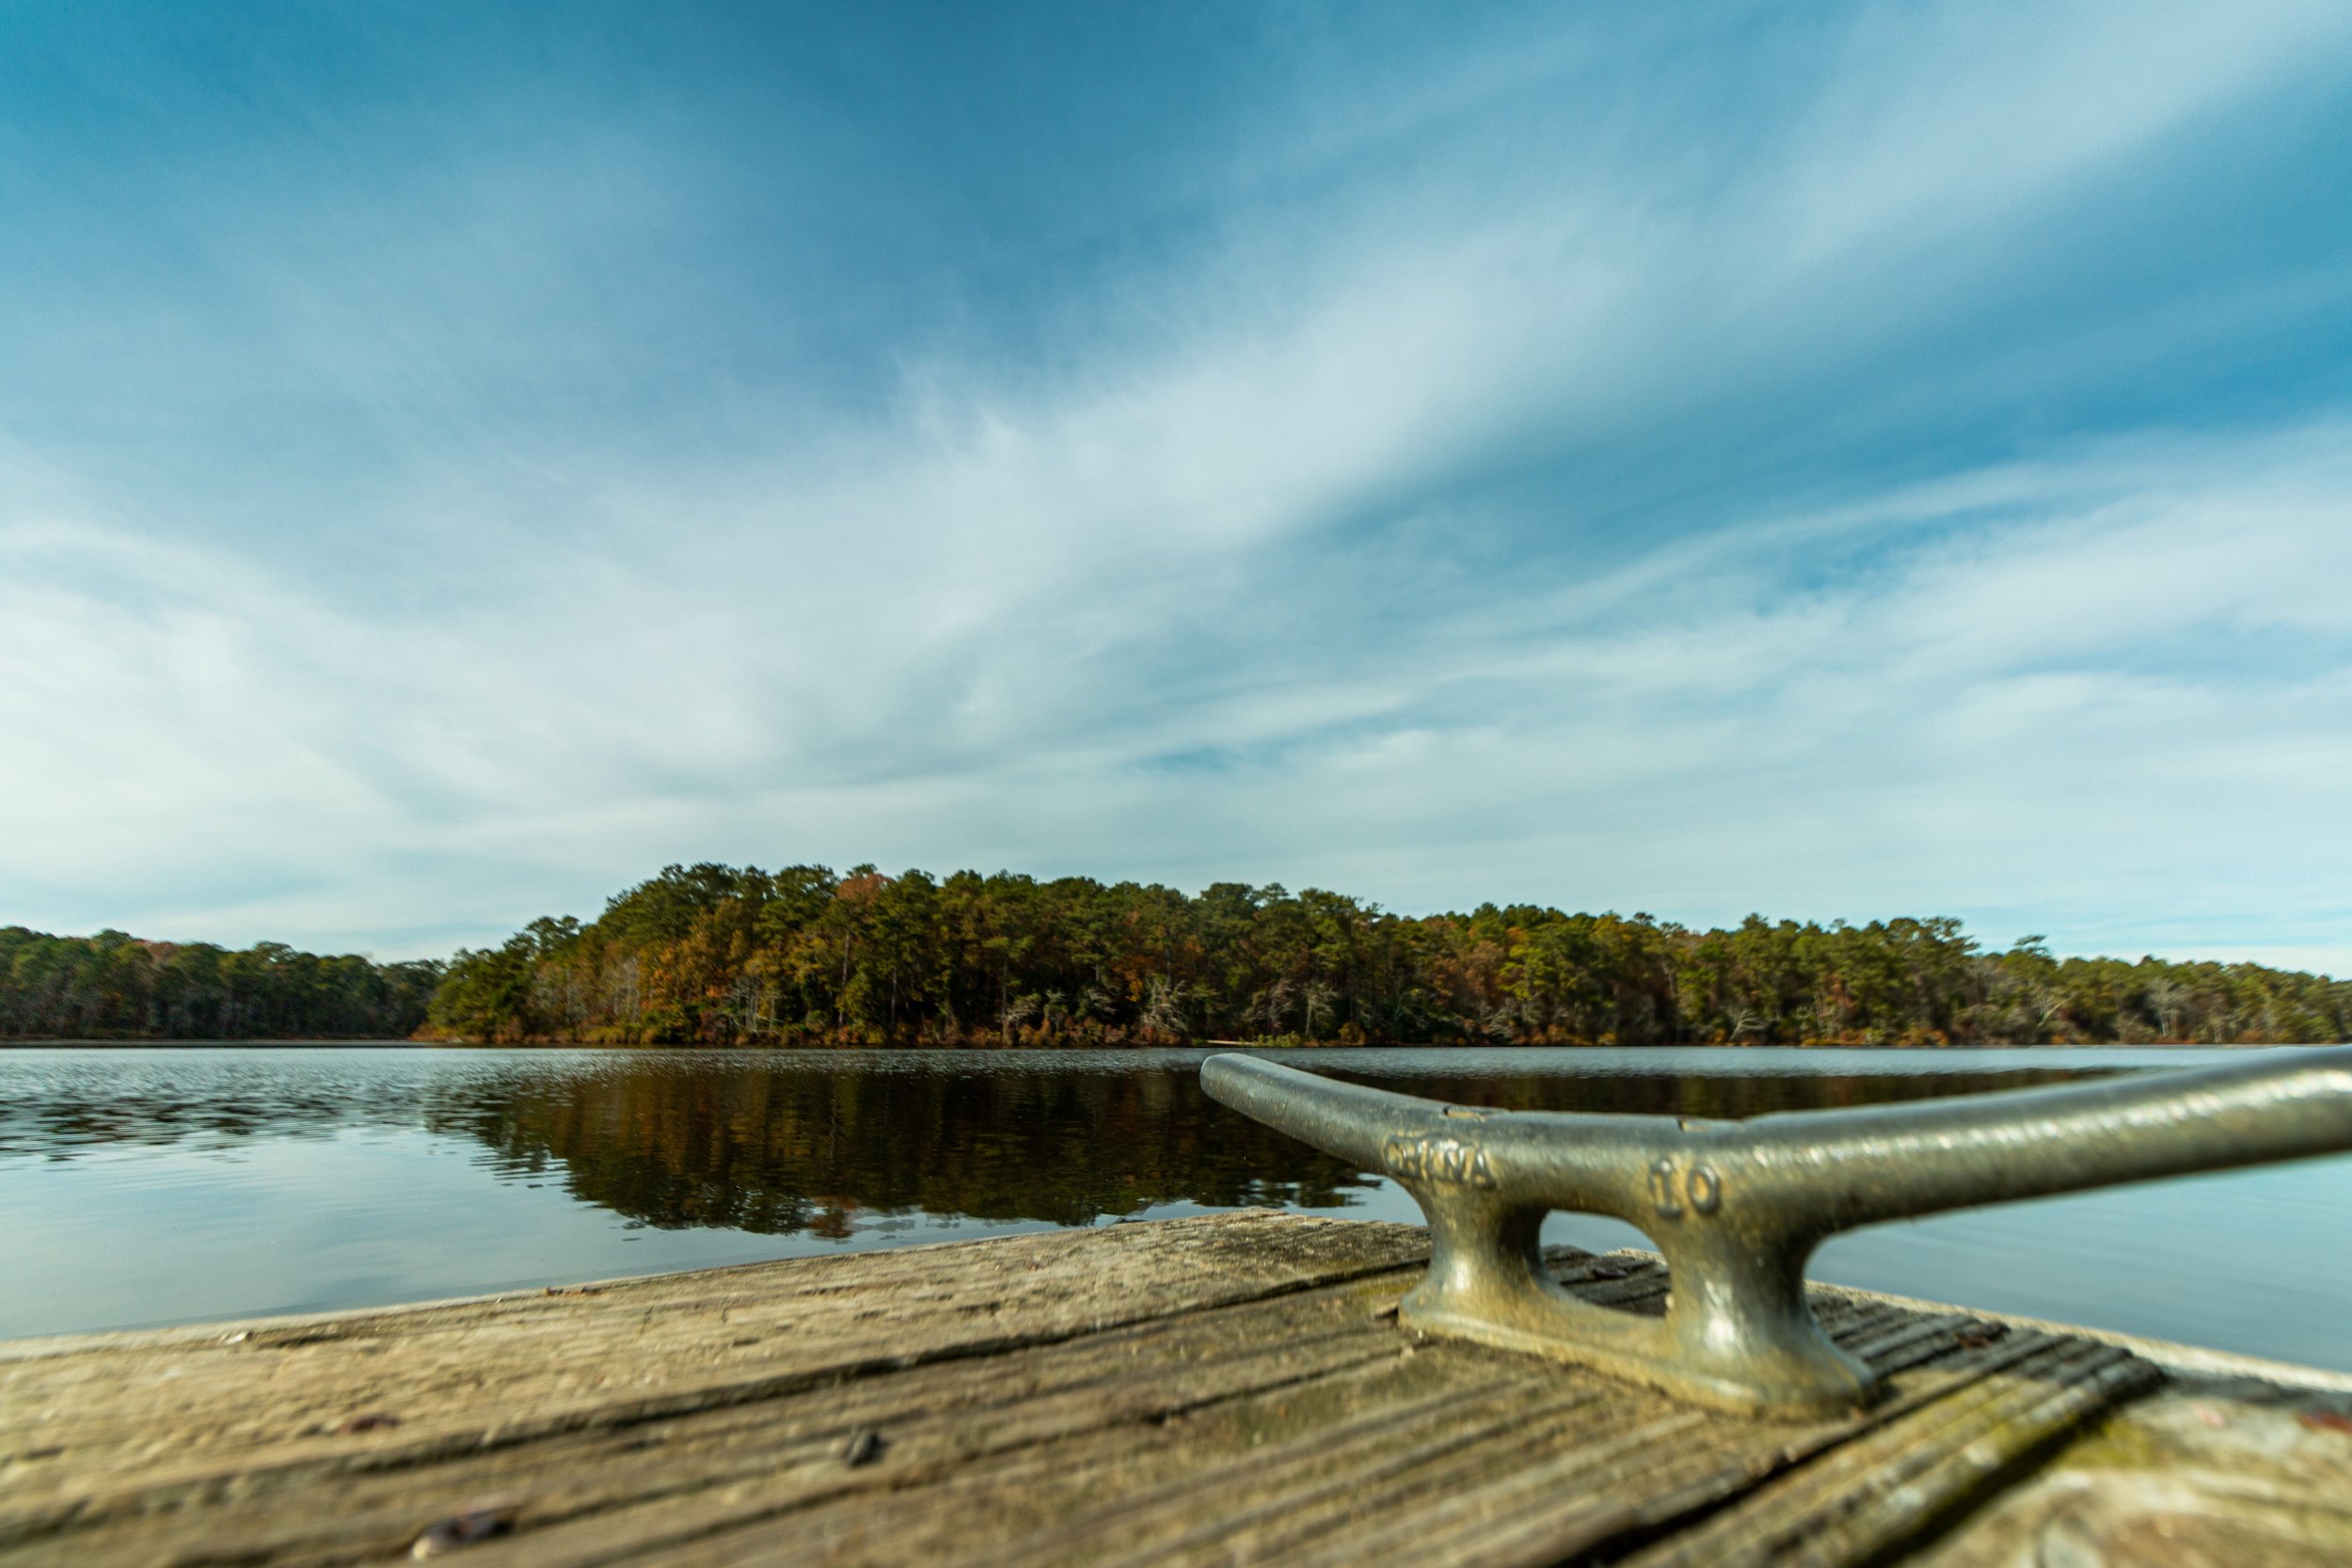
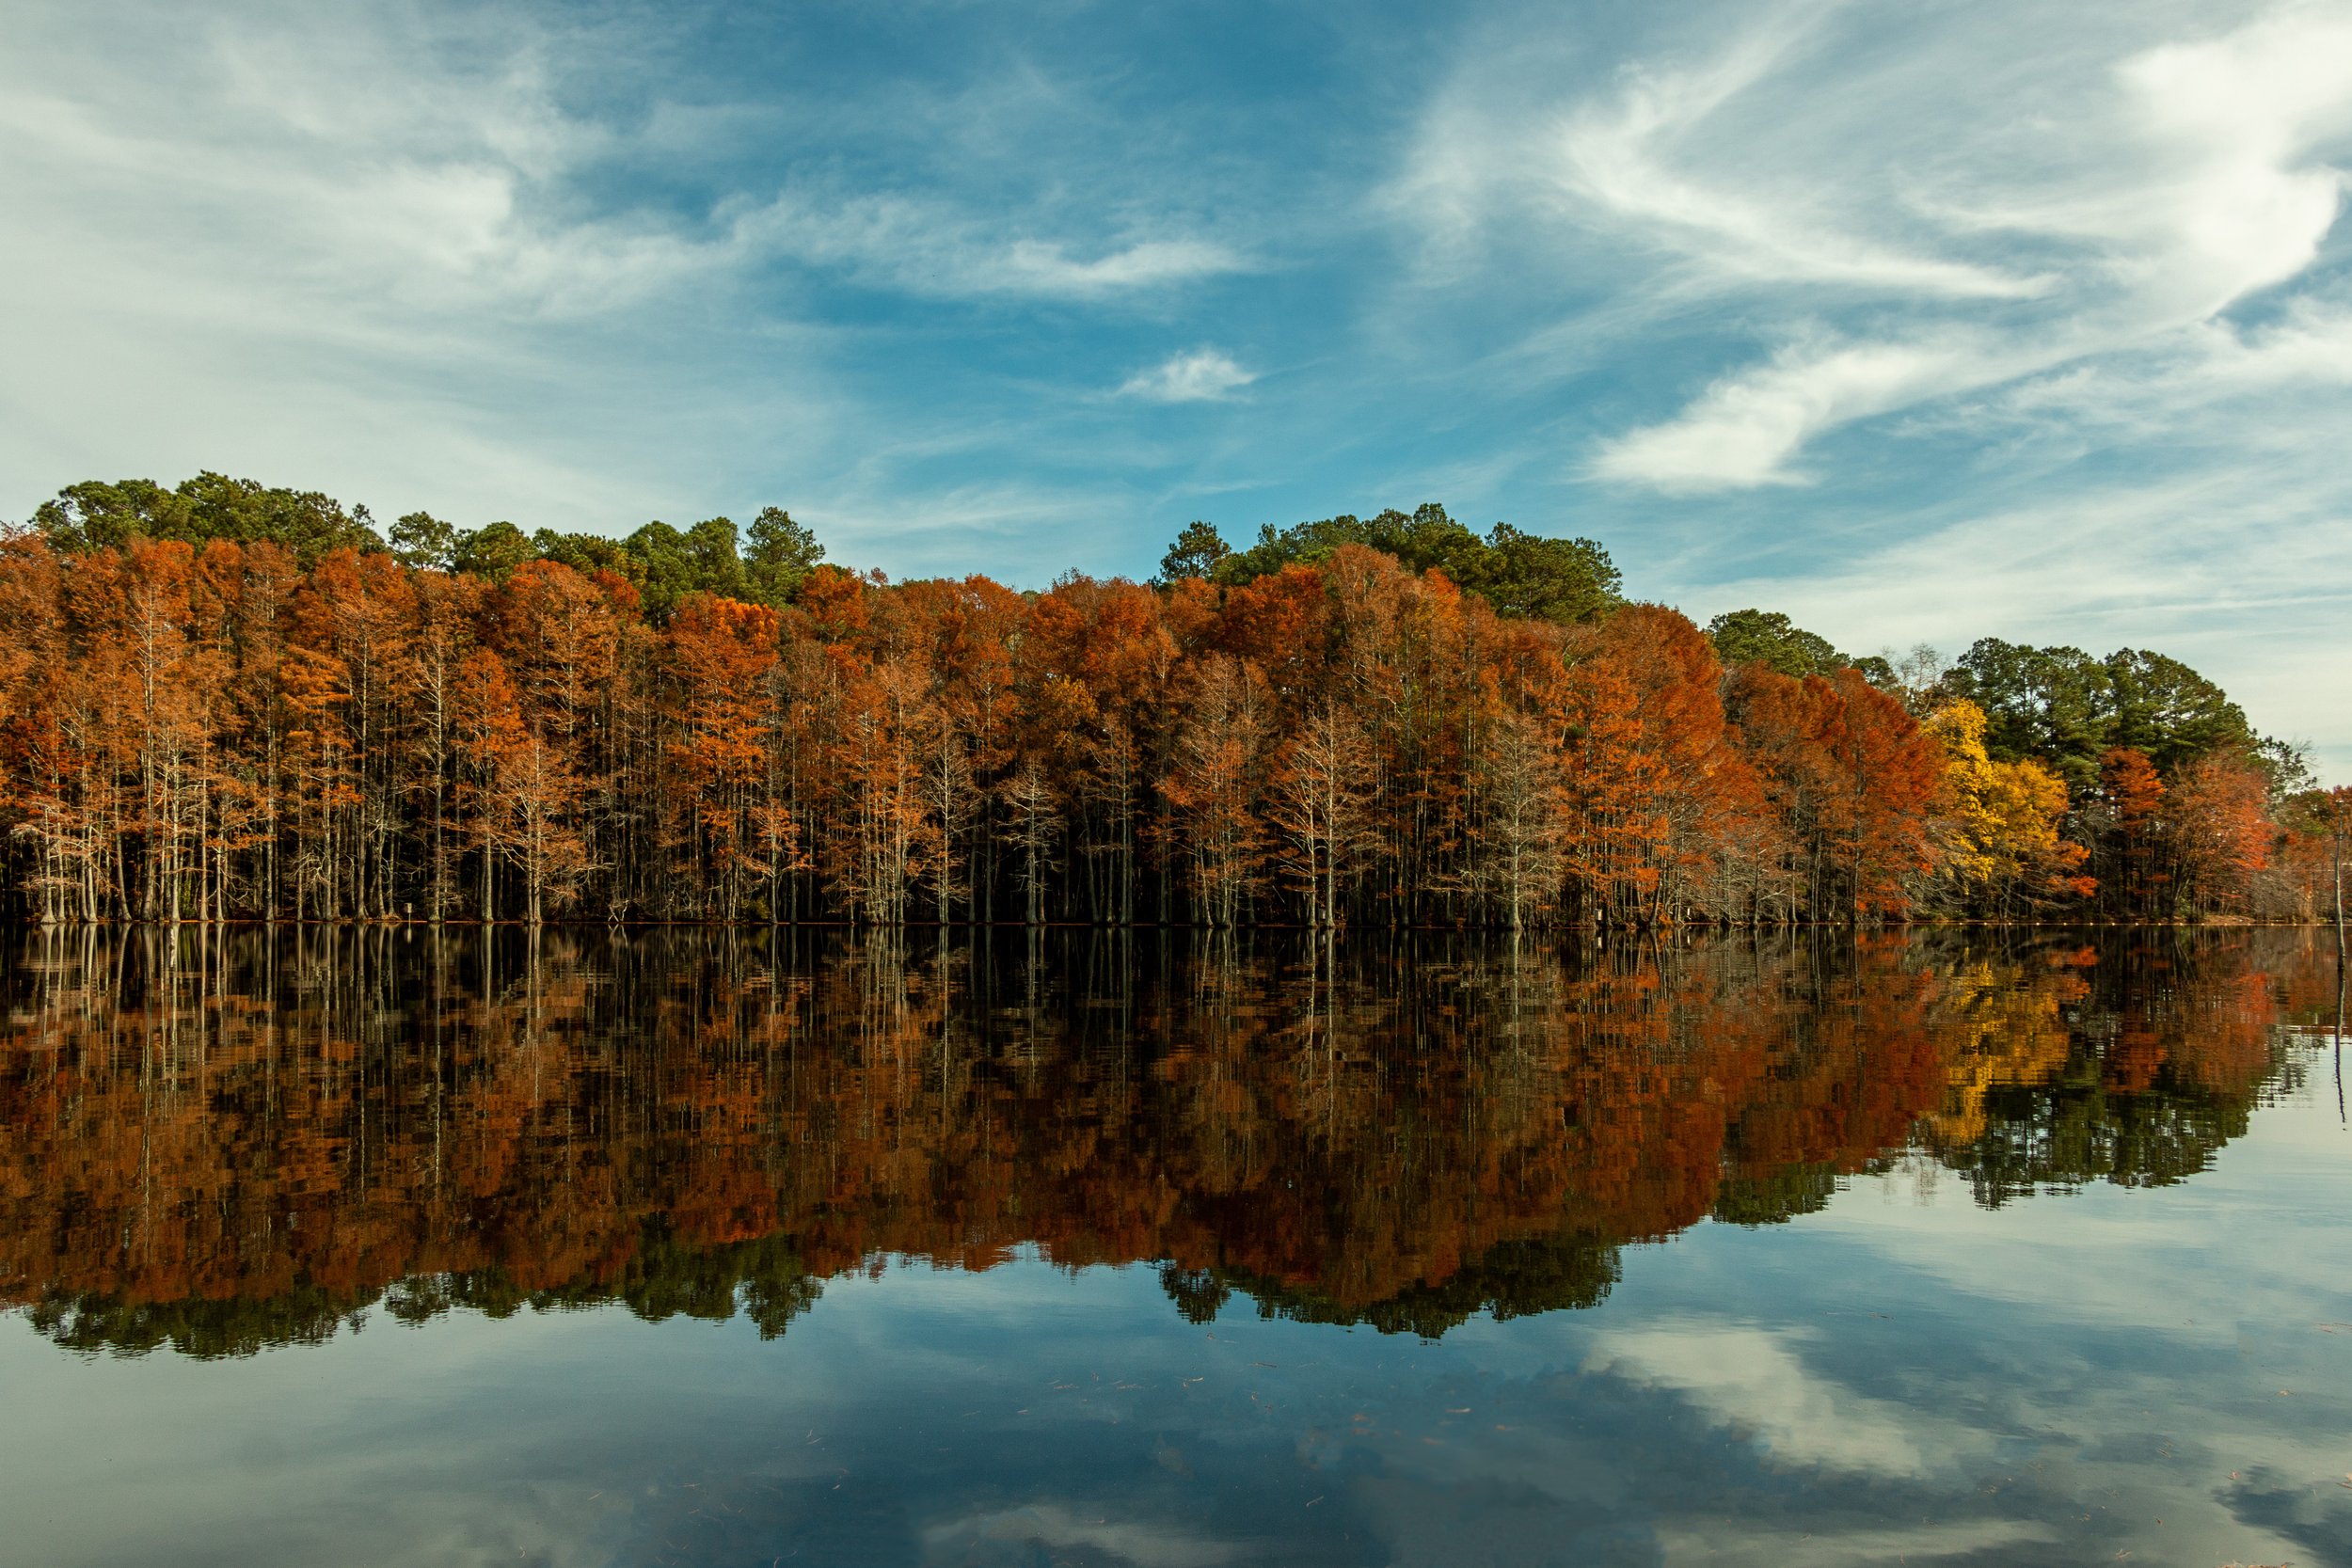
A view of the Hope Mills Lake from the shore facing the north side of the lake. This photo was taken from the dock and features a wooden patio large enough for a family to host a picnic.

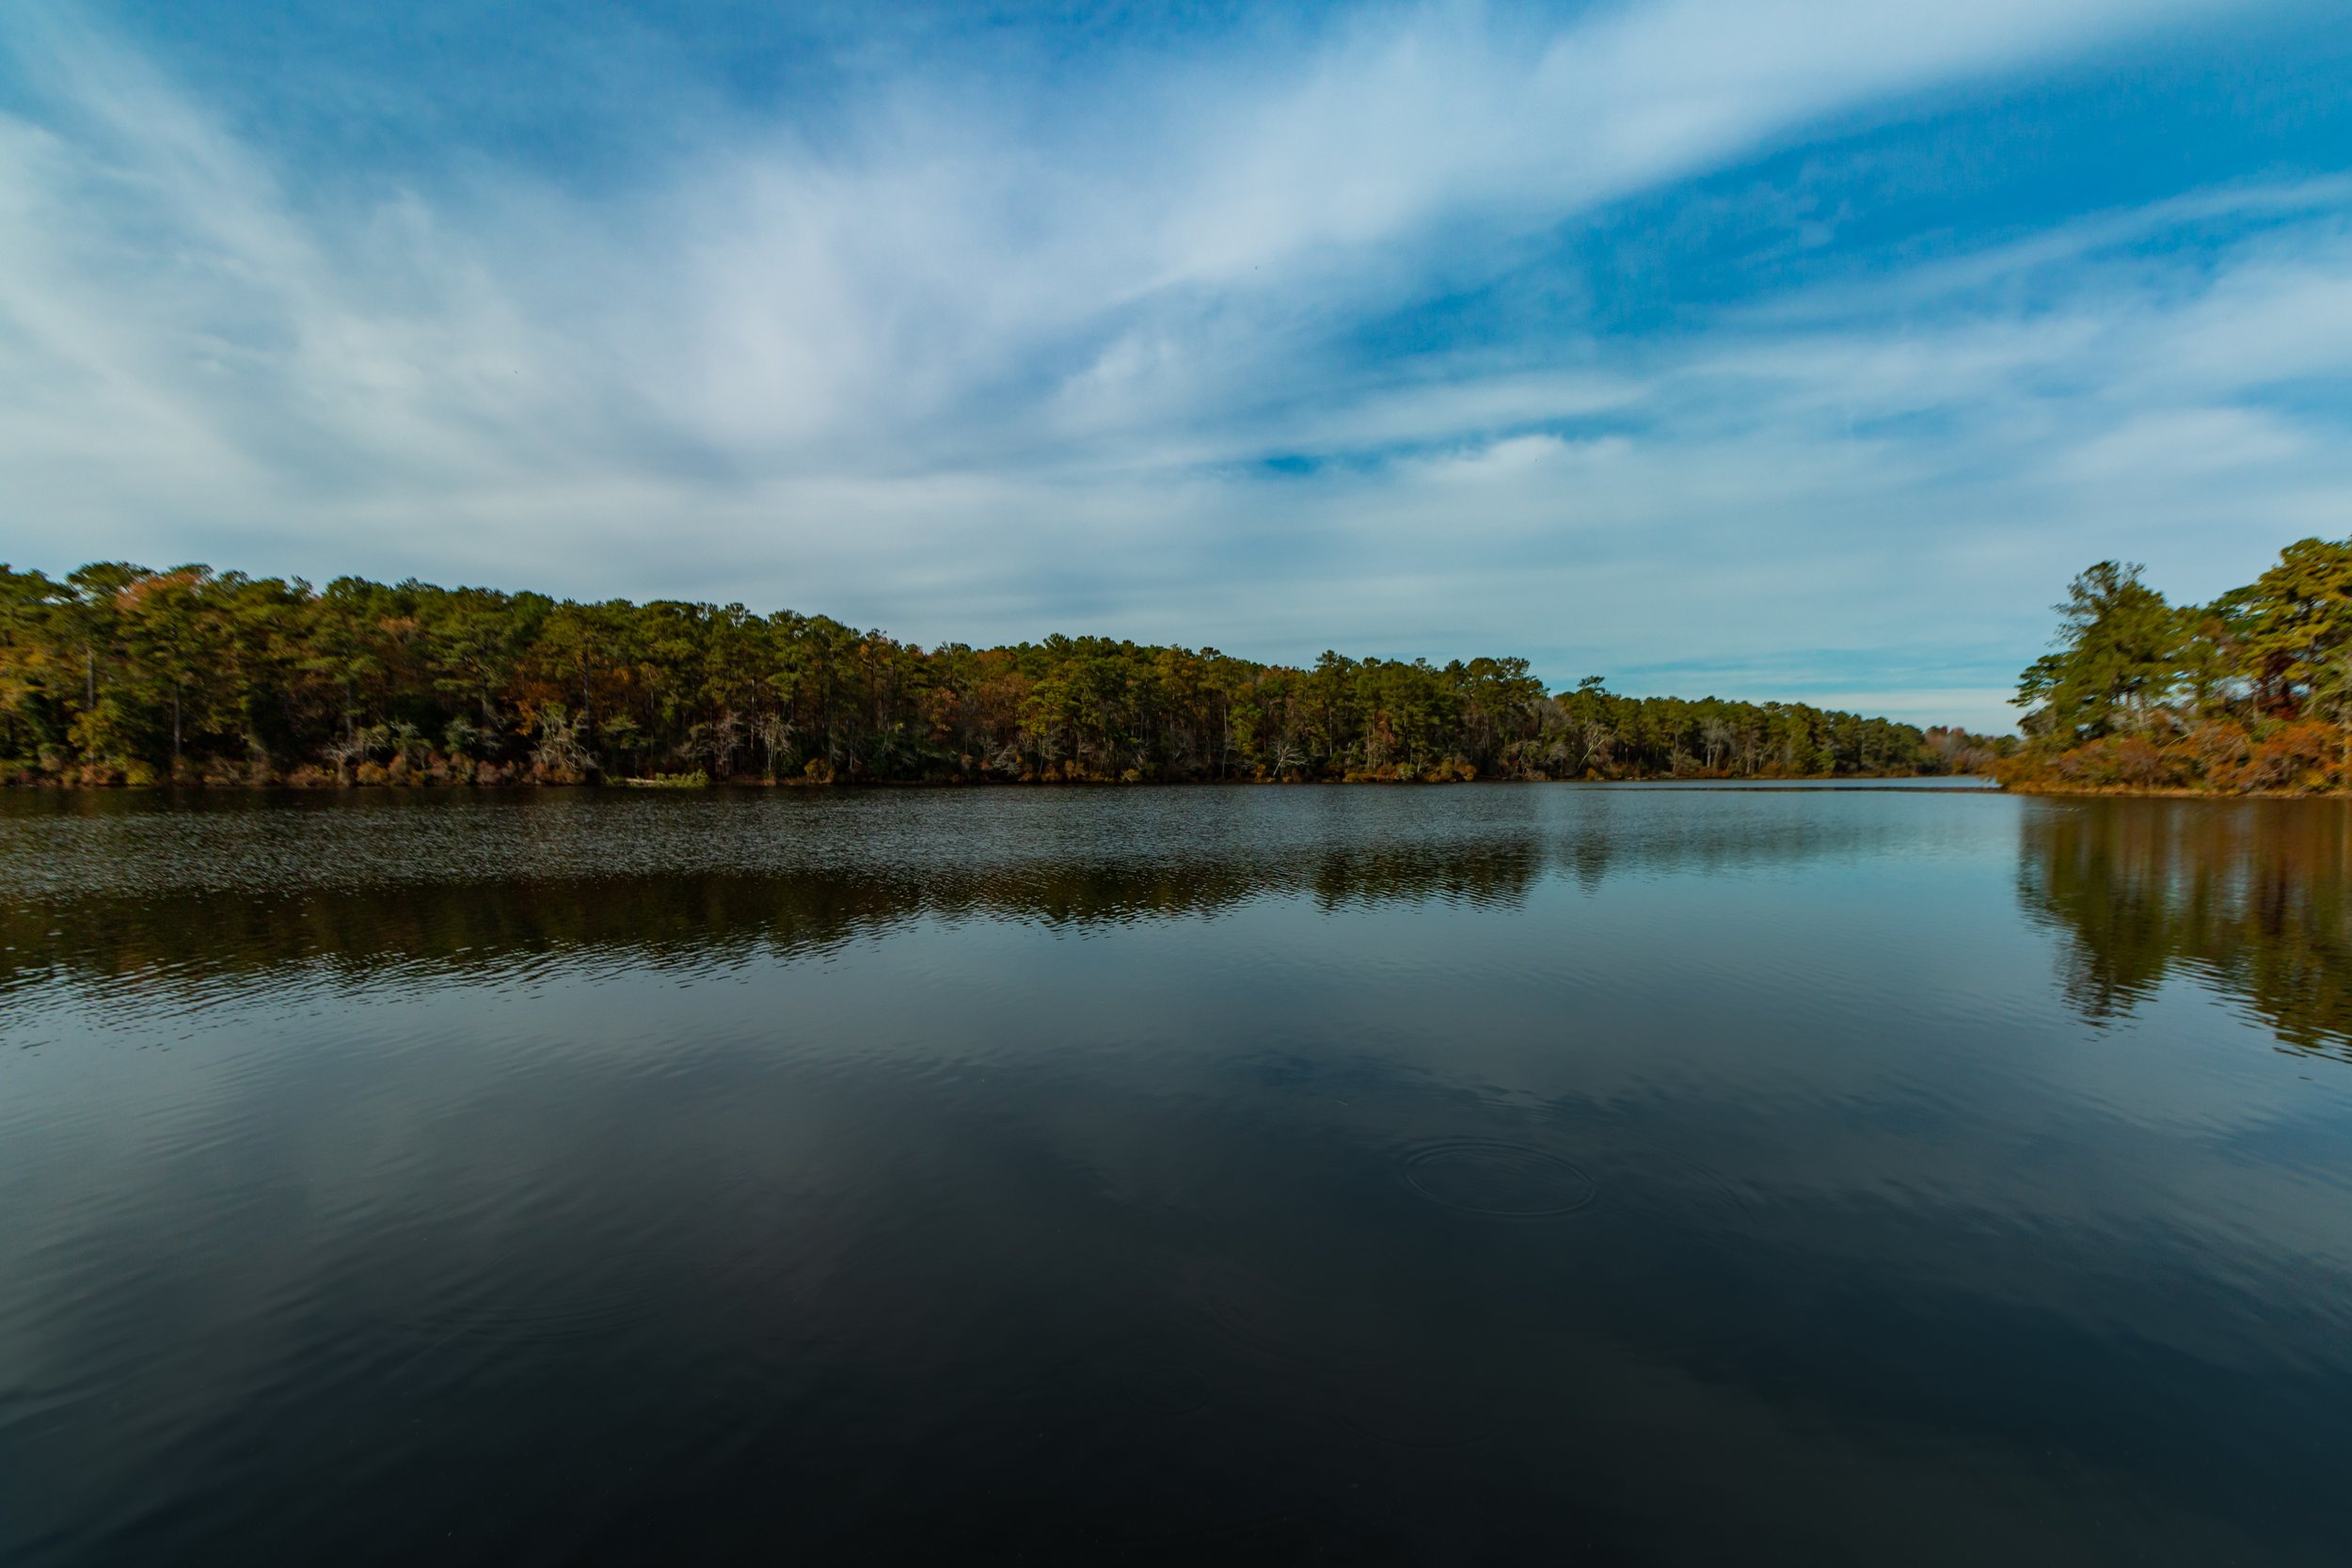
This is a view of Lake Rim from the slip where anyone can put in a kayak or canoe. The fish were jumping as park goers were fishing off the large fishing pier. Enjoy a family picnic, tennis courts, volleyball courts, and a walk on the one-mile boarder trail through the wetlands.

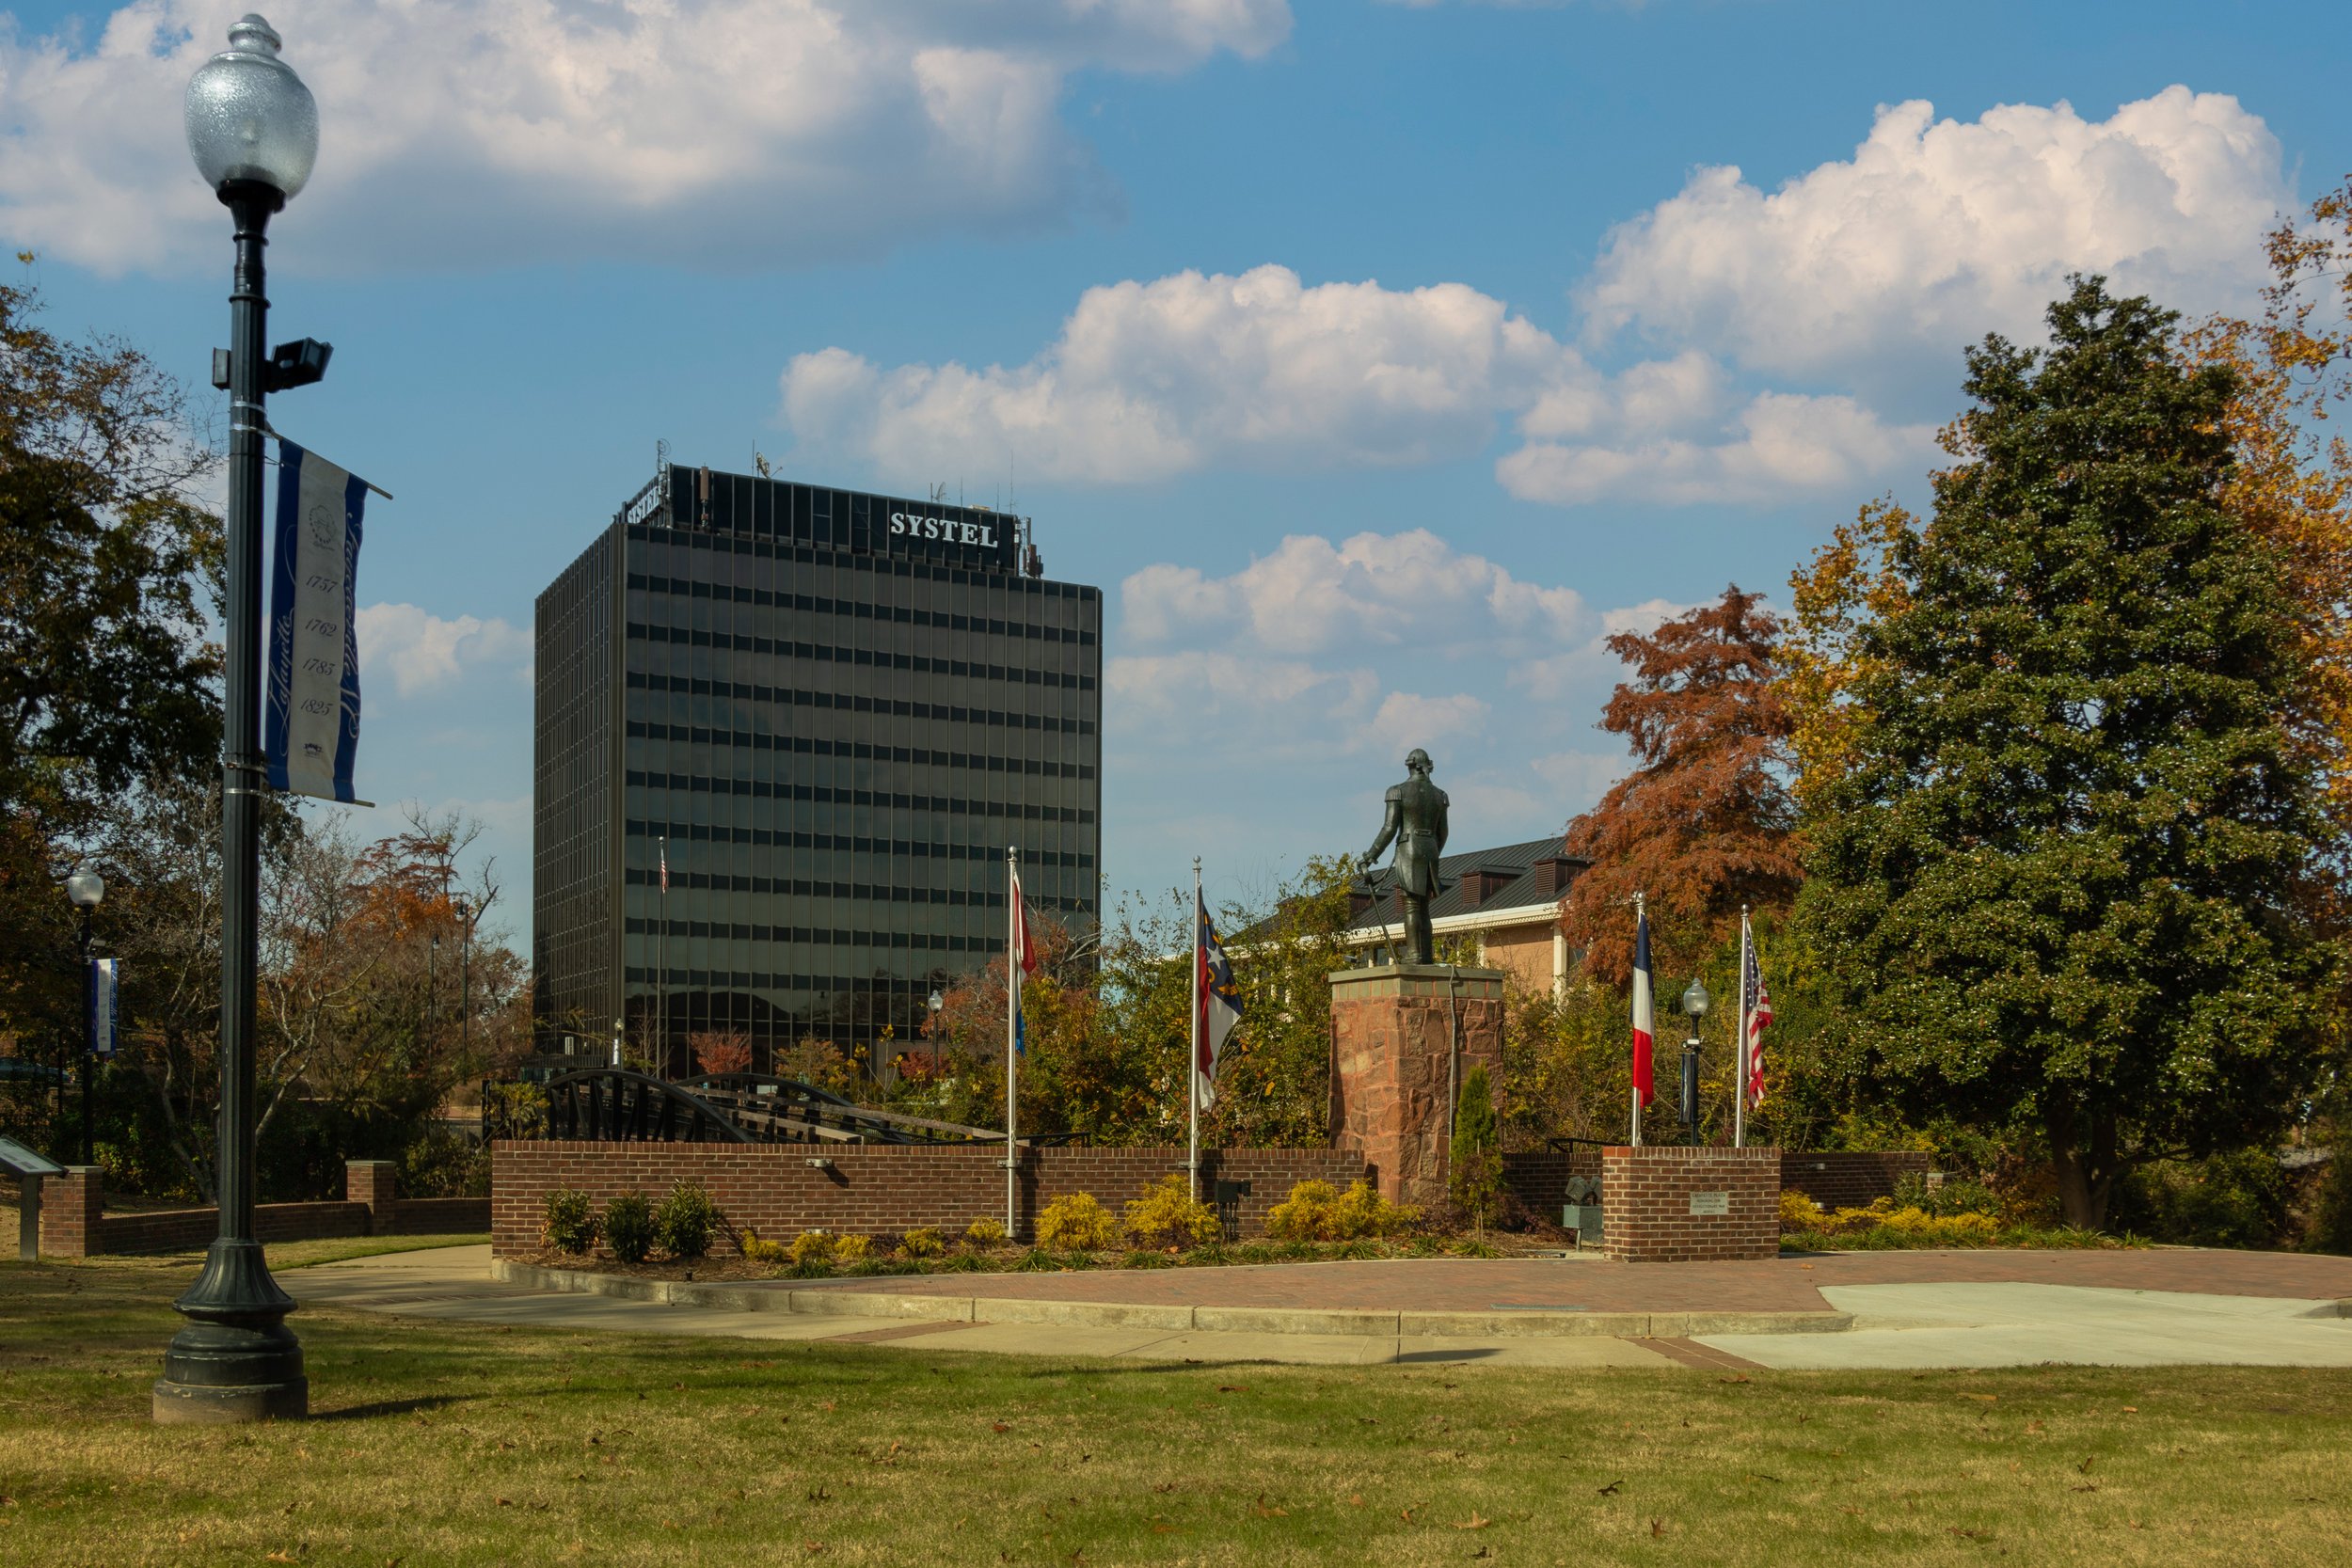
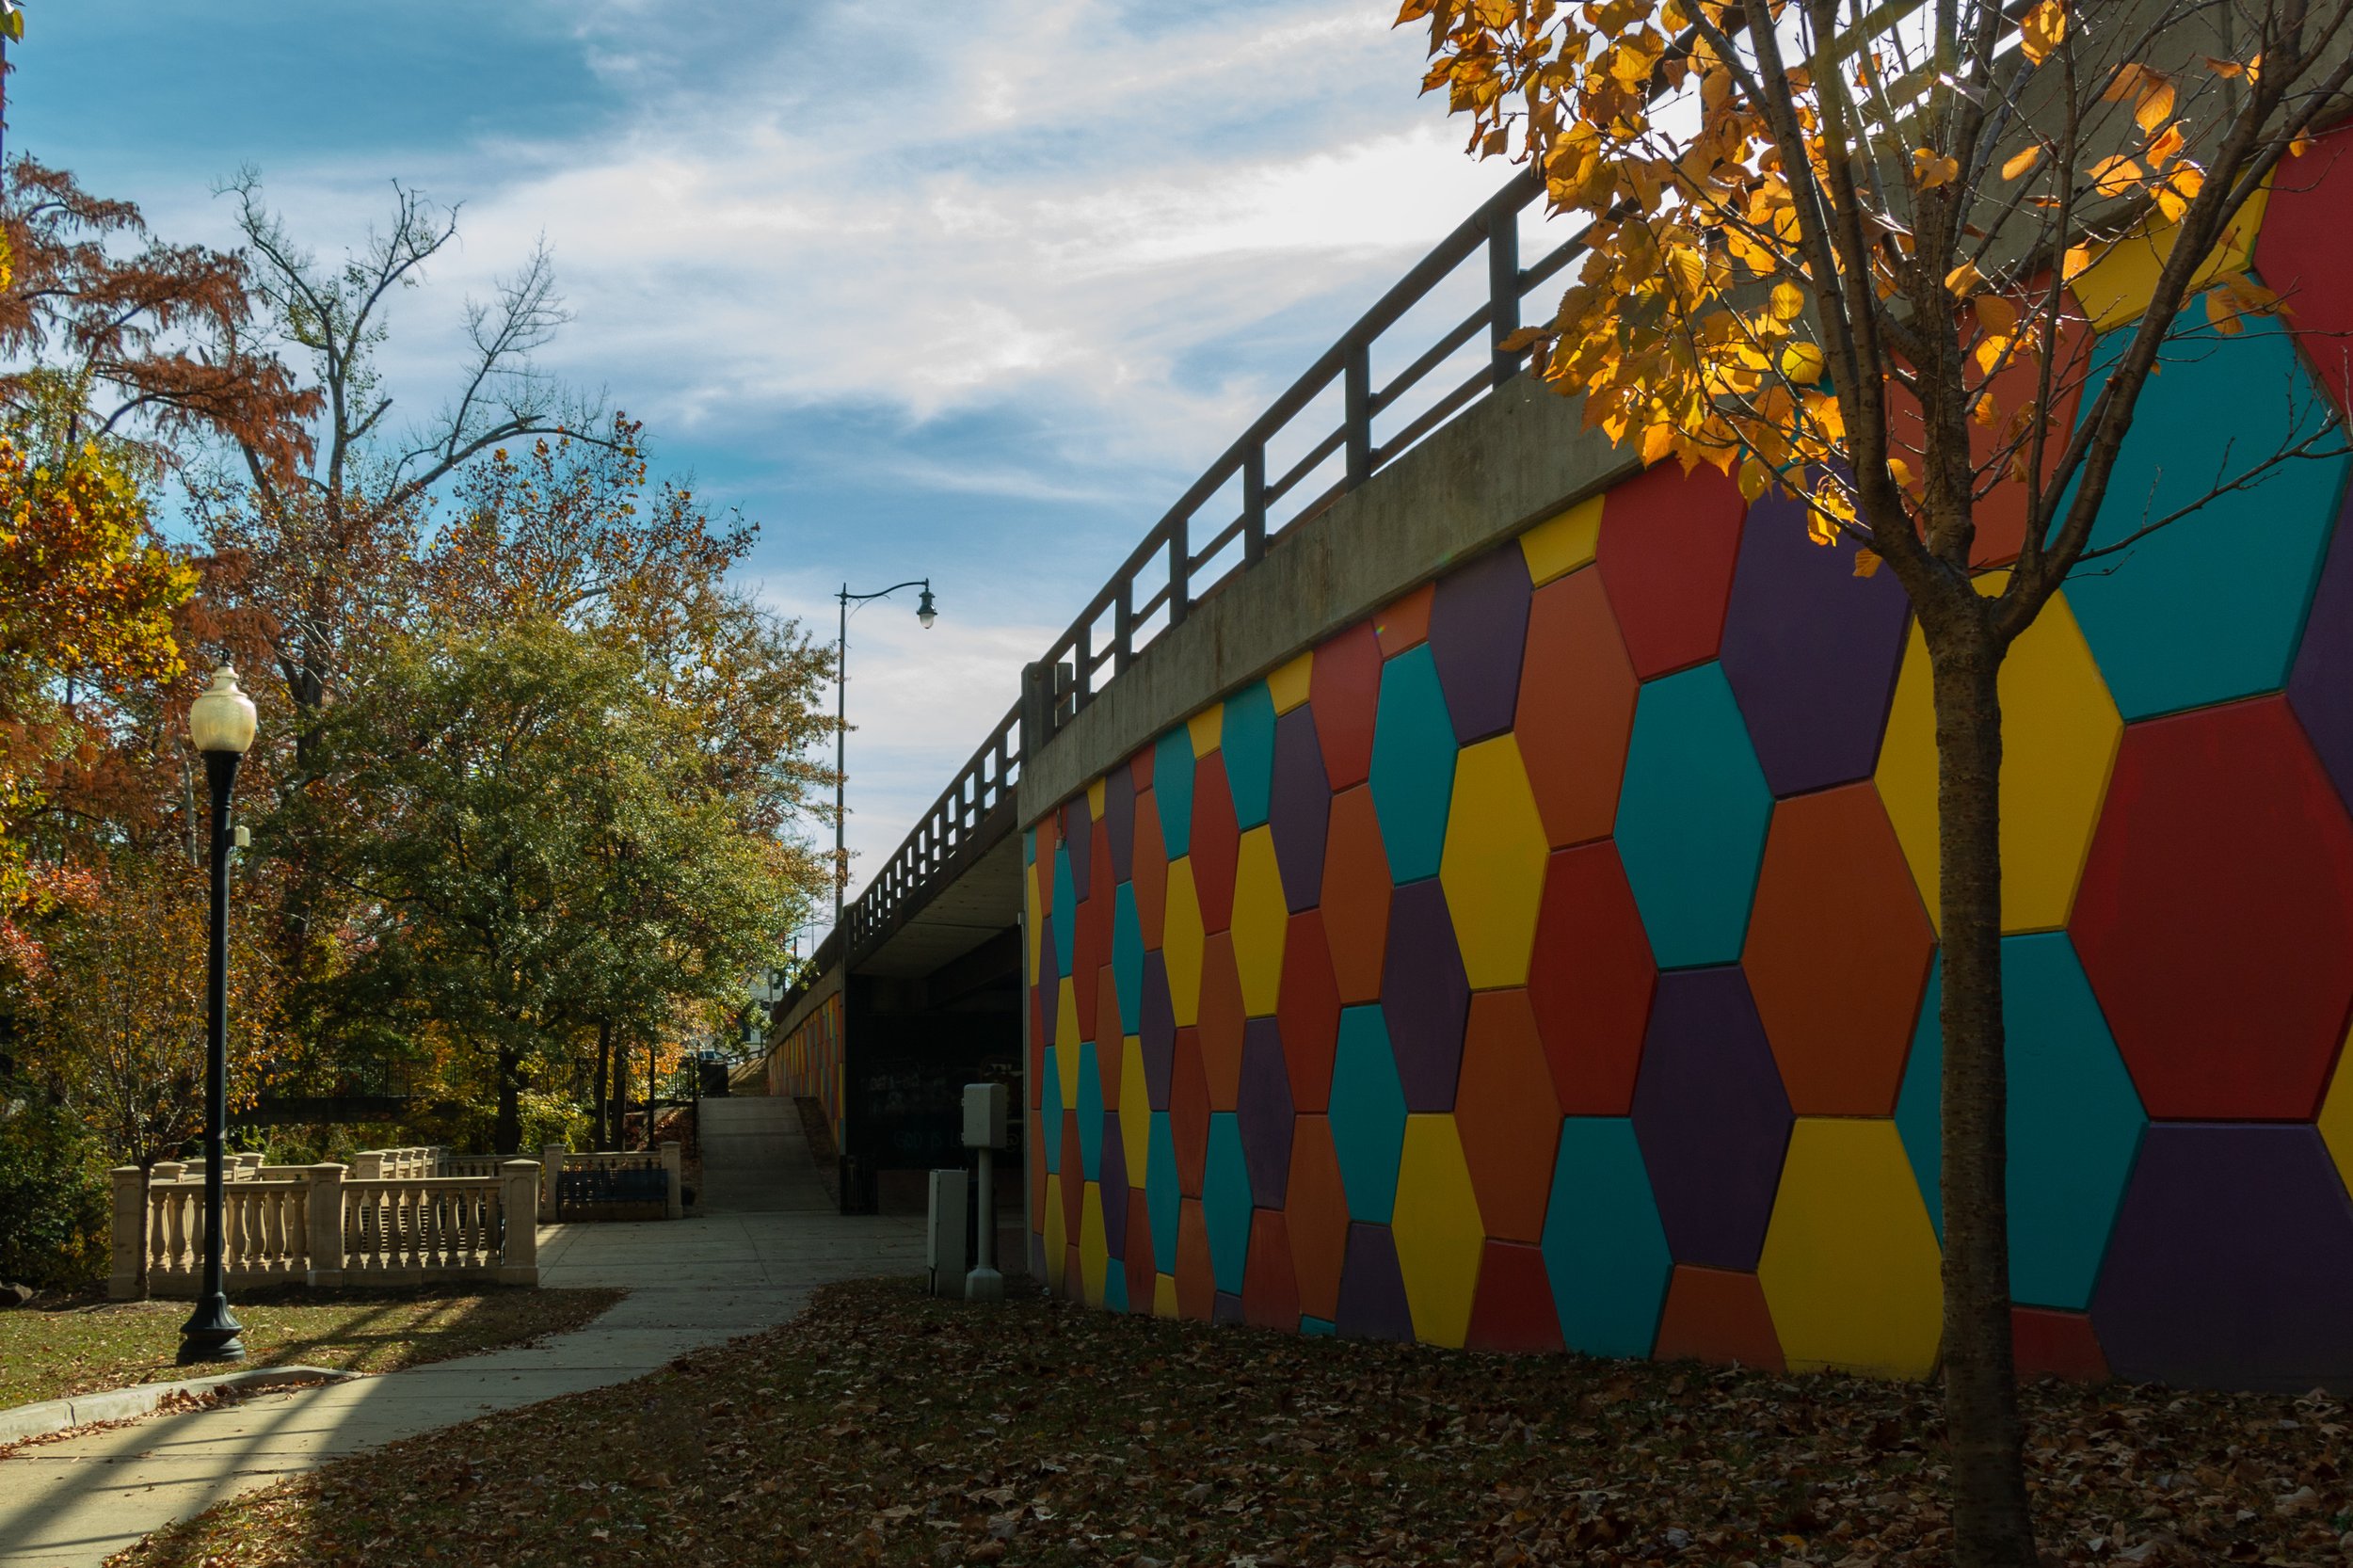
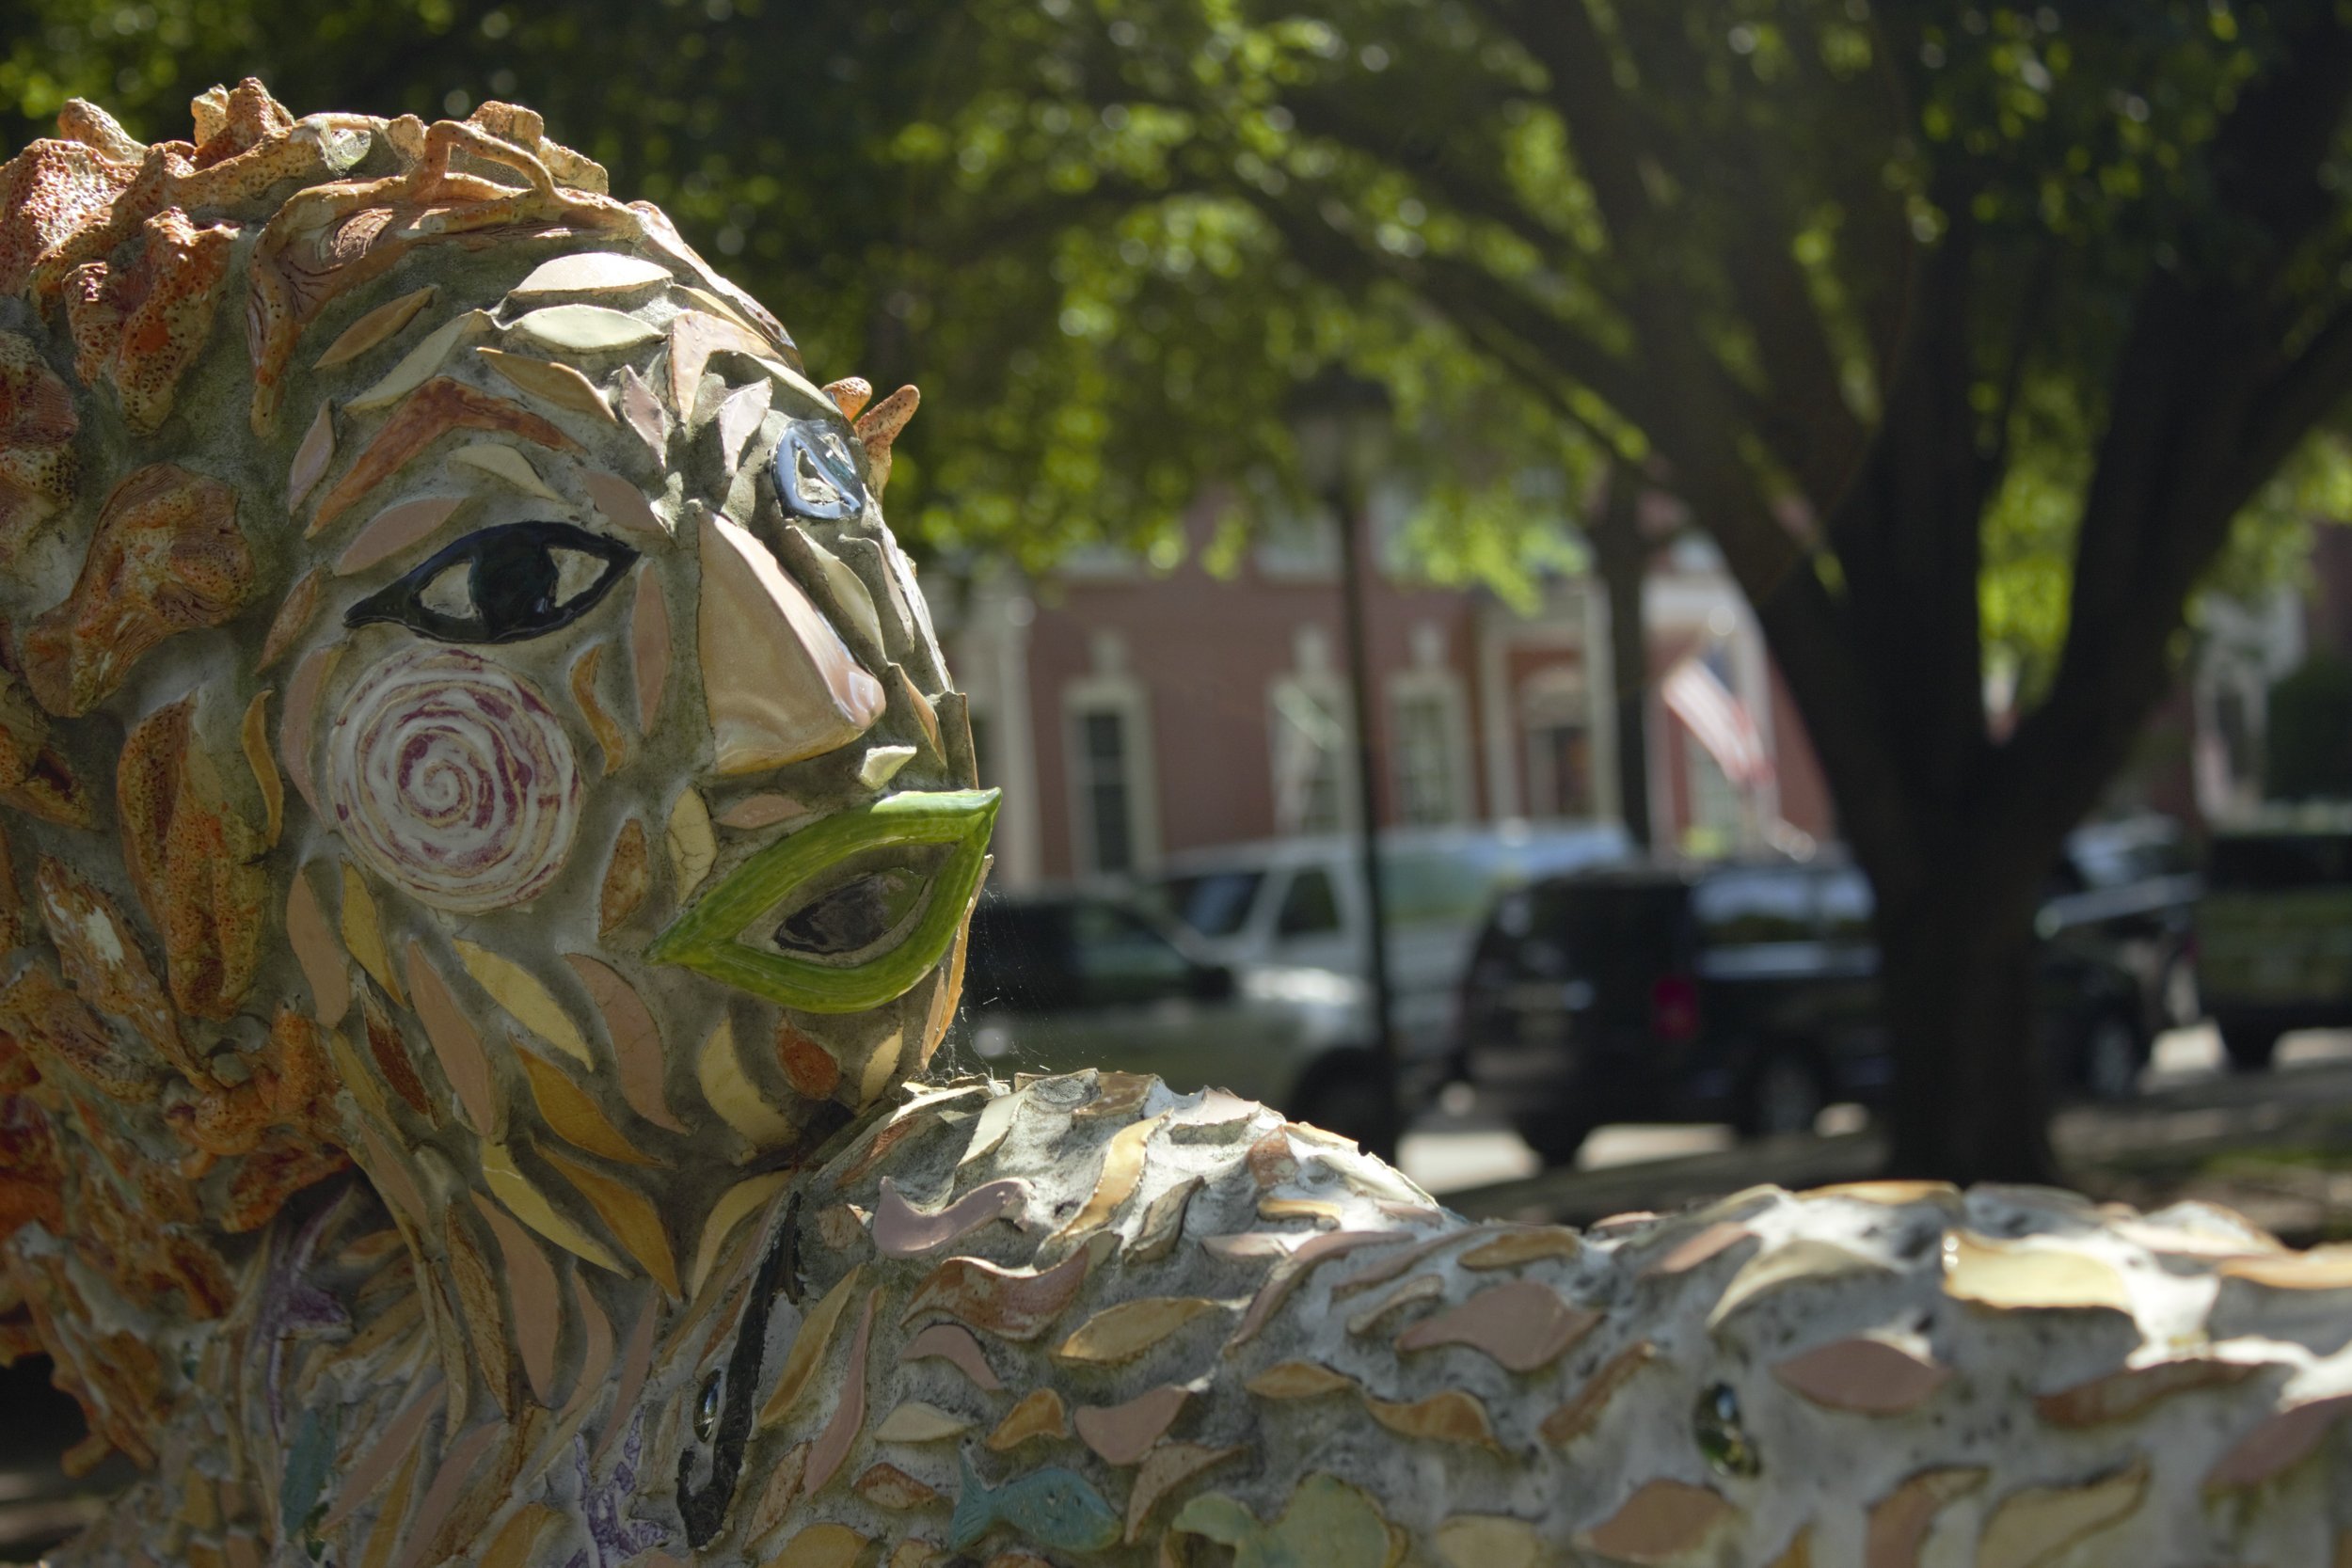
This photo features an art installation along the trail at Linear Park that runs along Cross Creek. This is a unique spot in Fayetteville as it’s the intersection of Urban Fayetteville, and a nature creek that winds through downtown

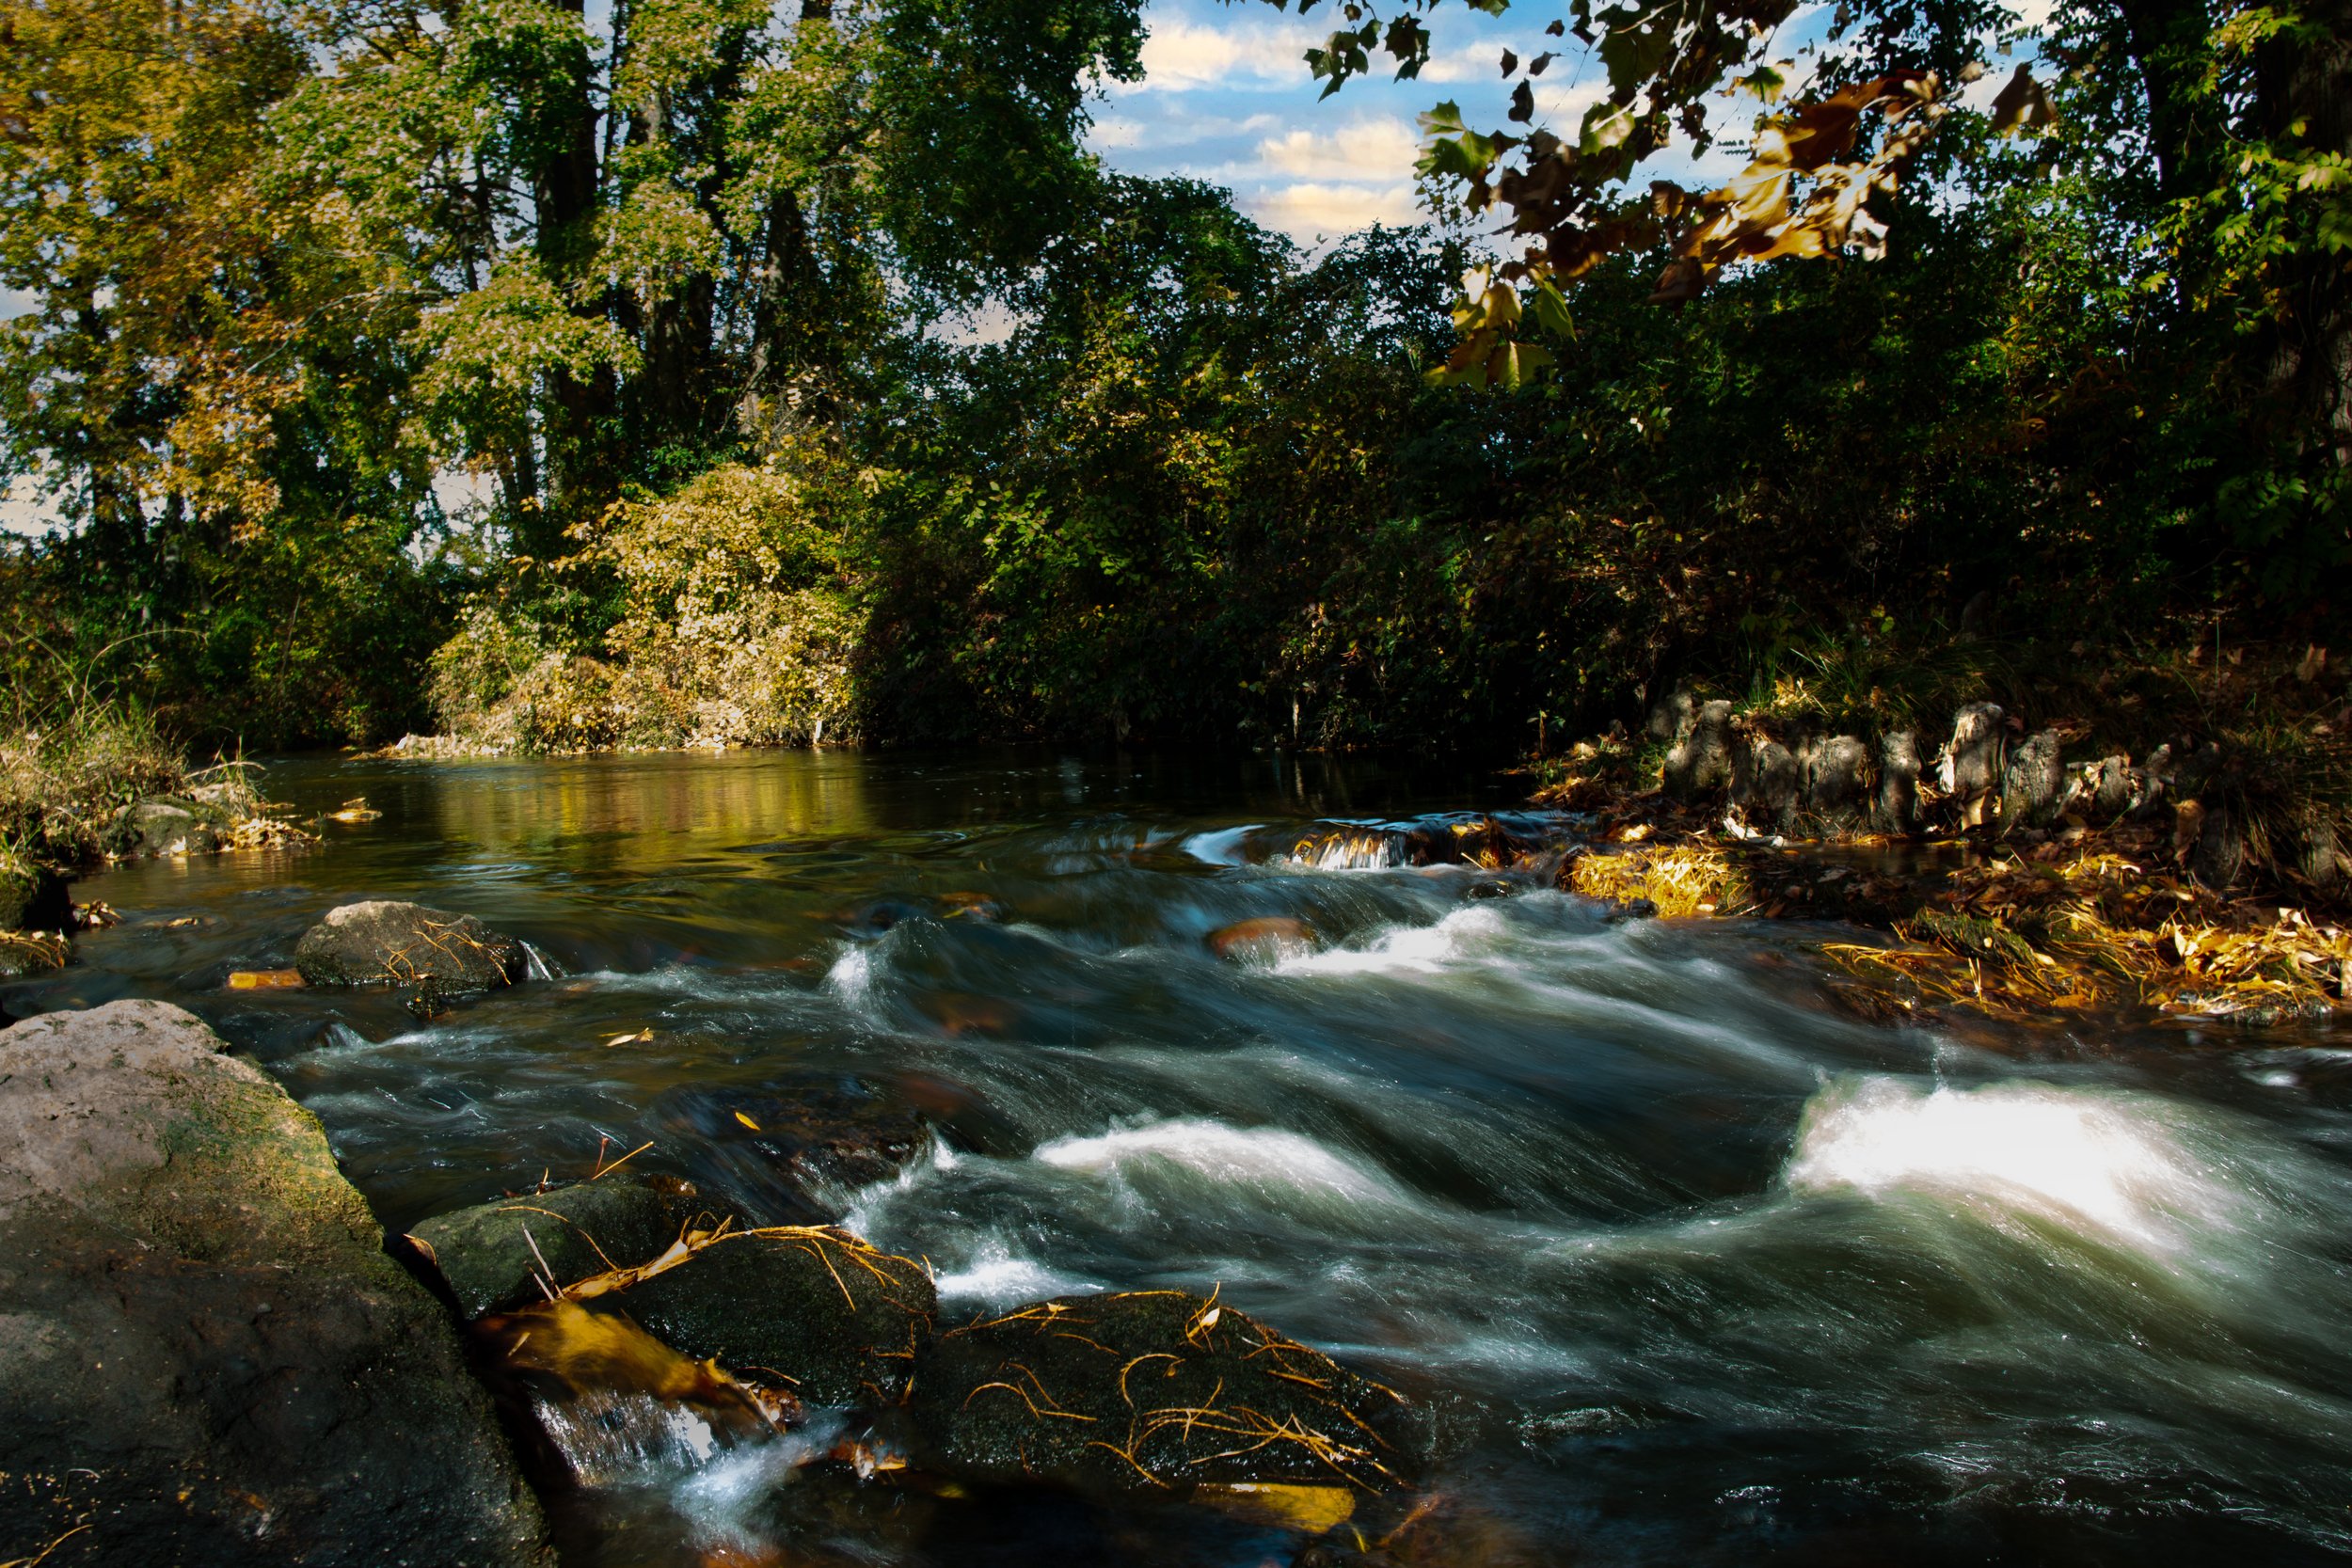
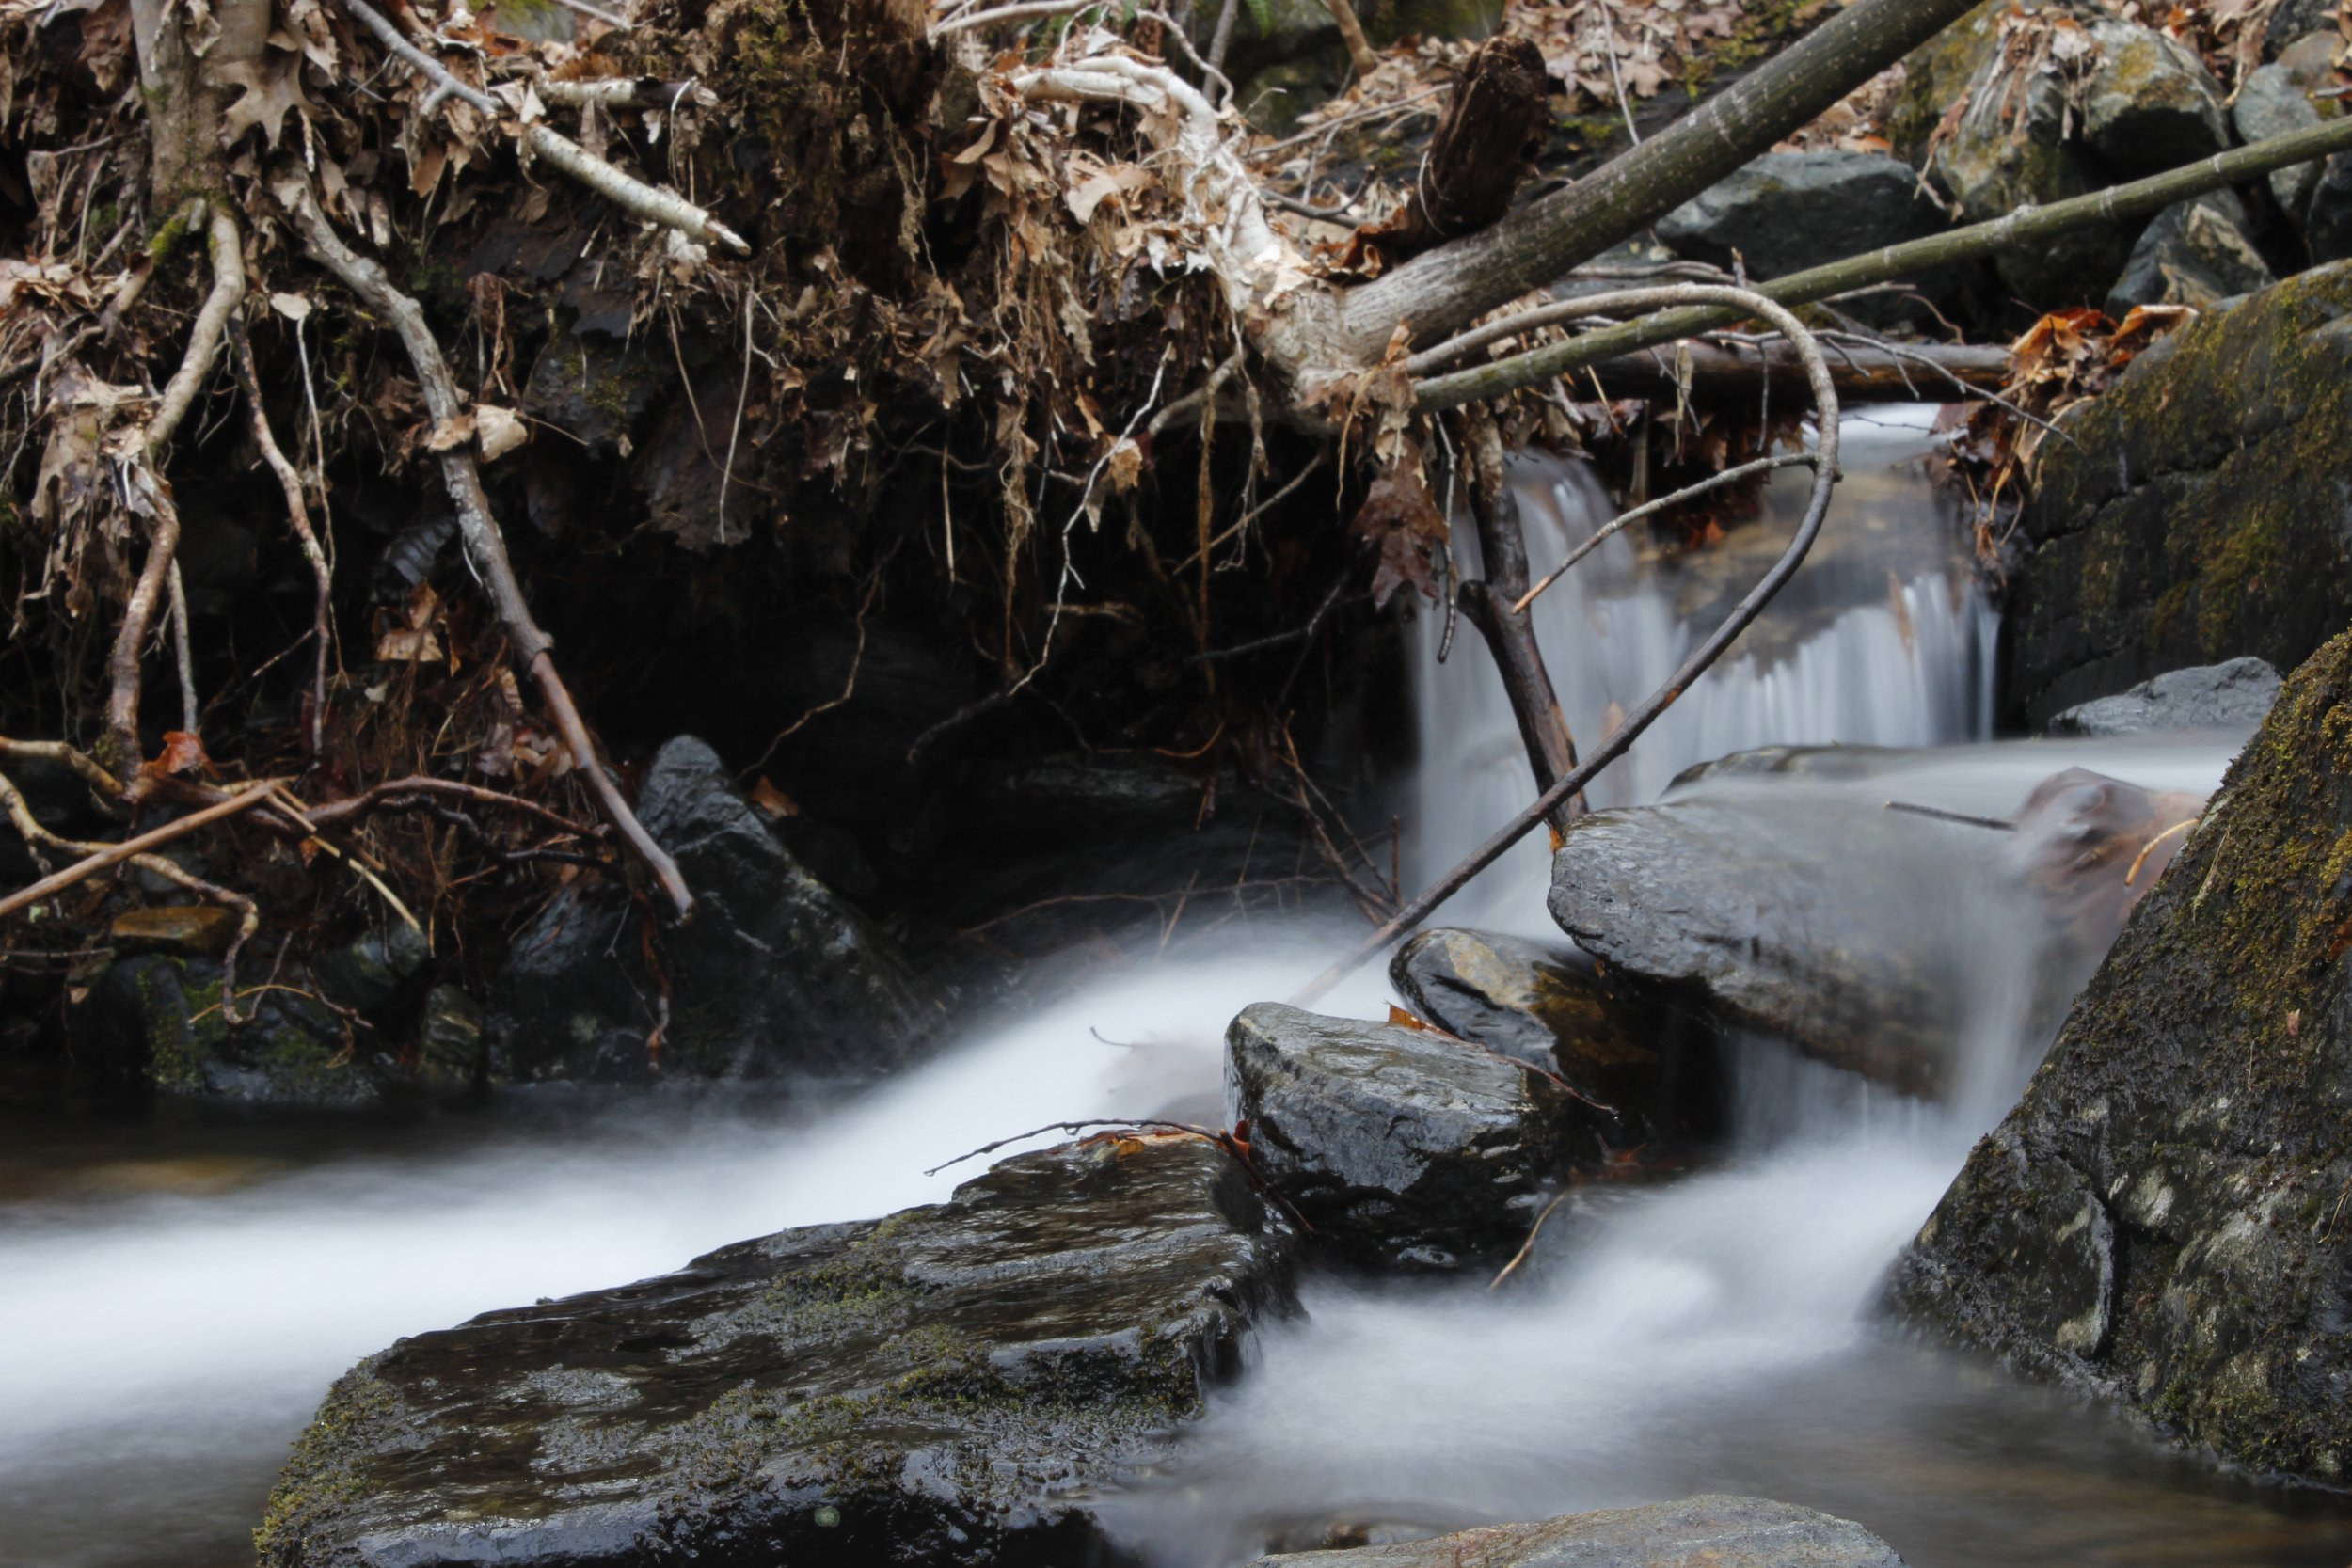
This is a close-up image of Cross Creek alongside Maiden Lane in downtown Fayetteville.
See the full gallery here:

The Process
How did we get here?
Have you ever a hobby… craft… or maybe something that you really enjoyed doing? It could be woodworking, painting, working on cars. Well mine is photography, and today I decided to publicly launch my business. It’s been a crazy journey just to get to the “start”, but it’s been so rewarding. And, truth be told, it would not have been possible if it wasn’t for you, the person reading this, and helping me along the way. Thanks!
My photography journey started during the summer of 2013, going into my senior year of high school. My mother was (and still is) into photography, and while on a family vacation to New York, she let me take some photos. Below are a few of my very first shots. I didn’t know anything about shutter speed, aperture, or ISO, but I knew I loved it! They were certainly over developed, but it was a start!

Other than our vacation to New York, I never really touched a camera after that. And it wouldn’t be until my Sophomore year of college in 2015 when I would start taking photos again. Right before I moved into my dorm, my mom gave me my first camera! I moved in a few weeks early since I was an RA so I spent a lot of my free time walking around campus taking as many photos as I could. Below is the first real collection of photos! It wasn’t a fancy camera by any means, just a Canon T3i (Canon Rebel). These photos were definitely over processed… just look at the cliché blurring and fake vignettes. It was fun though, and that’s how photography should be!
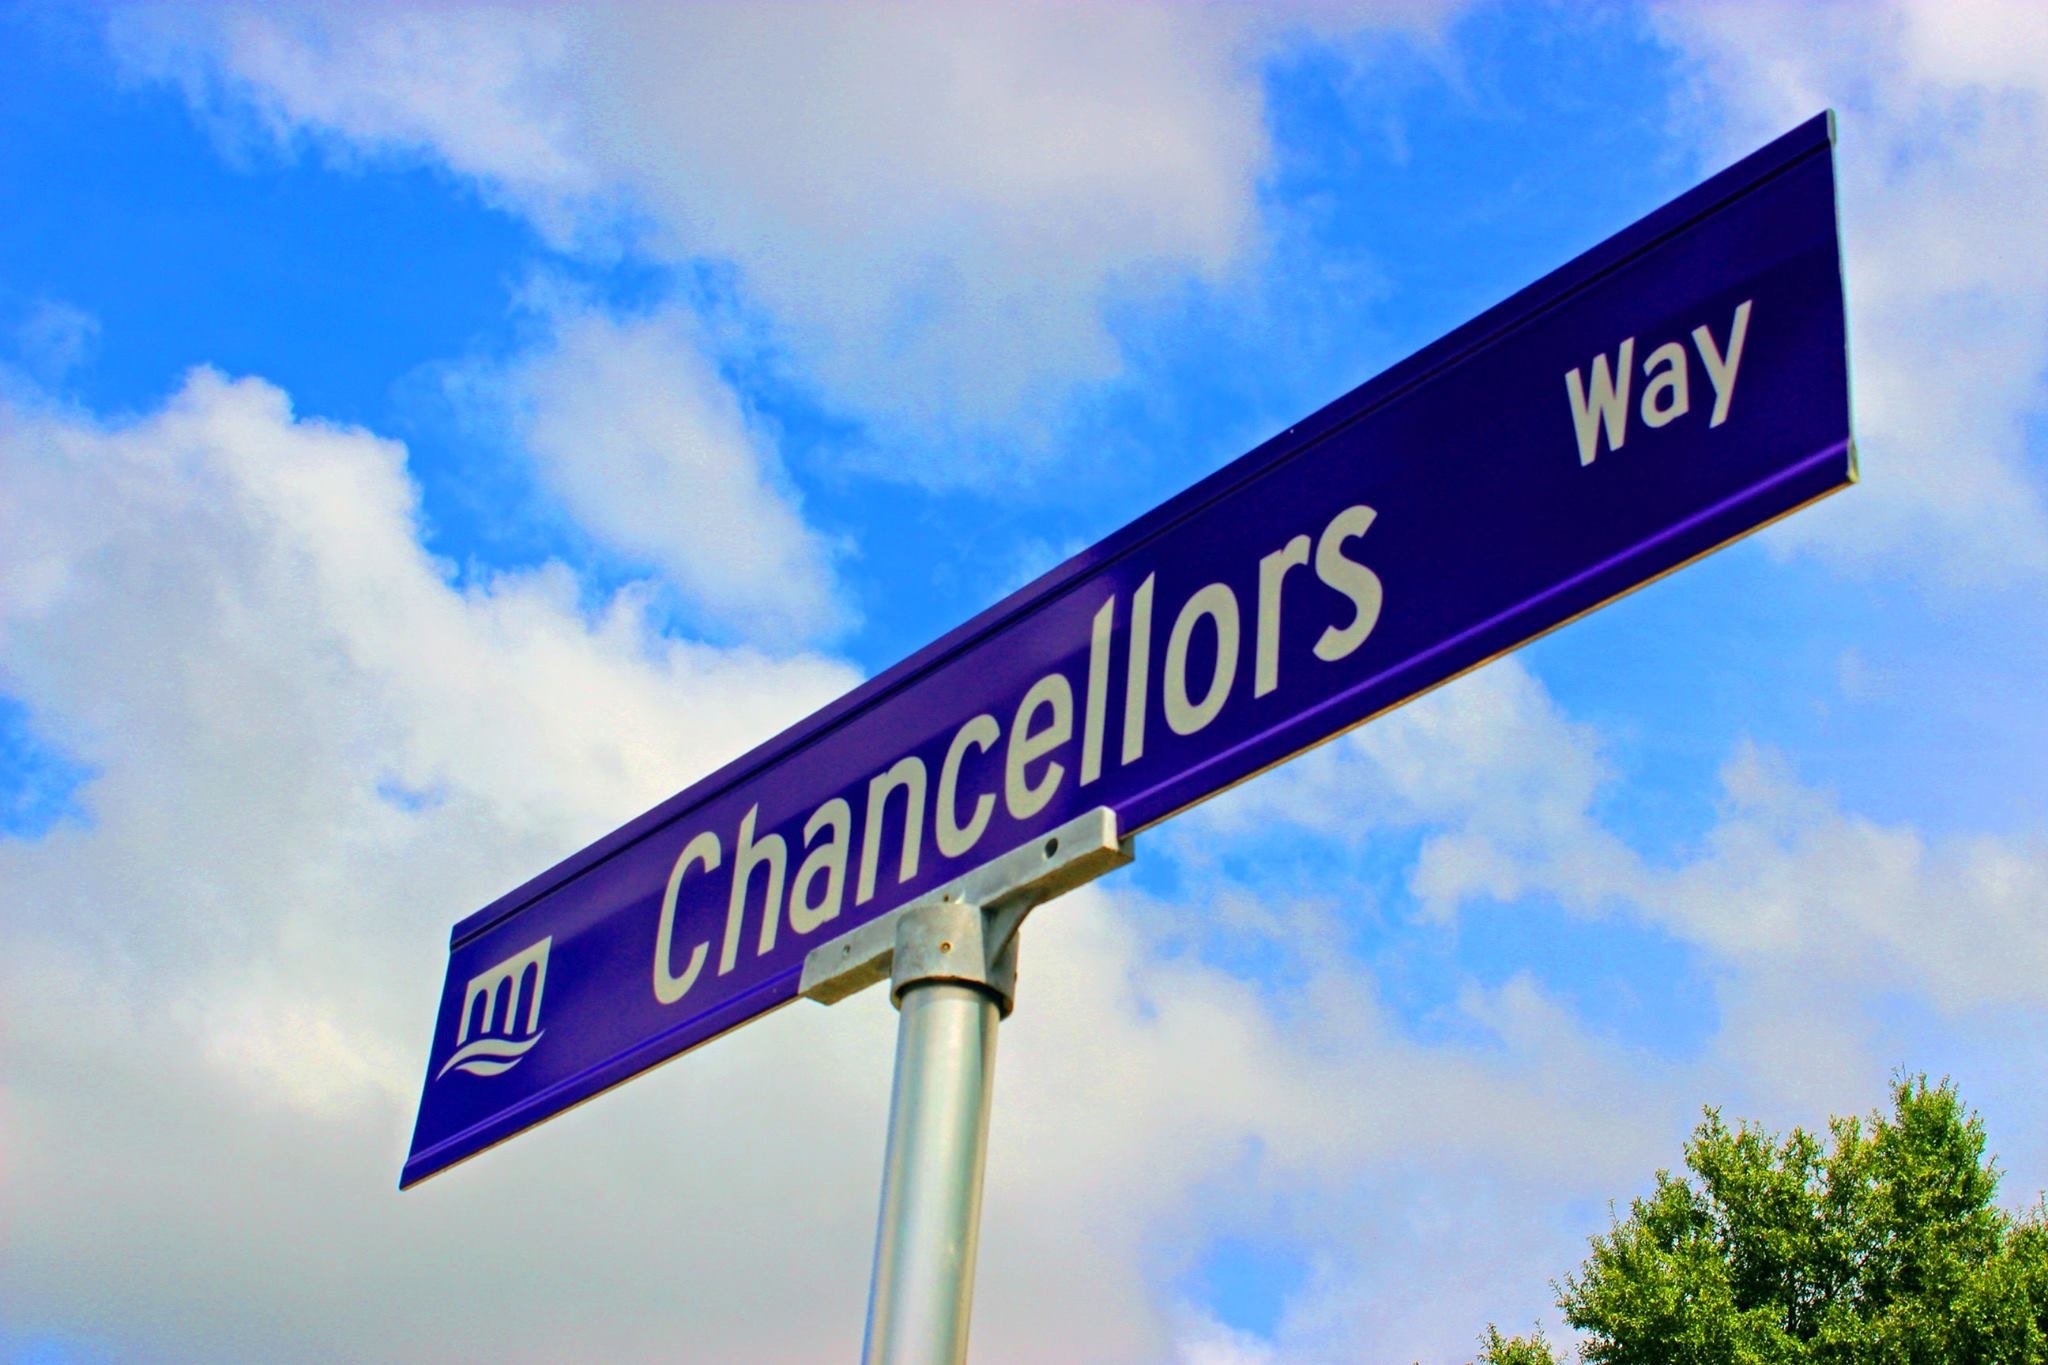
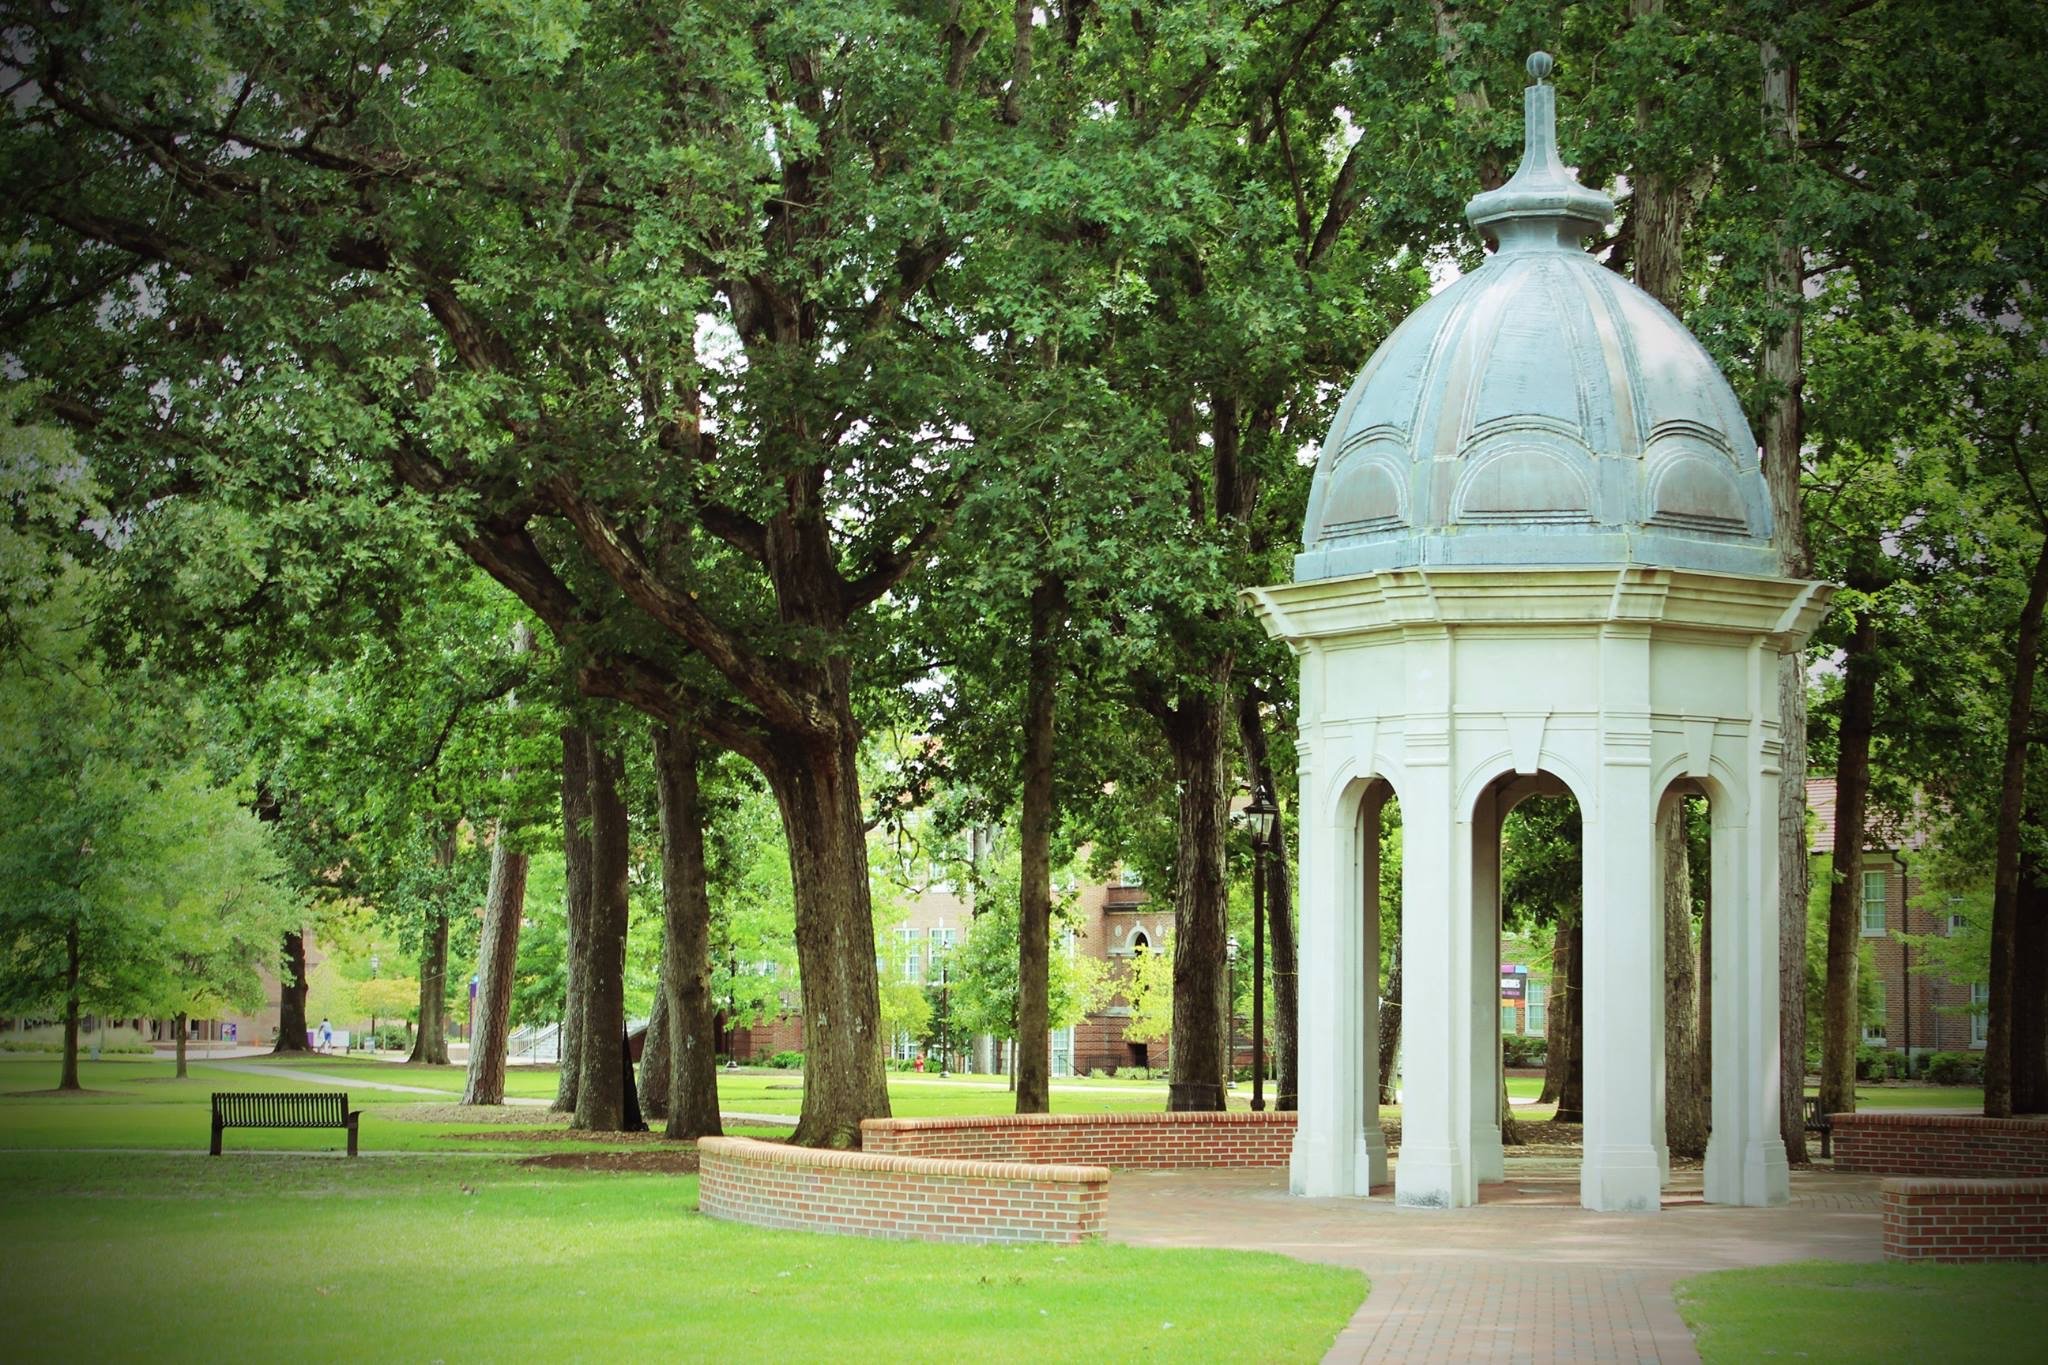
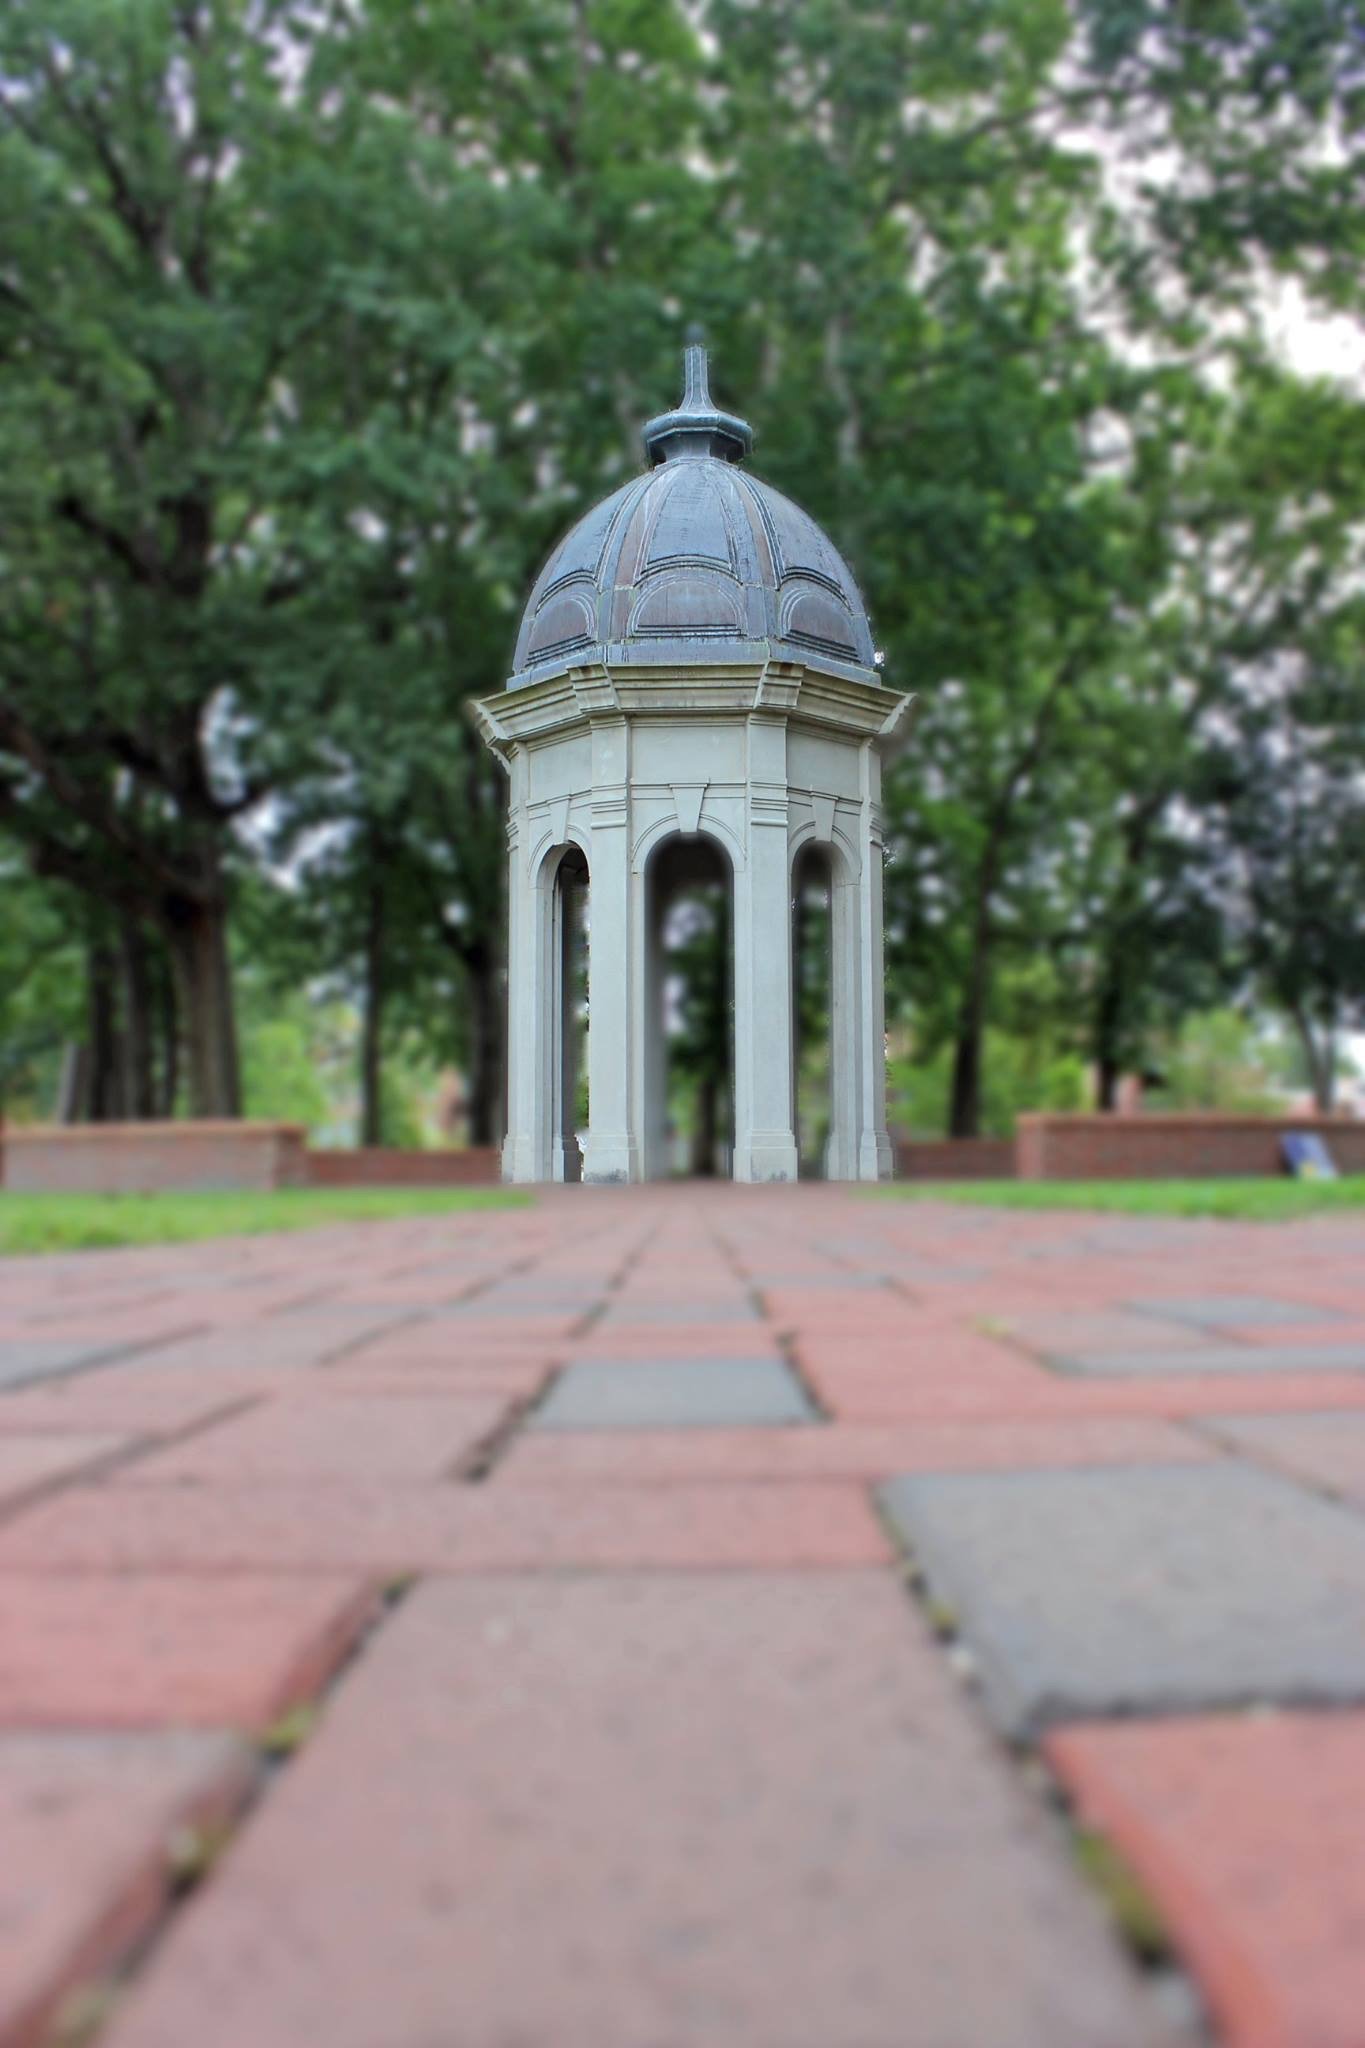

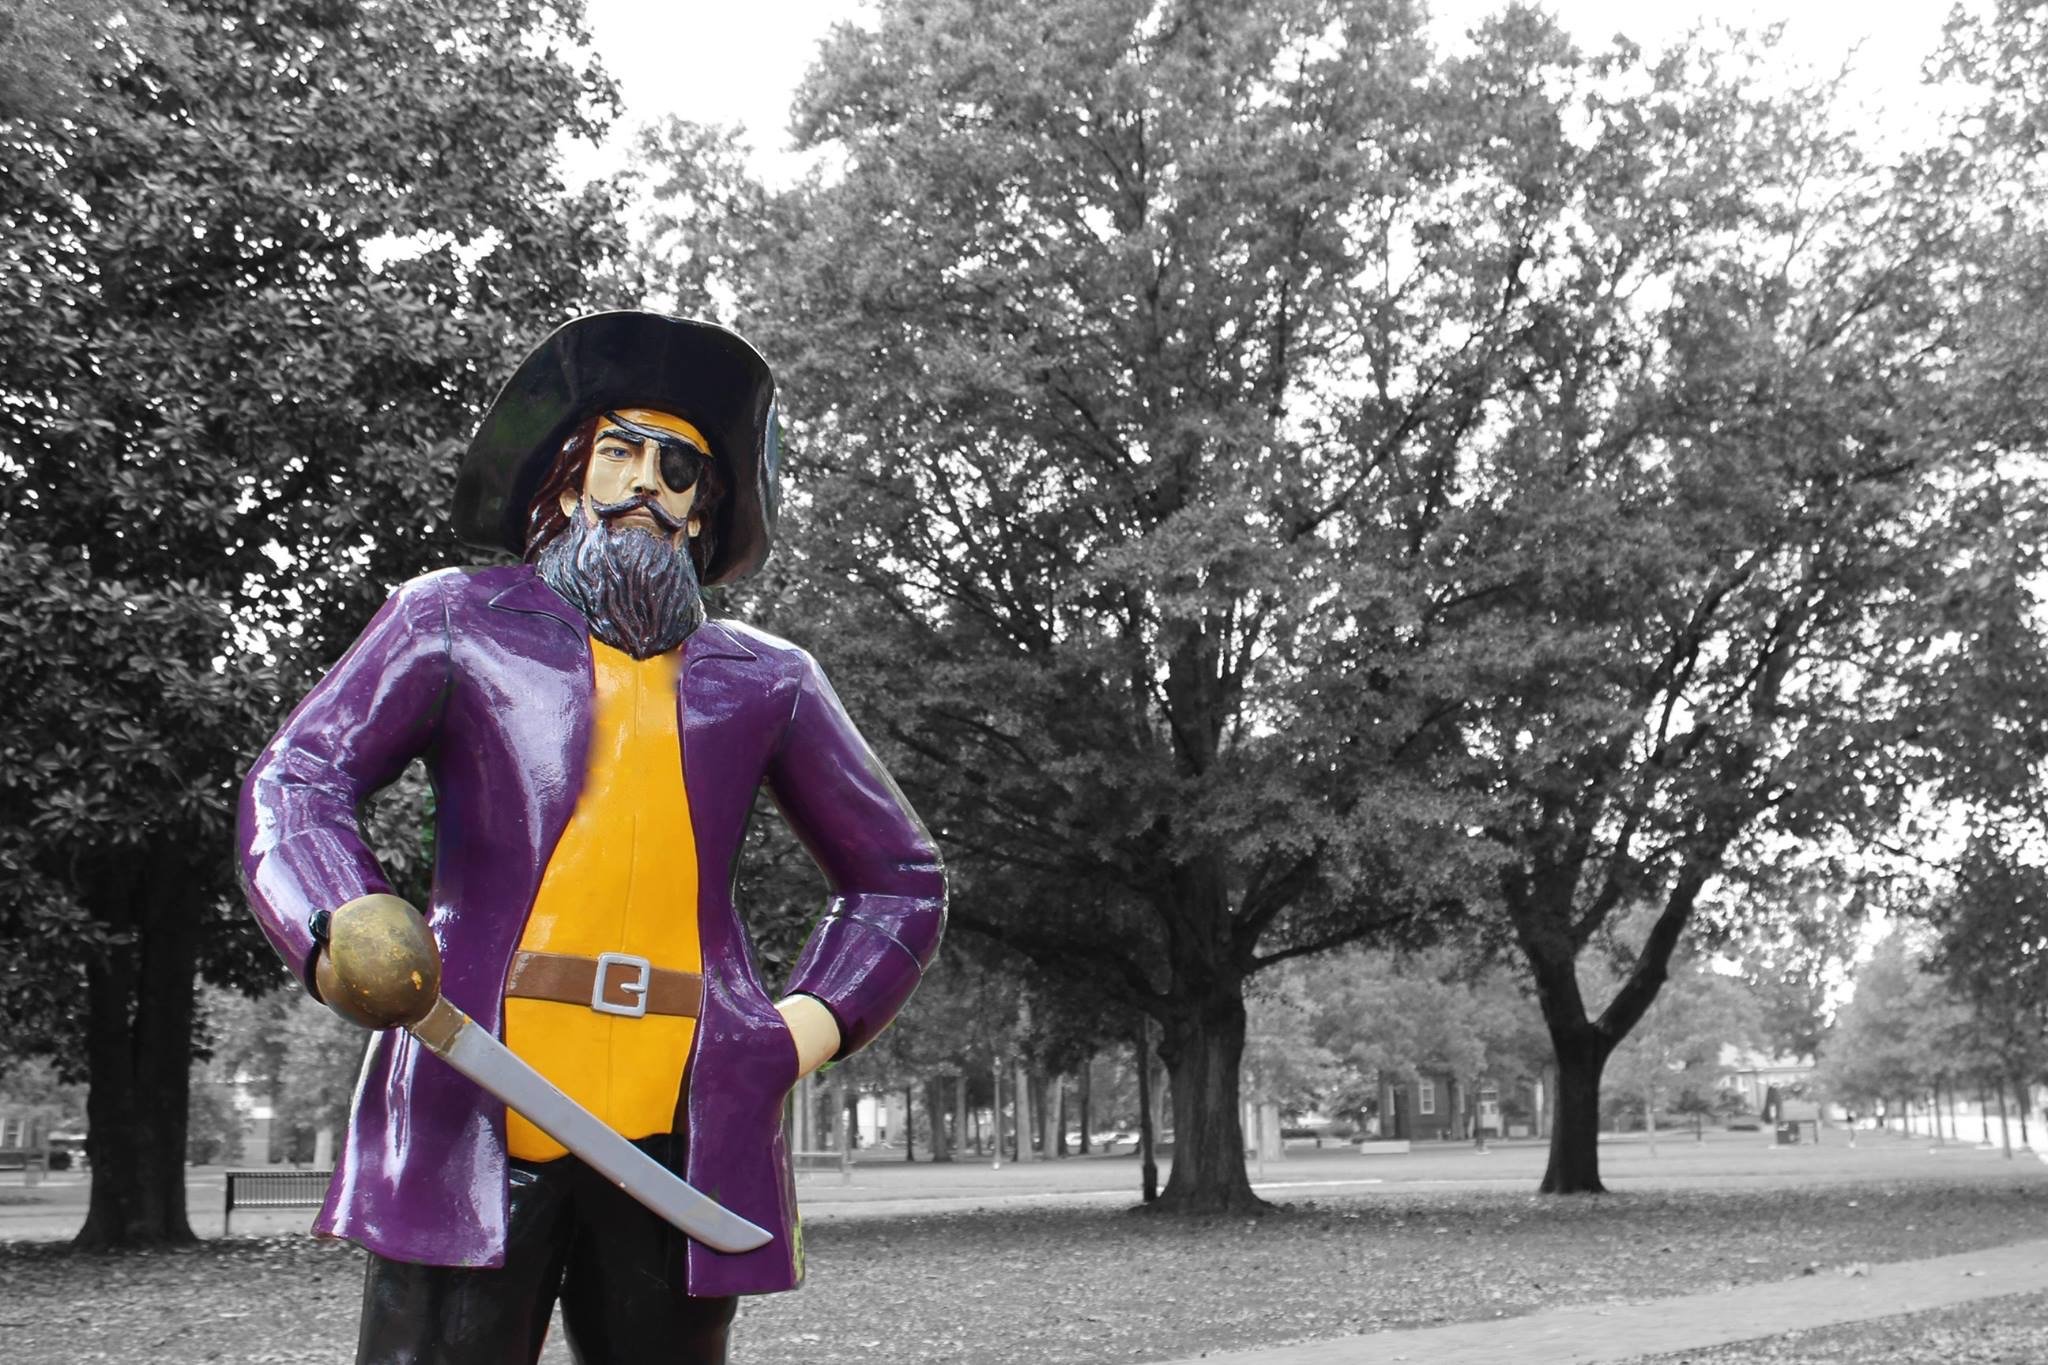
Over the next few years, I would go out and take photos whenever I could. Spring break trips, fraternity intramural events, and random evening around Greenville, NC, were my main sources of practice. And that’s the key word, PRACTICE. The more I practiced, the better I became at framing and editing photos… but my no means would I say I have it “mastered”! However, with years of practice, I could see my art take shape!
2016:
2018:
2021:
It took me nearly 8 years to finally get to a spot where I’m “happy” with my work, but I still have many more to go!
Today, I decided to officially turn my hobby into a side hustle. Business is picking up, and it was time for me to take my photography seriously. Does this mean I have the nicest, most expensive equipment around? No. I still photograph with a Canon 70D, which I would not consider a true “professional camera”. However, that hasn’t stopped me, and shouldn’t stop you (if you’re a photographer) from doing what you love! The process has been long, and at times difficult! It has taken time, energy, and practice. Even the process of setting up this website, the business, social media accounts, etc. have been challenging. But if you find you passion, then 8 years will feel like just a few days!
To everyone who helped me get to a point where I can launch this side-hustle, THANK YOU. To my friends and family who’ve helped me, THANK YOU. To the random guy on Facebook one time who said my picture was over done, THANK YOU! And to everybody joining me on this journey, THANK YOU! The process is just beginning, and we will all see where this goes! I will still continue to work my day job, and this will still be my side business, but the sky’s the limit!
Of course, as a shameless plug for my business, I have an amazing shop set up on this site with prints starting at $31. Feel free to browse, maybe purchase some art for your office, home, etc *wink wink*, or follow me on any of my social media accounts below! I also have a mailing list to send out sales, promotions, and updates which you can sign up for below!
Finally, for business inquiries on larger prints, and for an extended gallery for corporate clients, email me at gtaylor@gftphotography.com!
Cheers,
Garrett